Cleaning circuit boards helps devices work well and last longer. Dirt and dust can mess up connections and cause problems. Smaller electronics today need careful cleaning to stay dependable. Using the right tools and steps, beginners can clean PCBs easily.
Key Takeaways
Use isopropyl alcohol (IPA) with 90% or higher purity. It cleans dirt and oils without leaving bad residues.
Always wear safety gear like gloves and goggles. This keeps you safe from chemicals and splashes.
Clean your PCBs every 6 to 12 months. This helps devices work better and last longer.
Tools and Materials Needed
To clean PCBs, you need the right tools. Below is a list of basic supplies, advanced tools, and safety gear to help you prepare for the task.
Essential Cleaning Supplies
Isopropyl Alcohol
Isopropyl alcohol (IPA) is very important for cleaning PCBs. It removes dirt, oils, and flux without leaving harmful traces. Use IPA with at least 90% purity for the best outcome. This keeps your PCBs clean and safe from damage like corrosion or leaks.
Soft Brushes
Soft brushes are great for cleaning fragile PCB parts. They help remove dirt without harming small components. Pick brushes with anti-static features to avoid static electricity during cleaning.
Cotton Swabs
Cotton swabs are useful for cleaning small areas. They can reach tight spots on the PCB. Use them carefully to apply cleaning liquids without spilling too much.
Advanced Cleaning Tools
Compressed Air Canister
A compressed air canister is good for blowing off dust. It clears loose dirt from the PCB surface. Hold it upright and spray gently to remove debris.
Ultrasonic Cleaner
An ultrasonic cleaner is strong for tough dirt. It uses sound waves to create bubbles in a liquid. These bubbles clean hard-to-reach areas on the PCB. It’s great for detailed or crowded boards.
Deionized Water
Deionized water is used to rinse PCBs after ultrasonic cleaning. It leaves no minerals behind, keeping the board clean. This is often used for high-quality or industrial cleaning.
Tip: Using deionized water with an ultrasonic cleaner is eco-friendly. It avoids using harsh chemicals while cleaning effectively.
Safety Equipment
Gloves
Wear gloves to protect your hands from cleaning liquids. They also stop skin oils from getting on the PCB.
Safety Goggles
Safety goggles keep your eyes safe from splashes. They are especially helpful when using IPA or ultrasonic cleaners.
Face Mask
A face mask stops you from breathing in fumes. It’s a simple way to stay safe while cleaning.
Using the right tools and safety gear helps you clean PCBs well. It also protects your electronics and keeps you safe.
Preparation Steps
Getting ready before cleaning a PCB is very important. It keeps you safe and avoids harming your device.
Turn Off the Device
Unplug or Remove Batteries
First, turn off the device completely. Take out the batteries or unplug it. This stops electrical risks and keeps the PCB safe from short circuits.
Let It Cool Down
After turning it off, wait for the device to cool. Heat can make parts weak, so cooling helps protect them. If you need to take apart a keyboard or other device, cooling is extra important to avoid breaking delicate pieces.
Set Up Your Workspace
Clean Your Work Area
Make sure your workspace is clean and organized. A neat area helps you find small parts and tools easily. When taking apart devices like keyboards, this prevents losing screws or other tiny items.
Gather Tools and Supplies
Get all your tools and materials ready before starting. This includes cleaning items, safety gear, and tools for taking apart electronics. Being prepared saves time and makes the process smoother.
Wear Safety Gear
Put on Gloves
Wear gloves to keep your hands safe from cleaning liquids. Gloves also stop skin oils from getting on the PCB.
Protect Your Eyes
Use safety goggles to guard your eyes from splashes. This is especially needed when using isopropyl alcohol or other cleaners.
Wear a Face Mask
Put on a face mask to avoid breathing in fumes. This is very important if your workspace has poor airflow.
Tip: Take notes or pictures when taking apart devices like keyboards. This helps you put everything back together correctly and avoids mistakes.
Step-by-Step PCB Cleaning Process
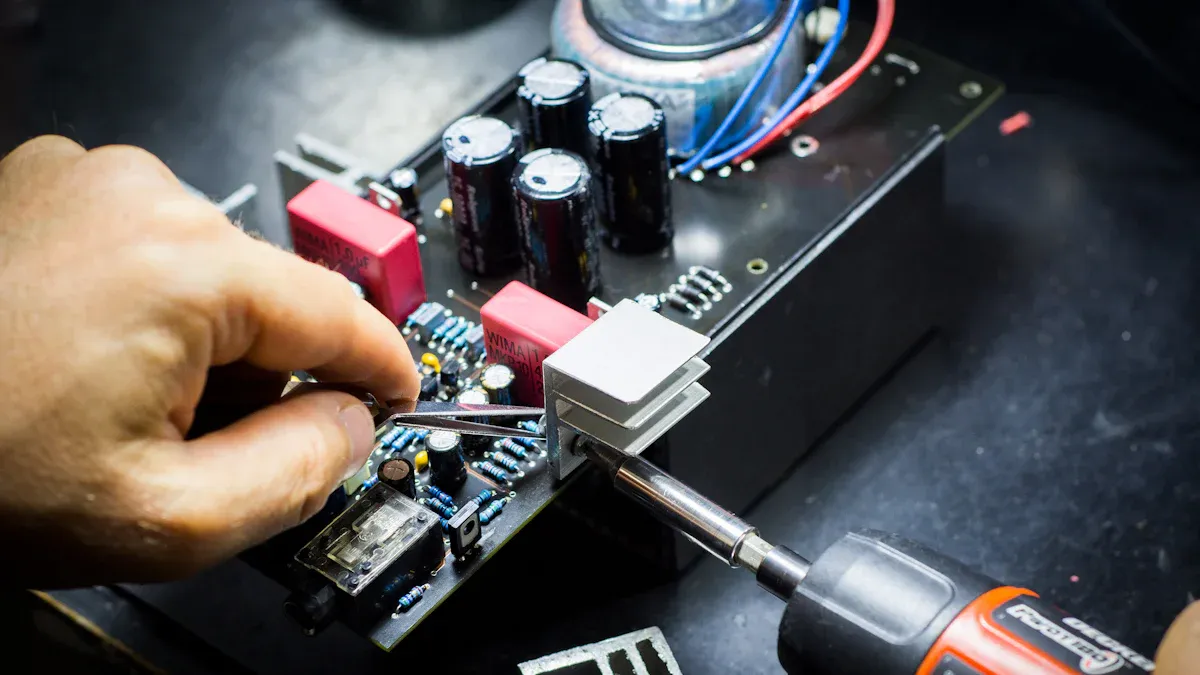
Cleaning a PCB is important to keep it working well. Follow these simple steps to clean it safely and effectively.
Remove Dust with Compressed Air
Hold Can Upright
Use a compressed air can to blow off dust. Keep the can upright to stop liquid from coming out.
Aim Nozzle at PCB
Point the nozzle at dusty spots on the PCB. Focus on areas like connectors and small parts.
Blow Away Debris
Spray short bursts of air to clear dirt. Don’t spray too long to avoid moisture buildup.
Tip: Use a soft brush for spots the air can’t reach. Anti-static brushes work best.
Prepare Cleaning Solution
Measure Isopropyl Alcohol
Pour some isopropyl alcohol (IPA) with at least 90% purity. Stronger IPA, like 91% or 99%, dries faster and leaves no residue.
Mix with Deionized Water
Mix IPA with deionized water to make a cleaning solution. A 70% IPA and 30% water mix works well for cleaning.
Ensure Proper Concentration
Balance the mixture carefully. Too much water leaves residue, while too much alcohol dries too fast.
Apply Cleaning Solution
Use Cotton Swab
Dip a cotton swab in the solution. Clean small areas gently without soaking the PCB.
Dampen Soft Brush
Lightly wet a soft brush with the solution. Use it to clean larger parts of the PCB.
Avoid Excess Liquid
Don’t use too much liquid. Too much can damage sensitive parts of the PCB.
Step | Description |
|---|---|
1 | Use a soft brush with the solution to clean the PCB. |
2 | Spray a phosphate-free cleaner if needed, then scrub gently. |
Scrub PCB Surface
Use Gentle Pressure
Scrub lightly to avoid harming delicate parts. Gentle pressure removes dirt safely.
Focus on Contaminated Areas
Clean dirty or corroded spots carefully. These areas need extra attention to work properly.
Clean in Circular Motion
Scrub in circles to lift dirt without spreading it around.
Rinse PCB Thoroughly
Use Deionized Water
Rinse the PCB with deionized water to wash off the cleaning solution. This water leaves no residue.
Skipping this step may leave solution residue that could cause problems later.
Remove Residue Completely
Make sure all cleaning solution is rinsed off. Leftover residue can affect how the PCB works.
Avoid Water in Sensitive Areas
Keep water away from connectors and sockets. Rinse carefully to protect these parts.
Dry the PCB
Use Lint-Free Cloth
Pat the PCB dry with a lint-free cloth. This stops fibers from sticking to the board.
Allow Air Drying
Let the PCB air dry for at least 30 minutes. This ensures no moisture remains.
Ensure No Moisture Remains
Check that the PCB is completely dry before putting it back together. Moisture can cause damage when powered on.
Note: Isopropyl alcohol dries quickly and helps speed up the process. It also leaves no residue.
Precautions to Avoid Damage
Cleaning PCBs needs care to stop any harm. Using the right methods keeps your board safe and working well.
Clean Gently Without Too Much Pressure
Too much pressure can break small parts on the PCB. Use soft methods like sprays in a back-and-forth motion. This helps cleaning solutions reach under parts without leaving residue. Don’t scrub hard with brushes or swabs, as this might loosen pieces or scratch the board. Tools like tweezers or pliers are useful for holding the PCB while cleaning tight spots.
Tip: Keep your PCB in a clean, dry place before and after cleaning to avoid dirt.
Keep Water Away from Sensitive Parts
Water can ruin delicate areas of the PCB. Avoid getting it near connectors, sockets, or fragile parts. Use deionized water for rinsing, as it leaves no minerals behind. After cleaning, make sure the board is fully dry before putting it back together.
Precaution | Description |
|---|---|
Sealed Packaging | Store PCBs in sealed bags or dry boxes with low humidity. |
Humidity Sensitivity | Treat PCBs as sensitive to moisture and store with drying agents. |
MSL Recommendations | Use special wraps with desiccants to protect bare boards from moisture. |
Note: Handle moisture-sensitive PCBs carefully. Always follow the maker’s storage and cleaning advice.
Handle the PCB with Care While Cleaning
Careful handling stops accidental damage to your PCB. Disconnect all power before cleaning. Work in a dry area with no water nearby. Wear gloves to keep oils or dirt from your hands off the board. Safety goggles protect your eyes from splashes when using cleaners.
Use precise tools like anti-static brushes and cotton swabs to clean safely. Don’t bend or twist the PCB, as this could break connections or weaken solder points.
Alert: Never use too much heat or force while cleaning. These can bend the board or harm delicate parts.
Benefits of Cleaning PCBs
Better Device Performance
Cleaning PCBs helps devices work better. Dust and dirt can block connections, making electronics slower or less reliable. Removing these problems lets electricity flow easily. This keeps your device working at its best. For instance, a clean keyboard PCB ensures every key works properly. Regular cleaning also stops signal problems that can cause errors. Keeping your PCB clean makes your device dependable.
Longer Life for Electronics
A clean PCB lasts longer. Dirt traps heat, which wears out parts faster. Cleaning removes dirt, helping your device stay cool and work well. This lowers the chance of overheating and makes electronics last longer. Immersion cleaning is great for tough dirt. Taking care of your PCB saves money by avoiding repairs or replacements.
Stops Corrosion and Problems
Corrosion can ruin PCBs. It damages paths and causes failures. Cleaning removes and prevents corrosion. Experts say dirt weakens coatings, making boards easier to damage. Without cleaning, tiny growths called dendrites can form and cause short circuits. Corrosion also messes up signals, leading to errors. Cleaning your PCB keeps it safe and working well.
Tip: Dry your PCB completely after cleaning to prevent moisture damage.
Cleaning PCBs is important to keep devices working well and lasting longer. A clean PCB stops dirt, keeps connections strong, and looks better too. Using the right tools, like soft brushes and lint-free cloths, helps prevent problems later.
Benefit/Tip | Explanation |
|---|---|
Why Clean PCBs | Stops dirt and keeps connections working properly. |
Avoiding Dirt Issues | Removes impurities that can cause problems. |
Better Electrical Performance | Clean PCBs work better and avoid soldering issues. |
Looks Neat | Clean boards look good during checks or inspections. |
Suggested Tools | Use soft brushes, lint-free cloths, and ultrasonic cleaners. |
Follow Steps | Cleaning in order prevents future issues. |
Make it a routine to clean PCBs, like those in keyboards. This easy task helps devices last longer and work smoothly.
FAQ
How often should you clean a PCB?
Clean a PCB every 6 to 12 months. Do it sooner if dirt builds up. Regular cleaning stops problems and helps your device last longer.
Can you use regular water instead of deionized water?
No, regular water has minerals that leave residue. These minerals can cause corrosion. Use deionized water to rinse PCBs safely and keep them clean.
Is it safe to clean a PCB without gloves?
No, cleaning without gloves is risky. Gloves stop skin oils from touching the PCB. They also protect your hands from chemicals like isopropyl alcohol.