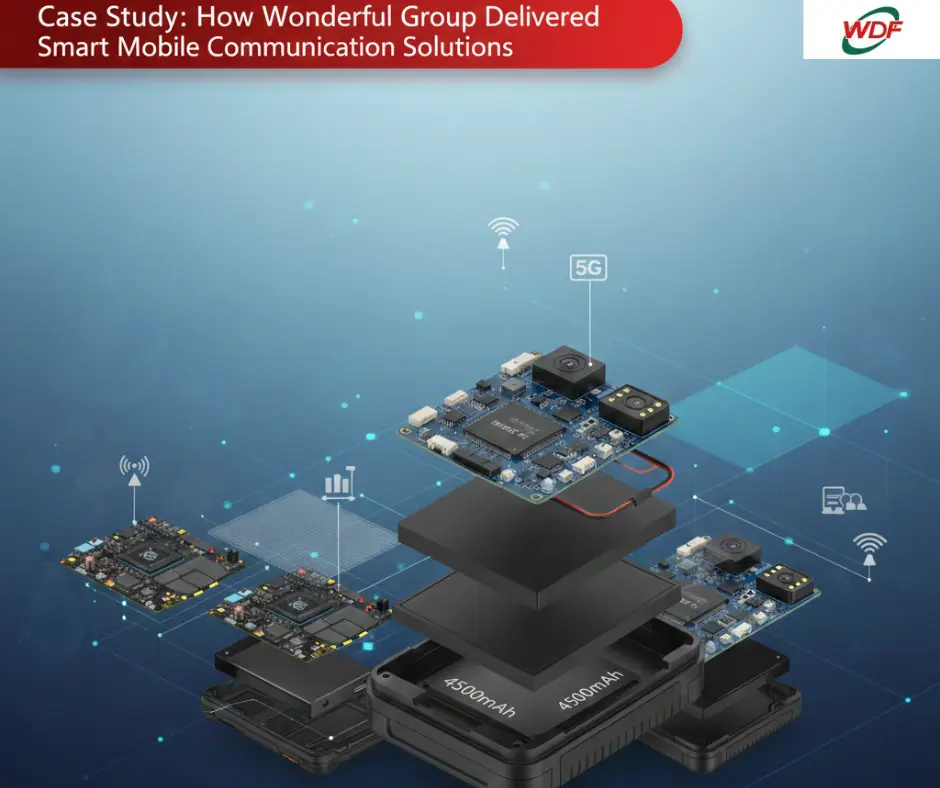
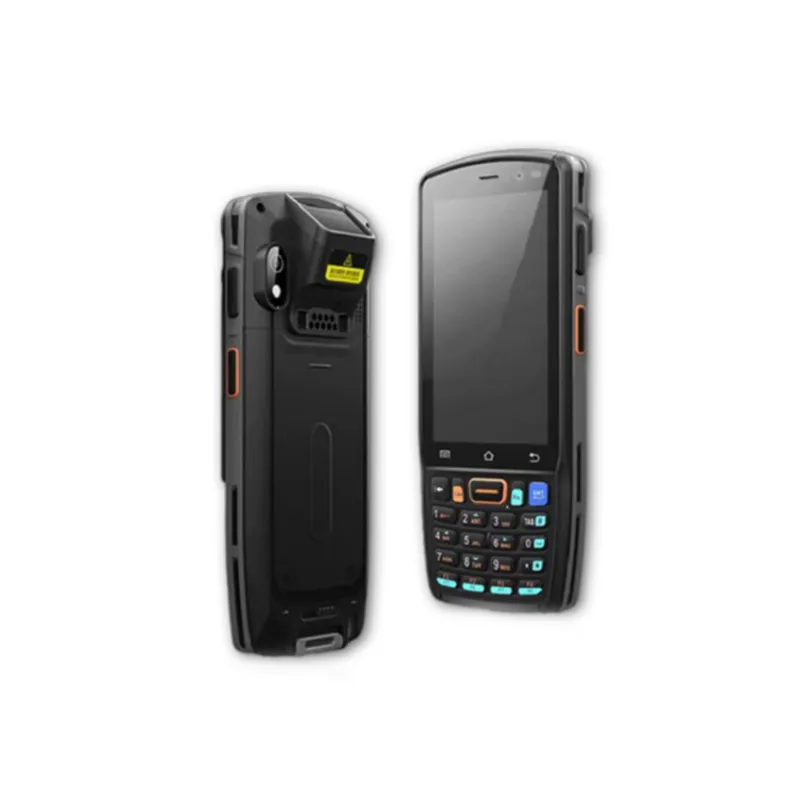
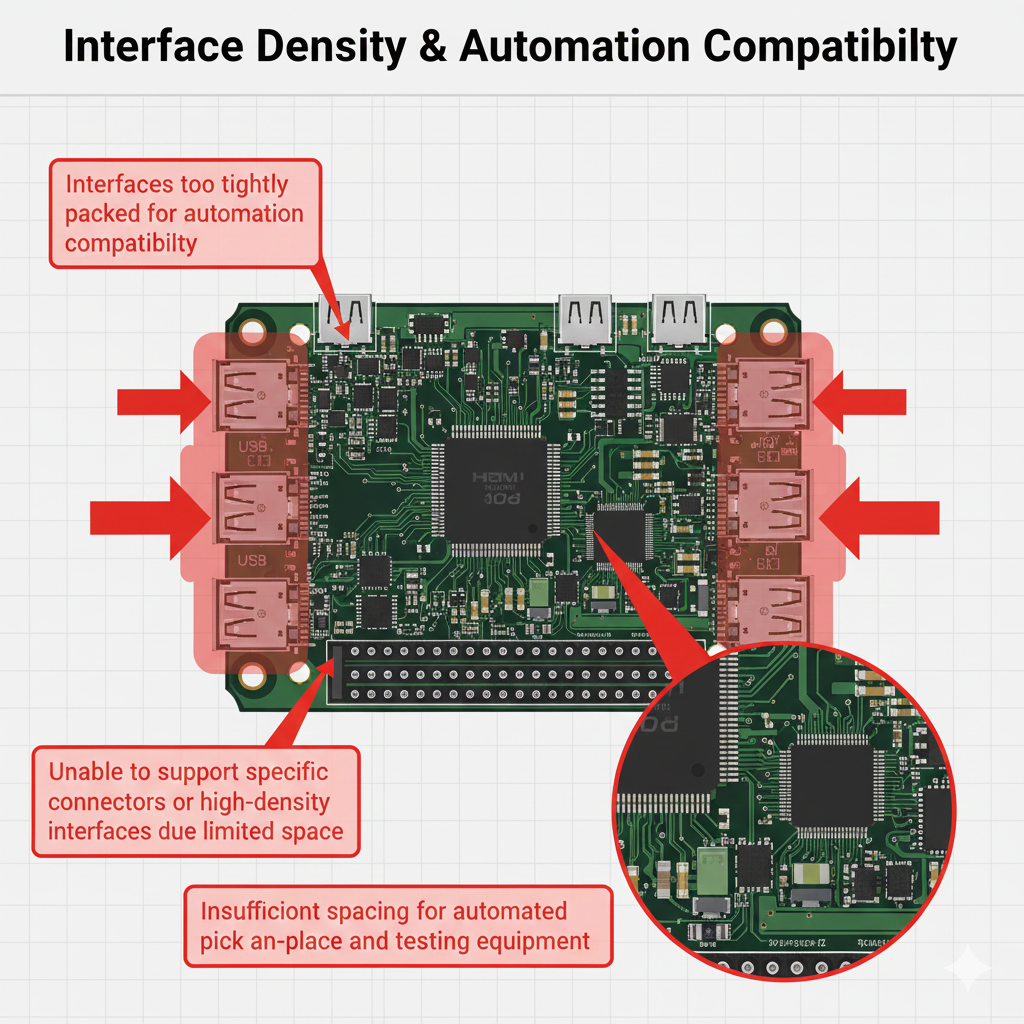
Many brands look at a prototype and think the work is done. This is not true. In tablet manufacturing, the prototype in a factory is often a Golden Sample. First, you need to understand that this sample is made by hand. It uses the best parts. So it works very well. Then start mass production. Same as always, the factory might try to save money by changing parts. This is why you must know the engineering. How do we keep the quality the same for 10,000 units?
The Consumer Tablet Market Landscape
The market for consumer tablets is growing in many areas. People use them for schools, for smart homes, and for watching movies. You are interested to make own design or use an existing one from a factory. Generally avoid just picking a product from a catalog. In terms of business, it is better to customize. So have a product that fits your users.
Many new brands choose OEM or ODM manufacturing. It just means someone else builds the tablet. You should be able to control the parts they use. This can be a useful question to ask the factory: Who are the main part suppliers? Do you know? Many factories swap high-quality parts for cheaper ones after signing the contract. Until then, everything looks perfect. So ever since then, experienced buyers check every batch.
Consumer Tablet Product Positioning & Market Segmentation
First, you must decide who will use the tablet to choose the hardware.
Entry-Level Consumer Tablet
These usually have an 8-inch screen. Use plastic for the case to save money. So the tablet is light. The factory will suggest a cheap SoC. Such as the type that only has 4 cores. Then check if the WiFi is fast enough. This often just causes a bad user experience if you go too cheap. Get a cost-optimized battery. Just make sure it does not get too hot in the plastic shell.
Mid-Range Android Tablet
These are often 10 inches or 11 inches. Most people use these for school or work. In terms of build, you should generally avoid all plastic. Use some metal so it feels better. Then use a stylus for writing. Best way to do this is to use an active pen. Passive pens are just like fingers. They are not so great. A 1080p screen here so text is clear.
High-End Consumer Tablet
These have 2K screens and fast chips. First, use an aluminum case. So the tablet can stay thin. In terms of sound, you will need big speaker boxes. So the sound is loud and clear. Finally, make sure to check the screen refresh rate. A 120Hz screen is much smoother. The screen updates 120 times every second.
Consumer Tablet System Architecture Design
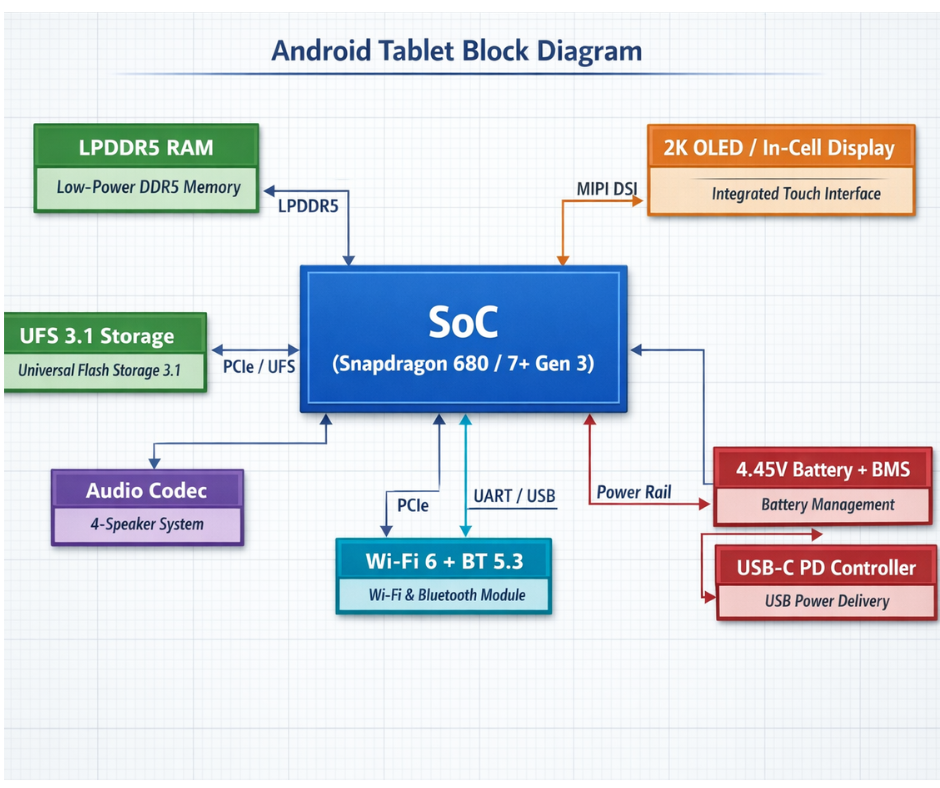
You choose the parts that make the consumer tablet run. This often just decides the price and speed.
SoC Platform Selection
The SoC is the brain of the tablet. In terms of power, you might want the newest chip. On the other hand, older chips are more stable. Look at the Board Support Package or BSP. The software that helps the chip talk to the tablet.
New chips often have bugs in the software. So using an older chip like a Snapdragon 680 is sometimes better. This can be a useful question: How long has this chip been in production? Until then, you might face many software crashes.
Display & Touch System Integration
Choose between LCD and OLED. OLED looks better so it costs more. Then look at In-cell touch. The touch layer is inside the screen glass. This can be a useful question for your engineer: What is the EMI level of this screen? The screen makes electrical noise. So it can mess up the touch sensor. Add shielding to fix this.
Memory & Storage Configuration
You need to pick RAM. LPDDR4X is common. LPDDR5 is faster. Then pick the storage and avoid eMMC storage for fast tablets. Use UFS storage. So apps open quickly. This often just makes a huge difference in how the tablet feels. After a few weeks of use, a tablet with eMMC will feel slow. Aim at least 128GB of storage for most users.
PCB & PCBA Engineering for Consumer Tablets
The PCB is the green board inside.
Multi-Layer PCB Design
You will need a multi layer PCB board with 8 or 10 layers. Such as the type used in smartphones. The engineers draw the traces. So the electricity can move fast. Then they match the length of the wires. In terms of speed, the RAM needs the wires to be exactly the same length.

No way to know if they are right unless you check the design files. Avoid cheap PCB shops. Best way to do this is to use a shop that does Controlled Impedance. The wires have the same electrical resistance.
Thermal Management in Slim Tablet Structures
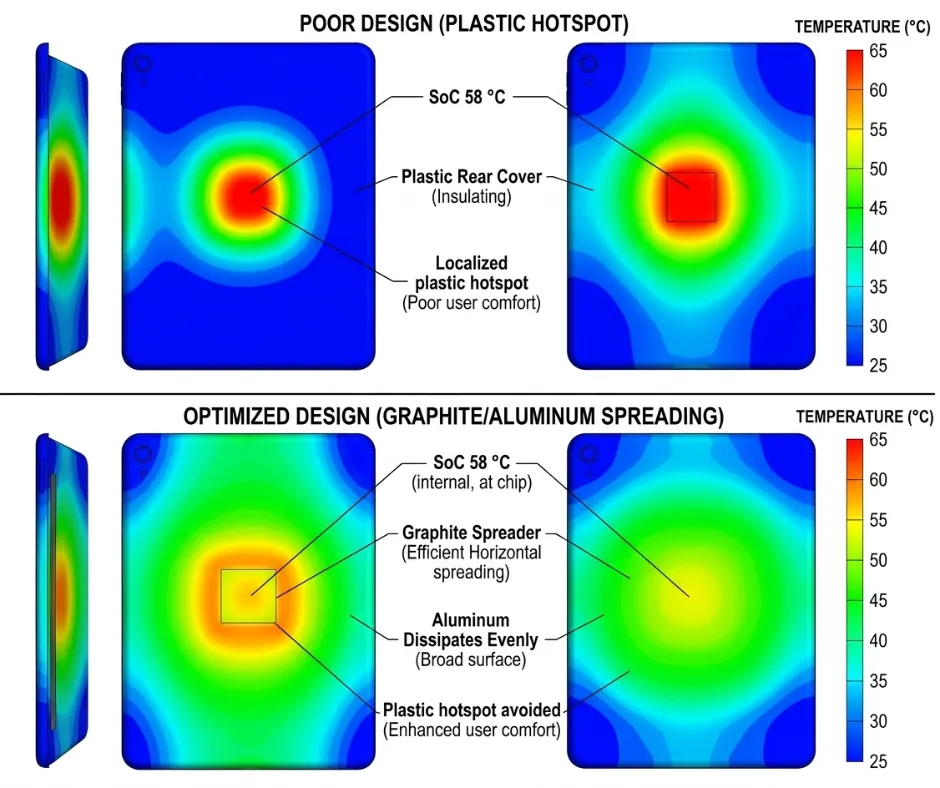
First, tablets get hot. So you need to move the heat away by getting graphite sheets. Such as the type that looks like black stickers. Stick them on the CPU and on the back of the case. This often just helps the heat spread out.
Generally avoid letting the heat stay in one spot. In terms of user comfort, nobody wants a hot consumer tablet. Aluminum cases spread heat better than plastic. So metal tablets can run faster for longer.
Mechanical & Industrial Design Engineering
You design the outside to make sure it is strong.
Structural Design & Material Selection
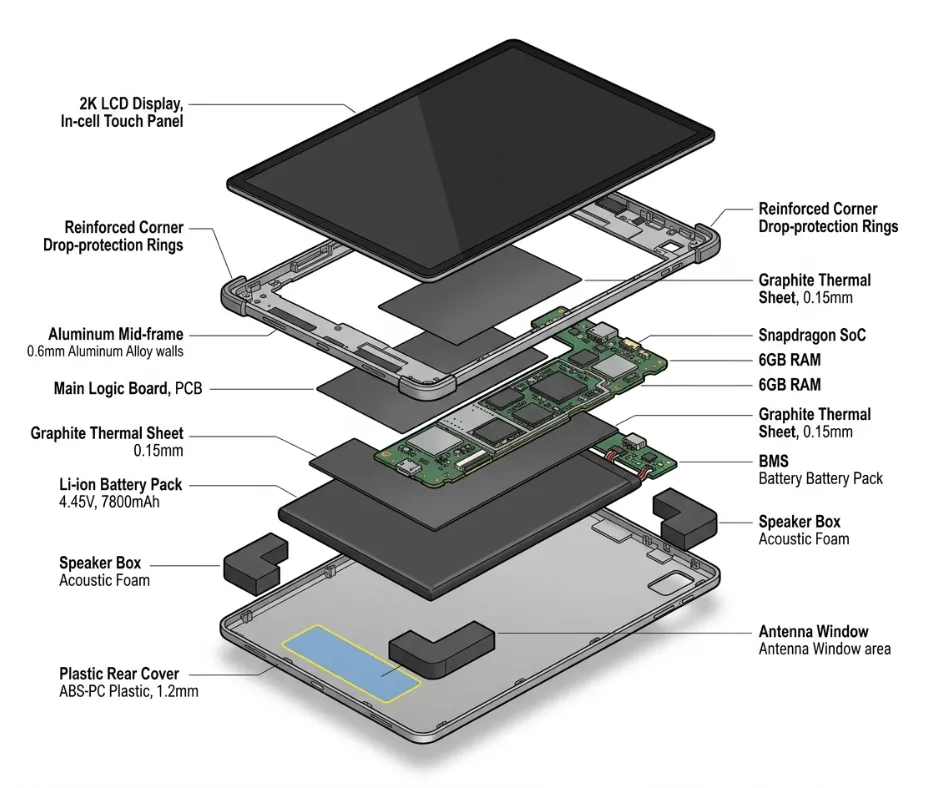
Choose between CNC metal or plastic. In terms of weight, plastic is lighter. So you have to find a balance and be able to add a metal frame inside a plastic case. So the tablet does not bend. This can be a useful question: What is the thickness of the aluminum wall? Avoid walls thinner than 0.6mm.
Structural Drop Protection
Tablets fall on the floor. So you need to protect the screen. Reinforce the corners because corners hit the floor first. Then the screen breaks. Use a small plastic ring around the glass. The metal does not touch the glass directly. After a few drops, check if your design works. Best way to do this is to do a 1-meter drop test on all sides.
Power Management & Battery Engineering
The battery is the most dangerous part.

Battery Design: The 4.45V Trap
Get a battery with high energy density. Such as the type called 4.45V cells. These cells hold more power in a small size. On the other hand, factories might swap them for 4.35V cells. It means your battery will die faster.
What is the cycle life of this specific cell? Avoid batteries that only last 300 cycles. You need to ask for 800 cycles. So ever since then, your customers will be happy.
Power Optimization Strategy
Android uses a lot of power. So you need to tune the software. Get a good BMS. Then check the standby current. No way to know why the battery dies overnight unless measure the current.
Use software to turn off the CPU when the screen is off. Finally, make sure to check the charging speed. Fast charging is good, but it makes the battery hot.
Connectivity & Peripheral Integration
First, a tablet needs WiFi and Bluetooth. So it can connect to the world.
Wireless Communication
Get WiFi 6 for new tablets. In terms of speed, it is much faster. The antenna needs a clear path. Avoid putting the antenna behind thick metal. So you need a plastic window in the case. This often just helps the signal get out. Then test the TRP and TIS. It means how well the antenna sends and receives data.
Peripheral Ecosystem
You need a way to connect a keyboard using Bluetooth. On the other hand, Pogo pins are better. Pins are more reliable. Then add a stylus. Just make sure the stylus has a place to stick on the tablet. Best way to do this is to use magnets. Get strong magnets so the pen does not fall off.
Android OS Customization & Certification
Get the software and get it approved from Google.
Android System Customization
Change the icons and the background. So it looks like your brand. Remove apps you do not need. The tablet will have more free memory. Avoid changing too much of the system code. So you have fewer bugs. This can be a useful question: How do we send updates to our users? Get an OTA server.
GMS Certification
GMS means Google Mobile Services. So users can use the Play Store. Pass the CTS and VTS tests. It means Compatibility Test Suite. Google will not let you sell the tablet if you fail. Then hire a lab to test it. This often just takes 4 to 6 weeks. Until then, you cannot ship the product. Google is very strict about security.
Consumer Tablet Prototyping & Validation Process
Build a few units to test and then in thousands.
EVT / DVT / PVT Development Stages
Follow these steps.
- EVT: First, check if the board works.
- DVT: Then, check if the design is strong.
- PVT: Finally, make sure to check if the factory can build it fast.
This is a helpful way to find mistakes. In terms of time, each stage takes about a month. You should be able to fix bugs in the DVT stage.
Reliability Testing
First, put the tablet in a hot room and check if it crashes. Then put it in a vibrating machine. Parts might fall off if the solder is bad. Then use a robot to tap the screen 100,000 times. After a few days, if the touch sensor is good. No way to know if the tablet is durable unless you try to break it.
Mass Production & Quality Control
The factory starts the machines. So the consumer tablets are built on a line.
SMT & PCBA Process
SMT means Surface Mount Technology. A robot puts the chips on the board. You need to check the Yield like a yield of 98% or higher. If it is 90%, it is not so great.
You should generally avoid reworking boards. What is your first-pass yield? Best way to do this is to use X-ray machines to see the solder.
Final Assembly Process
Workers put the screen and battery into the case. Then they glue the glass. Go to a clean room with no dust. Such as the type used for making medical tools. After a few minutes, the glue dries. Finally, make sure to test every single consumer tablet. So you have no dead screens in the box. Get a final software test for WiFi and sound.
Key Engineering Challenges & Solutions
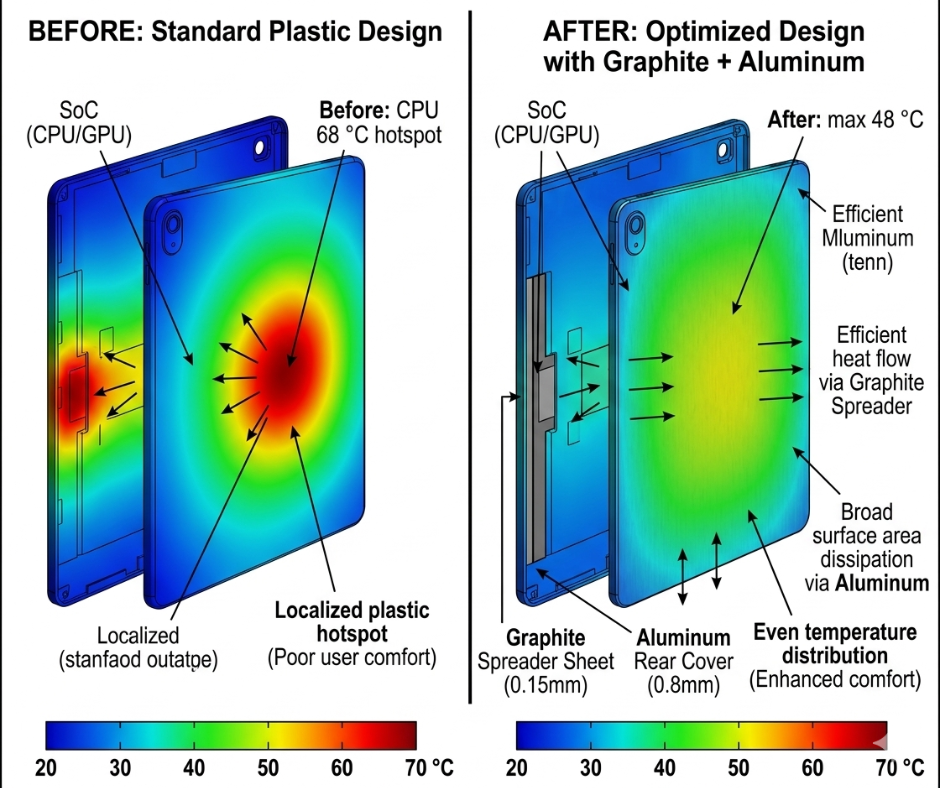
First, let’s look at the problems you might face. Then we look at the fixes.
| Engineering Challenge | Why it is a problem | Best way to fix this |
| Tablet gets too hot | It slows down the CPU. | Use thicker graphite and metal. |
| WiFi signal is weak | The metal case blocks it. | Add a plastic window for the antenna. |
| Battery swells up | It is dangerous and breaks the case. | Use high-quality 4.45V cells. |
| Screen is not clear | Low resolution or poor glass. | Use FHD resolution and In-cell touch. |
| Tablet feels slow | Cheap storage or bad RAM. | Use UFS storage and LPDDR4X. |
| Google Play Store fails | The software is not certified. | Pass the Google CTS tests early. |
Conclusion
Building a consumer tablet is hard. In terms of quality, you cannot trust the Golden Sample. Check the battery cells and the PCB yield. This often just saves you from a disaster. Choose the right SoC. Then design a strong case. Finally, make sure to get the Google certification.
The best brands are the ones that check the things no one else sees. Now you have the knowledge to build something great. Just make sure to follow these steps. You can then use this guide for your next project.