When a circuit board breaks, replacing it costs a lot. PCB troubleshooting and repair can save money and reduce waste. Finding problems early lowers repair and replacement costs. It also keeps the circuit working well, making users happy. Using a step-by-step method with good tools helps find issues fast. This keeps the PCB reliable and working properly. It also saves time and avoids delays in your projects.
Key Takeaways
Checking PCBs early saves money and keeps devices working well. Regular checks stop expensive problems.
Use proper tools like multimeters and oscilloscopes to find problems fast. Good tools make fixing easier.
Be gentle with PCBs to avoid breaking them. Wear anti-static gear to protect parts from static electricity.
Fix PCBs step by step. Check the circuit, look for damage, and change broken parts to fix it right.
Keep your workspace clean and safe. Good airflow and neatness help you work better and stay safe.
Common Causes of PCB Damage
Overheating and Thermal Stress
Heat is a big problem for PCBs. High temperatures can weaken solder and harm the board. When parts of the PCB heat up differently, stress builds up. This stress can make layers of the board peel apart. Too much heat can also bend the board, breaking circuits and lowering performance.
Thermal stress happens during making or in hot places. Over time, it can break wires, crack chips, or damage parts. To stop overheating, use cooling systems and avoid long heat exposure.
Physical Damage from Handling
Bad handling can hurt a PCB. Dropping it, pressing too hard, or using tools roughly can cause cracks or broken parts. Even small damage can stop electricity from flowing and cause problems.
Always handle PCBs gently. Use safe workstations and don’t touch sensitive parts with bare hands. Store and move PCBs carefully to avoid accidents.
Contamination and Corrosion
Dust, dirt, and water can damage a PCB. Water can cause rust, which eats metal parts. Rust weakens connections and may cause short circuits. Dirt can also create paths for electricity, causing errors.
Keep PCBs clean and dry to avoid damage. Use coatings to protect against water and harmful stuff. Clean and check your PCB often to make it last longer.
Component malfunction or breakdown
A component malfunction is a common cause of PCB problems. When a part fails, the whole circuit stops working. This can happen because of old age, bad manufacturing, or tough conditions. Finding broken parts quickly is key to fixing the PCB.
Look for damage like burn marks, swollen capacitors, or cracked resistors. If nothing looks damaged, use tools like a multimeter or oscilloscope. These tools check voltage, resistance, and current to find the problem.
Tip: Always turn off the PCB before testing to stay safe.
Some parts, like ICs, can fail inside without visible damage. Comparing the faulty PCB with a working one can help. If an IC acts differently on the bad board, it might be broken.
Replacing the bad part is usually the best fix. Use a matching replacement to keep the PCB working well. Solder the new part carefully to avoid new problems. If unsure, check the part’s datasheet or ask an expert.
Fixing broken parts quickly helps your PCB last longer and work better.
Tools for PCB Troubleshooting and Repair

Basic tools: Multimeter, test probes
To fix a PCB, you need basic tools. A multimeter checks voltage, current, and resistance. It helps find broken parts or bad connections. Test probes let you measure specific spots on the board.
Good probes give better results. Pick ones made from strong materials like fiberglass plastic. Make sure they match your oscilloscope’s settings for accurate readings. Well-known brands are reliable, but OEM probes work if specs are correct.
Tip: Use these tools in labs or factories where accuracy matters.
Feature | Description |
|---|---|
Build Quality | Probes should handle frequent use and tough conditions. |
Compatibility | Match probes to your tools for correct measurements. |
Vendor Reputation | Trusted brands are reliable; OEM options can save money. |
Advanced tools: Oscilloscope, LCR meter, logic analyzer
For harder PCB problems, advanced tools are helpful. An oscilloscope shows signals as waveforms. It helps check how circuits work. It also has features like storage and multi-channel analysis.
An LCR meter measures inductance, capacitance, and resistance. It ensures parts meet their specs. A logic analyzer captures digital signals. It helps find problems in digital circuits by showing how signals interact.
Tool | Key Features |
|---|---|
Oscilloscope | Shows signals, stores data, and supports multi-channel testing. |
LCR Meter | Measures inductance, capacitance, and resistance with precision. |
Logic Analyzer | Captures digital signals and helps analyze complex circuit issues. |
These tools help you study circuits and find problems easily.
Repair tools: Soldering iron, conductive epoxy, replacement parts
Fixing a PCB needs special tools. A soldering iron is used to attach or remove parts. Choose one with adjustable heat for better control. Conductive epoxy is useful for fixing broken paths or making new ones without soldering.
You also need spare parts. Keep extra resistors, capacitors, and ICs ready. This helps you quickly replace bad parts and fix the PCB.
Note: Always work in an ESD-safe area to protect sensitive parts.
ESD-safe workstation and protective gear
Static electricity, or ESD, can harm PCB parts quietly. The damage might not show right away but can cause failures later. Using an ESD-safe workstation and protective gear helps avoid this problem. It also makes your repairs more successful.
An ESD-safe workstation has tools and surfaces that stop static. Anti-static mats, wrist straps, and grounding points are key. These items move static electricity away from the PCB to protect it. Wear anti-static gloves and clothes to stop static from your body or outfit.
Here’s why ESD safety is important:
Evidence Type | Details |
|---|---|
ESD Damage Cost | ESD causes 33% of device failures, costing $5 billion yearly in the U.S. |
Cost Reduction | Managing ESD risk can cut related costs by 60-70%. |
Preventing ESD saves money and keeps devices working well. Spending a little on anti-static tools avoids costly repairs or replacements.
Tip: Always check if your workstation is grounded before fixing a PCB.
Keep your workspace neat and clean. Dust and mess can create static and make repairs harder. Store tools and parts in anti-static containers to keep them safe and easy to find.
An ESD-safe setup is more than just tools; it’s about good habits. Handle PCBs gently and don’t touch sensitive parts. With the right tools and care, you can protect your PCB and make it last longer.
Step-by-Step PCB Troubleshooting Process
Map out the circuit board
The first step is to map the circuit board. This helps you see how parts connect. Start by checking the schematic diagram. It shows how components work together. If no schematic is available, look at the board closely. Trace the paths by hand to understand the layout.
Follow these tips for a good map:
Add test points to important signals. These make testing easier.
Use controlled impedance for fast signals. This avoids data mistakes.
Plan for heat and interference. Ground planes and cooling help fix these problems.
Clear labels are important too. Add silkscreen labels to show parts and connections. These make troubleshooting faster. Use CAD tools to design the layout based on the schematic. Check the design for errors before building the PCB.
Tip: Keep a copy of the schematic and layout handy for repairs.
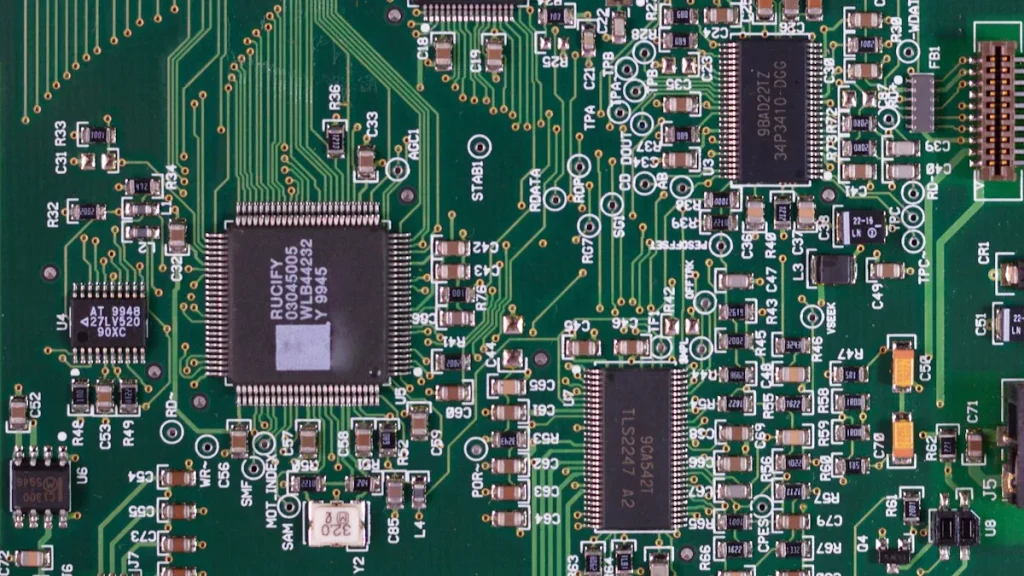
Conduct visual inspection
Looking at the PCB can quickly show problems. Check for visible issues like misplaced parts, solder bridges, or missing components. You might also see burn marks, cracks, or rust.
Take your time and look carefully. Use a magnifying glass or microscope for small details. This helps find surface problems that machines might miss.
Visual checks give fast results. If you see a problem, fix it right away. For example, you can re-solder loose parts or replace broken ones. Finding issues early saves time and prevents bigger problems later.
Note: Clean the PCB first. Dust and dirt can hide problems and make checking harder.
Compare with an identical circuit board
If you have a working circuit board, use it as a guide. Compare the bad board with the good one to find problems faster. Start by looking at the layout. Check if parts, solder joints, or traces are different.
Next, use tools like a multimeter to measure voltage, resistance, and current. Compare readings from both boards. Big differences mean something might be wrong. For digital circuits, use a logic analyzer to compare signal patterns.
This method helps find hidden issues. For example, an IC might fail inside without showing damage. Comparing its behavior on both boards can confirm if it’s broken.
Tip: Mark the working board clearly to avoid mixing it up during testing.
Find faulty components
To repair a PCB, find the broken parts first. Use a multimeter to check resistance, voltage, and continuity. Test each part one by one. Look for strange readings that don’t match normal values.
Focus on problem areas in the circuit. For example, if a section overheats or fails, test parts there first. For digital circuits, use a logic analyzer. It helps find bad signal patterns that show a part is broken.
If you have a working PCB, compare it with the broken one. This makes spotting differences easier. Mark the bad parts once you find them. This helps you stay organized during repairs.
Tip: Always unplug the PCB before testing. This keeps you safe and avoids more damage.
Check ICs and power supply
Integrated circuits (ICs) and the power supply are key parts of a PCB. A bad IC can stop the whole circuit. Use a multimeter or oscilloscope to test ICs. Check input and output pins for correct voltage. If the voltage is wrong, the IC might be broken.
For the power supply, measure the output voltage. It should match the circuit diagram. Low or changing voltage means there’s a problem. Check capacitors and diodes in the power section. Swollen or leaking capacitors often cause power issues.
High-tech tools like temperature mapping can help. These tools show hot spots caused by overheating ICs. They also help find thermal problems in circuits. Accurate maps make testing more reliable.
Evidence Description | Key Findings |
|---|---|
Temperature mapping of operating nanoscale devices by scanning probe thermometry | This method shows detailed heat patterns in ICs. |
Self-heating study of indium arsenide nanowire | It separates heating effects to study thermoelectric issues. |
Correction of systematic errors in temperature mapping | Fixing errors gives better heat maps for testing. |
Note: Replace broken ICs or power parts with the same type to keep the circuit working well.
Use thermal cameras to find hot spots
Thermal cameras are great for spotting hot areas on a PCB. Hot spots often mean overheating parts or short circuits. Scan the board with a thermal camera while it’s running. Look for areas that are too hot.
Hot spots can happen from bad soldering, broken parts, or too much current. Once you find a hot spot, check nearby parts. Look for burn marks, discoloration, or damage.
Thermal cameras also check if cooling systems work well. For example, if a heat sink isn’t working, the camera will show the problem. Fixing these issues stops more damage and helps the PCB last longer.
Tip: Pick thermal cameras with high sensitivity. They catch small temperature changes for better results.
Use signal probing techniques
Signal probing helps find problems in a PCB. It checks how signals move through the circuit and shows where issues happen. With signal probes, you can measure voltage, waveforms, and signal quality at certain spots.
Choose the right tools for probing. A logic analyzer or oscilloscope works well. Attach the probe to test points or component pins. Make sure the probe connects firmly for accurate readings. If there are no test points, carefully connect to exposed traces or solder joints.
Focus on problem areas when probing. If a part of the board isn’t working, check input and output points nearby. Compare the signals you see with expected values from the schematic or a working board. This helps find broken parts or bad connections.
Probing also finds noise or interference in the circuit. Noise can mess up signals and cause problems. Use an oscilloscope to check waveforms. A clean waveform means the circuit works well. Irregular waveforms show issues like bad grounding or interference.
Write down what you find during probing. Note signal levels, waveforms, and any problems. These notes help fix the PCB and avoid mistakes later.
Tip: Always ground your probe properly. A bad ground adds noise and hides real problems.
Signal probing takes time and care. By checking signals and comparing them to expected values, you can quickly fix PCB issues.
Effective PCB Repair Techniques
Fixing Broken Traces
Broken traces stop electricity from flowing, making the PCB fail. Fixing these needs care and the right tools. First, find the broken trace by looking closely or using a multimeter. After finding it, clean the spot to remove dirt or rust.
Here are ways to fix broken traces:
Conductive inks and pens: These let you redraw the trace. They are great for parts that can’t handle heat.
Conductive pastes: Nickel-based pastes work well for fixing traces. They carry electricity well and are like silver pastes in performance.
Solder bridges: For bigger breaks, use solder wire and a soldering iron. This works for traces that can take more heat.
Tip: Test the fixed trace with a multimeter to check if it works before putting the PCB back together.
Changing Bad Components
Bad parts often cause PCB problems. Replacing them needs care to avoid more damage. Start by finding the bad part. Look for burn marks, swelling, or strange test results.
Follow these steps to replace parts:
Warm up the PCB to clean it and help solder flow better. This also stops sudden heat damage.
Use a soldering iron or hot air tool to remove the bad part. Heat it evenly to keep the board safe.
Clean the area with a solder sucker or wick to remove old solder.
Put the new part in the right place on the board.
Solder it carefully without overheating nearby parts.
Cool the board after soldering to stop heat damage. Too much heat can bend the board or hide problems, so watch the temperature.
Note: Always use parts that match the original ones to keep the PCB working well.
Fixing Damaged Pads
Pads can get damaged by heat, stress, or rust. Pads connect parts to the PCB, so fixing them is important. Start by cleaning the damaged spot with alcohol to remove dirt.
For small damage, use conductive epoxy to rebuild the pad. Add a little epoxy and shape it like the original pad. Let it dry fully before attaching the part.
If the pad is gone, use a copper foil repair kit. Cut the foil to size and stick it to the board. Solder the edges to hold it in place.
Tip: After fixing the pad, use a multimeter to check if it works properly.
Fixing pads the right way keeps your PCB reliable and prevents future problems.
Fixing Breaks in EMI or RF Shielding
EMI and RF shielding protect your PCB from bad signals. These shields block outside noise and stop your circuit from causing problems for other devices. If the shield breaks, signals can get messed up, performance drops, or the PCB might stop working. Fixing the shield keeps your circuit running well.
Why EMI and RF Shielding Are Important
EMI and RF shields act like walls. They block outside waves from entering your circuit. Without these shields, your PCB can face interference. This can lead to errors, weak signals, or overheating.
Tip: Check the shield often to find breaks early.
What Causes Shielding Breaks?
Shielding breaks happen because of:
Physical damage: Dropping or rough handling can crack the shield.
Corrosion: Water or chemicals can ruin the shield material.
Wear and tear: Over time, shields weaken, especially in shaky places.
Steps to Fix Shielding Breaks
You can fix shielding breaks with simple tools. Follow these steps:
Find the Break
Use a magnifying glass to spot cracks or missing parts in the shield.Clean the Spot
Wipe away dirt or rust with alcohol and a clean cloth. A clean area helps the repair stick better.Fix with Conductive Materials
Conductive Tapes: Stick tape over the break for a quick fix.
Conductive Paints or Epoxies: Brush on a thin layer to fill gaps. Let it dry before testing.
Metal Patches: For big breaks, use foil. Solder the edges to connect it securely.
Test the Shield
After fixing, check if the shield works. Use an EMI tester to see if interference is gone. If not, fix it again or check for more breaks.
Note: Use repair materials that match your PCB’s shield type. Wrong materials can cause new problems.
How to Stop Future Breaks
Handle your PCB gently to avoid damage. Store it in anti-static bags and keep it dry. Regular checks help catch small problems early.
Reminder: Good-quality shielding lasts longer and protects your PCB better.
Fixing shielding breaks keeps your PCB safe from bad signals. Follow these steps to keep your circuit working well.
Safety Tips for PCB Repair
Wear safety gear (glasses, gloves, mask)
When fixing a PCB, wearing safety gear protects you. Harmful materials, sharp edges, and dust can hurt you. Always wear safety glasses to shield your eyes from flying bits or chemicals. Use gloves that resist chemicals to keep harmful substances off your skin. A mask or respirator stops you from breathing in bad dust or fumes during repairs.
Here’s a simple chart of safety gear and why it’s needed:
Safety Gear | Why You Need It |
|---|---|
Chemical-resistant gloves | Protects skin from harmful substances |
Disposable coveralls and shoe covers | Keeps clothes and skin clean from contamination |
Safety glasses or goggles | Shields eyes from debris and harmful materials |
Respiratory mask | Prevents breathing in harmful dust or fumes |
OSHA rules say you must use proper safety gear when handling dangerous materials. This keeps you safe and avoids health problems later.
Avoid static electricity (ESD)
Static electricity can quietly harm PCB parts. Even a tiny static shock can ruin delicate components like chips. To stop this, always work in a static-safe area. Wear an anti-static wrist strap to ground yourself and avoid passing static to the PCB. Use anti-static mats and grounding points on your desk to protect the parts.
Store parts in anti-static bags when not using them. Don’t wear synthetic clothes because they create static. Following these steps helps your PCB and its parts last longer.
Tip: Check that your workspace is grounded before starting any repairs.
Discharge stored energy
Capacitors and batteries hold electricity, even when the PCB is off. Touching them without discharging can shock you or damage the parts. Before fixing anything, use a resistor or discharge tool to safely release the energy.
To discharge a capacitor, connect a resistor to its terminals for a few seconds. For batteries, follow the maker’s instructions to discharge them safely. Never short-circuit a capacitor or battery—it can spark or explode.
Note: Always make sure all capacitors and batteries are fully discharged before touching the PCB.
Following these safety tips makes repairs safer and protects both you and the PCB from harm.
Keep your workspace safe and well-ventilated
A safe and ventilated workspace is important for PCB repairs. Without it, harmful fumes and dust can hurt you and the environment. A clean and safe area helps you work better and stay protected.
Set up your workspace where air flows well. Use fans or fume extractors to remove bad fumes from soldering or cleaning. If there’s no natural airflow, add an air filter to keep the air clean. Always check your ventilation tools before starting repairs.
Check air quality often to stay safe. Test the air near your workspace for harmful dust. If there’s a lot of dust, turn off the HVAC system to stop it from spreading. These steps keep your area safe from dangerous particles.
Keep your workspace tidy and organized. Put tools and materials in their proper places to avoid accidents. Use anti-static mats and grounding points to protect parts from static electricity. Wear gloves and masks to shield yourself from harmful substances.
By keeping your workspace safe and ventilated, you can repair PCBs effectively. Check your setup often and follow safety rules to stay safe and productive.
Knowing what causes PCB damage helps keep devices working. Spotting problems like rust early stops more harm and makes your equipment last longer. Cleaning and testing your PCB the right way keeps it dependable. Taking care during design, making, and using the PCB avoids expensive fixes later.
Fixing PCBs step by step saves time and works better. Drawing circuit maps, finding problems, and using good tools make repairs easier. Always stay safe by wearing gear and working in a clean area with fresh air.
Keep learning new ways to improve your skills. With the right tools and knowledge, you can fix PCB problems and keep devices running well.
FAQ
What if you don’t have a PCB schematic?
Begin by carefully looking at the board. Manually follow the connections to learn its layout. If you have a working PCB, compare it to the broken one. Mark important parts and test points to make fixing easier.
How do you spot a bad capacitor?
Check for signs like swelling, leaking, or strange colors. Use a multimeter to test its capacitance. If the reading is very different from normal, the capacitor is likely broken and should be replaced.
Can you fix a PCB without soldering?
Yes, you can use conductive glue or special ink to repair broken paths. These are good for areas that can’t handle heat. But soldering is usually stronger and lasts longer for most fixes.
How do you avoid ESD damage while repairing?
Work in a static-safe area. Wear an anti-static wrist strap and use special mats. Keep parts in anti-static bags. Don’t wear clothes that create static, like synthetic fabrics.
What tools do beginners need for PCB repair?
Start with a multimeter, soldering iron, and probes. A magnifying glass helps you see small details. As you improve, get advanced tools like an oscilloscope or logic analyzer.
Tip: Practice on old PCBs before fixing important ones.