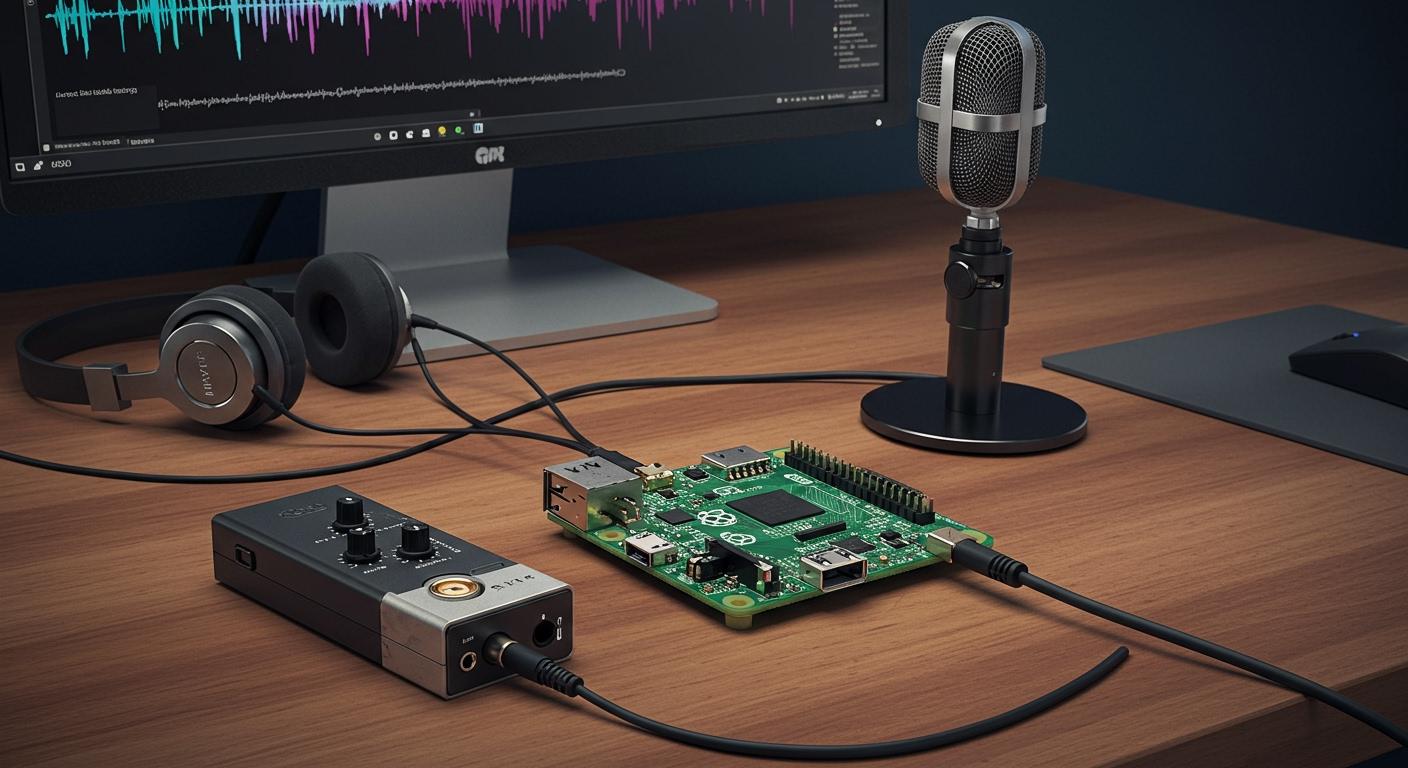
You can set up a microphone with your Raspberry Pi in just a few steps. Most folks use USB microphones, external sound cards, or Bluetooth devices. Some even connect MEMS I2S microphones straight to the GPIO pins—like using 3.3v power, ground, and pins 18, 19, and 20 for clock and data. Adjusting your microphone volume matters for clear Raspberry Pi audio recording. Just follow the right connections, and you’ll get great results.
Connect a Microphone

There are different ways to connect a microphone to your Raspberry Pi. Each way has its own steps and good points. Let’s look at the most common choices so you can choose what fits you.
USB Microphone
Many people use a usb microphone first because it is simple. Plug it into a USB port. The Raspberry Pi will usually find it right away. You do not need extra drivers or adapters. If you want to set up fast, usb microphones are best. The Raspberry Pi Pico can use USB 1.1 Host/Device mode. It also has a built-in ADC for audio input. Here is how you can wire a PDM mic to a Raspberry Pi Pico:
PDM Mic | Raspberry Pi Pico |
|---|---|
3V | 3V3 |
GND | GND |
SEL | GND |
DAT | GPIO2 |
CLK | GPIO3 |
You can use usb microphones for voice chats, podcasts, or easy sound recording. They work well and do not have many problems.
External Sound Card
If you want better sound, use an external sound card. These cards plug into your USB port. They give you more control over sound. Some, like the Wolfson Audio Card, give high-definition audio. Not all sound cards work with every Raspberry Pi or system. For example:
Issue Description | Device | Error Observed |
|---|---|---|
No sound over USB Audio S/PDIF | Raspberry Pi 4 | USB controller can’t set up required parameters; falls back to HDMI audio device |
You should check if your sound card works before you use it.
Bluetooth Microphone
A Bluetooth microphone lets you connect without wires. This is good if you want less mess on your desk. But Bluetooth microphones can have a delay of 3-4 seconds. This lag can make your sound not match your video. The sound may also be lower quality because Bluetooth has limits.
Pros and Cons
Here is a quick chart to help you pick a microphone connection:
Connection Type | Audio Quality Description |
|---|---|
USB Microphone | Easy and works well. Good for most things. Not always the best sound, but simple to use. |
External Sound Card | Best for high-quality sound. May need more setup and checking if it works. |
Bluetooth Microphone | No wires and easy to move. Can have delays and lower sound because of limits. |
Tip: For basic recording, usb microphones are the easiest. For music or great sound, try an external sound card. If you want wireless, Bluetooth is fine, but there might be some lag.
Microphone Setup
Plug In and Detect
Start by plugging your microphone into your Raspberry Pi. If you use a USB microphone or an external sound card, just connect it to a USB port. For Bluetooth microphones, pair the device using the Bluetooth settings on your Pi.
To check if your Raspberry Pi sees your microphone, open the terminal and type:
lsusb -t
This command shows all USB devices. If your microphone is connected, you will see a line with Class=Audio, Driver=snd-usb-audio. That means your Pi recognizes the microphone. If you want to build something more advanced, you can use Python libraries to detect audio input from microphones. This works well for projects that need to check for microphones automatically.
💡 Tip: Always plug in your microphone before you start recording. This helps your Raspberry Pi find the device right away.
Verify Connection
You should always make sure your Raspberry Pi can use the microphone, not just see it. There are some handy commands for this. Try these in your terminal:
Command | Description |
|---|---|
arecord -l | Lists all available recording devices |
aplay -l | Lists all available playback devices |
Type arecord -l to see if your microphone shows up as a recording device. If you see your device listed, you are ready to record audio. If you use aplay -l, you can check your playback devices too.
Troubleshooting
Sometimes things do not work right away. Here are some quick steps to fix common problems:
Make sure your microphone is plugged in all the way.
Try a different USB port if your Pi does not detect the microphone.
Restart your Raspberry Pi after plugging in a new device.
For Bluetooth, check if the device is paired and connected in the Bluetooth menu.
If your microphone still does not show up, run
lsusb -tagain to see if the Pi detects it.Use
arecord -lto double-check if your microphone is listed.
🔍 Note: If you still have trouble, try using another microphone or cable. Sometimes the problem is with the hardware, not your Raspberry Pi.
With these steps, you can set up and check your microphone on a Raspberry Pi. Once you see your device in the list, you are ready to record audio!
Record Audio
You have your microphone ready. Now, let’s see how you can record audio on your Raspberry Pi. You can use the desktop or the command line. Both ways work well, so you can pick what feels easiest.
Desktop Recording
If you like using a mouse and windows, you can record audio from the desktop. Raspberry Pi OS comes with simple tools. You can use the built-in Sound Recorder app. Here’s how you do it:
Open the main menu and search for “Sound Recorder.”
Plug in your microphone and make sure it’s detected.
Click the red record button to start. Speak or make your sound.
Click stop when you finish.
Save your file. The app saves your audio as a wav file by default.
You can play back your recording right away. If you want to record audio for a podcast or a school project, this method is quick. You don’t need to type any commands. You just click and record.
💡 Tip: Always check your microphone level before you record audio from the desktop. This helps you avoid quiet or distorted sound.
Command Line Recording
Some people like using the terminal. You can record audio from the command line with a tool called arecord. This tool is part of ALSA, which comes with Raspberry Pi OS. You can use it to record audio in different ways.
Here’s a basic command to record audio and save it as a wav file:
arecord -D plughw:1,0 -f cd -t wav -d 10 test.wav
Let’s break down what this does:
-D plughw:1,0tells arecord which device to use. You might need to change the numbers if your microphone is on a different device.-f cdsets the quality to CD level.-t wavsaves the file as a wav.-d 10records for 10 seconds.test.wavis the name of your audio file.
You can change the time or file name as you like. If you want to record audio for a longer time, just set a bigger number after -d.
You can also use Python with PyAudio for more advanced audio recording. This lets you process sound in real time or even classify sounds. To set it up, install PyAudio with:
sudo apt-get install python-pyaudio python3-pyaudio portaudio19-dev
pip install pyaudio
You can then run a script like this:
python run_classifier.py --featurizer compiled_featurizer/mfcc --classifier compiled_classifier/model --categories categories.txt --wav_file audio --sample_rate 16000 --auto_scale
This method is great if you want to record audio and do more with it, like making a smart assistant or a sound detector.
⚠️ Note: Sometimes, you might run into problems when you record audio from the command line. Common issues include too many USB devices, heavy CPU use, or power supply problems. If your audio recording sounds bad, check your power supply and try unplugging other USB devices.
Save and Find Files
After you record audio, you need to know where your files go. The Sound Recorder app usually saves your wav files in your home folder or the Music folder. If you use arecord, your wav file saves in the folder where you ran the command.
Here’s a quick table to show which file formats work best with arecord:
File Format | Compatibility with arecord |
|---|---|
WAV | Supported |
MP3 | Not supported |
OGG | Not supported |
FLAC | Not supported |
You should always use wav files for the best compatibility. They work with most Raspberry Pi audio recording tools.
If you record audio a lot, your files can get big. You need good storage. Here are some options:
microSD cards work well for the operating system and small audio files. Pick a card with at least 8GB, but 32GB is better if you record audio often.
USB drives are easy to use for extra space. If your Raspberry Pi has USB 3.0, you get faster speeds. You can also use an external hard drive, but make sure it has its own power supply.
🗂️ Tip: Organize your wav files in folders by date or project. This makes it easy to find your audio recording later.
You now know how to record audio on your Raspberry Pi. You can use the desktop or the command line. You can save your wav files and keep them organized. Try both ways and see which one you like best!
Alsamixer Settings
Getting your microphone to sound just right on a Raspberry Pi can feel tricky, but alsa tools make it much easier. You can use alsamixer to manage the microphone volume, boost your microphone amplification, and make sure your recordings sound clear in every wav file you create.
Open Alsamixer
You have two main ways to open alsamixer. If you use the Raspberry Pi desktop, look for the audio icon in the top-right corner. This lets you manage sound settings with just a few clicks. If you prefer the terminal, open it and type:
sudo alsamixer
This command brings up a colorful screen where you can control all your alsa audio devices. Sometimes, you might see error messages like alsa-lib main.c:1541:(snd_use_case_mgr_open) error: failed to import hw:0 use case configuration -2. If this happens, check that your microphone is plugged in and detected.
Switch Devices
Alsamixer can show you many devices. You might see your USB microphone, an external sound card, or even Bluetooth audio. Use the F6 key to switch between devices. Pick the one you want to adjust. If you do not see your microphone, try plugging it in again or restarting your Raspberry Pi. Sometimes, you may get errors like arecord: pcm_read:2221: read error: Input/output error. This usually means the device is not ready or not connected.
Adjust Volume
Once you pick your device, use the left and right arrow keys to move between controls. The up and down arrows change the volume. Look for the microphone input and turn it up or down as needed. If your recordings sound too quiet or too loud in your wav file, tweak the levels here. For best results, keep the volume just below the maximum to avoid distortion. If you need more boost, look for a setting called “mic boost” or “microphone amplification.” This helps if your voice sounds faint.
💡 Tip: Always test your settings by recording a short wav file. Play it back and listen for any hiss or crackle. If you hear problems, lower the volume a bit or move your microphone farther from your mouth.
With alsa and alsamixer, you can fine-tune your audio setup. You will get better sound for every wav file you record.
Raspberry Pi Audio Recording Tips
Best Practices
You want your raspberry pi audio recording to sound good. Try these easy tips to help you get clear sound every time:
Use an external microphone. Built-in mics pick up more noise. An external mic gives you better sound for your raspberry pi audio recording.
Try different recording apps. Some apps work better with certain microphones. Test a few to see which one works best for your raspberry pi audio recording.
Make sure your microphone and app work together before you start. This helps you avoid problems later.
Lower background noise. You can use the
noisereducelibrary in Python to clean up your audio:rate, data = wavfile.read("mywav.wav") reduced_noise = nr.reduce_noise(y=data, sr=rate) wavfile.write("mywav_reduced_noise.wav", rate, reduced_noise)Cut out silent parts from your recordings. The
pyAudioAnalysislibrary helps you remove quiet sections:[Fs, x] = aIO.read_audio_file(file) segments = aS.silence_removal(x, Fs, 0.020, 0.020, smooth_window=1.0, weight=0.3, plot=True)Find guides that show how to record and stream both audio and video. These guides have extra tips for raspberry pi audio recording.
💡 Tip: Always test your setup before you record something important. A quick test can help you avoid problems.
Troubleshooting Audio
Sometimes, raspberry pi audio recording does not work right. Here are some steps you can try if you have problems:
Step | Action |
|---|---|
1 | Open a terminal and run |
2 | Restart your Raspberry Pi after you remove PulseAudio. |
3 | If you use an older OS, run |
4 | Edit |
5 | Save your changes and restart your Raspberry Pi. |
6 | Test your audio with |
You can also find tutorials that show how to set up USB microphones, external sound cards, and Bluetooth mics. These guides help with raspberry pi audio recording for things like voice recognition or security systems.
If you follow these tips and steps, your raspberry pi audio recording will sound better and work well.
You have learned how to connect a microphone and record audio with your Raspberry Pi. Many people get good results when they do these steps:
Plug in your microphone and make sure it works.
Change the volume so your sound is clear.
Record your voice and save the file.
Trying different microphones helps you pick the one you like best. Here is a simple chart that shows what each microphone type is good for:
Microphone Type | Applications |
|---|---|
USB Microphones | Podcasting, Voice recognition, Video calls, Home automation |
Electret Condenser Microphones | Audio recording, Watching places, Checking the environment |
MEMS Microphones | Noise sensors, Small gadgets, IoT projects |
Test your microphone setup, change your settings, and enjoy good sound every time!
FAQ
How do I know if my microphone works with Raspberry Pi?
You can check your device with the arecord -l command. If you see your microphone listed, you are good to go. Try recording a short clip to test the sound.
Can I use multiple microphones at the same time?
Yes, you can connect more than one microphone. You need to pick the right device in your recording app or use the correct device number in the terminal.
Why is my recording too quiet or noisy?
Try adjusting the volume in alsamixer. Move your microphone closer or farther away. Make sure there is not too much background noise. Test different settings until you get clear sound.
What file format should I use for saving audio?
You should save your recordings as WAV files. This format works best with Raspberry Pi tools. If you need smaller files, you can convert them later.