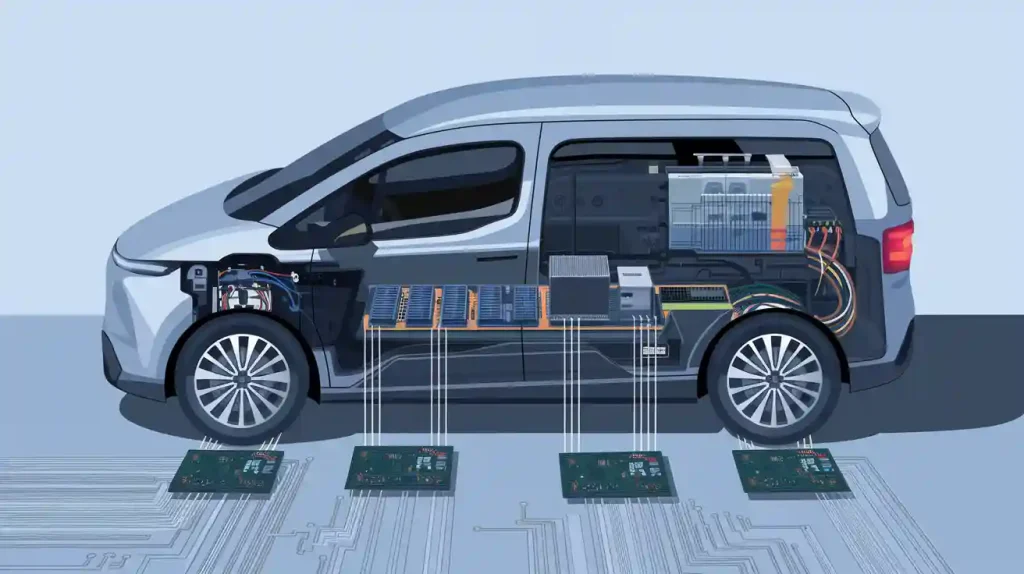
You see integrated circuit board design in most electronic devices. When you look at an ic, you notice a small chip. This chip controls many things. An ic can keep data, handle signals, and control power. You use ic technology in computers, phones, and home devices. Engineers use ic chips to make devices work better and faster. If you know how an ic works, you can fix problems and make electronics better.
Integrated Circuit Board Design
IC Definition
You see an ic as a tiny chip that holds many electronic parts. An ic can do many jobs, like storing data or controlling signals. You use ic chips in computers, phones, and even toys. When you learn about ic, you start to understand how devices work. Each ic has a special design that helps it do its job. You find ic chips in almost every modern device. The design of an ic decides how fast and well it works.
Board Design Overview
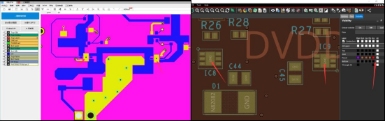
You need to know how integrated circuit board design works if you want to build or fix electronics. The process starts with picking the right ic for your project. You look at what the ic must do and how it fits with other parts. You draw a plan for the board and decide where each ic goes. You use software tools to help with the design. You check your work to make sure each ic connects the right way. Good design helps your device run smoothly. You see that ic board design is a step-by-step process.
Tip: Always check the datasheet for each ic before you start your design. This helps you avoid mistakes.
Importance in Electronics
You use integrated circuit board design in almost every electronic device today. When you learn about ic and design, you can make better products. You see that ic chips make devices smaller, faster, and smarter. You need good design to keep your devices safe and reliable. If you know how to use ic in your design, you can solve problems quickly. You help make technology better when you master integrated circuit board design.
IC Feature | Why It Matters |
|---|---|
Small Size | Saves space |
Fast Operation | Speeds up devices |
Low Power Use | Saves energy |
Smart Design | Adds new functions |
IC Board Design Stages
Requirements
You begin by finding out what the ic needs to do. You write down the main jobs for the ic. You set goals for how fast and how small it should be. You think about how much power it will use. You talk with engineers and customers to learn what they want. You use charts and pictures to organize your ideas. You check if your list matches what the device needs. You make sure the ic will fit in the whole design.
Note: If you have clear goals, you make fewer mistakes later.
Architecture
After you know the requirements, you make a big plan. You decide how the ic will work and connect inside. You pick the main blocks like memory and logic. You use computer programs to draw block diagrams. You test your plan with simulation. You check if your plan does everything needed. You see if the ic can be fast and use little power.
Architecture Tools | Purpose |
|---|---|
Block Diagram | Shows ic structure |
Simulation | Tests ic functionality |
Design Software | Draws ic layout |
Micro-architecture
Now you look at each block in detail. You break big blocks into smaller parts. You decide how each small part works. You use simulation to test each part. You check timing and how data moves. You use design tools to draw detailed pictures. You make sure all parts fit together. You run tests to find mistakes early.
Tip: Use simulation a lot to catch problems before building.
Implementation
When details are ready, you start building the ic. You write code using special languages like VHDL or Verilog. You use software to lay out the ic. You test circuits with simulation. You use tools to place each part on the chip. You check if the ic meets all your goals. You look at power, speed, and size. You use tests to make sure the ic works right.
Steps in implementation:
Write hardware code
Lay out the ic design
Run tests to check
Testing
After building, you test the ic. You make samples and run tests to see if it works. You use simulation to check the ic in different cases. You measure speed and power. You use machines to find problems. You run tests to see if the ic meets all goals. You fix any problems you find. You keep testing until the ic passes every check.
Alert: Good testing helps you avoid big mistakes later.
Productization
When the ic passes tests, you get it ready for making lots of them. You finish design files and send them to the factory. You set up checks to make sure each ic works. You work with the factory to fix problems. You use simulation to see if the ic works in real devices. You make sure the ic is safe and reliable. You plan how to ship and help customers.
Productization Steps | Description |
|---|---|
Final Design Files | Ready for manufacturing |
Quality Checks | Ensure ic functionality |
Simulation | Test in real-world cases |
Sustaining
After selling the ic, you keep supporting it. You fix bugs and update the ic if needed. You help customers with problems. You use simulation to test updates. You watch how the ic works in devices. You plan new improvements. You make sure the ic stays useful and reliable.
Tip: Supporting your ic helps it work well for a long time.
IC Role on PCB
Core Functions
You see the ic as the brain of your electronic device. The ic controls how signals move and how the device responds. You use the ic to process data, store information, and manage timing. Many devices need the ic to handle tasks quickly and accurately. You find that the ic can switch signals, amplify sounds, or even do math. The ic helps your device work smarter and faster. You rely on the ic to keep everything running smoothly.
Tip: If you want your device to perform well, choose the right ic for the job.
Integration with Components
You connect the ic to other parts on the pcb. The ic works with resistors, capacitors, and sensors. You use wires or traces to link the ic to these components. The ic sends signals to motors, lights, or speakers. You see that the ic can control many parts at once. You need to match the ic with the right components for your design. The ic often acts as a bridge between input and output devices. You make sure the ic fits with the voltage and current of each part.
Component | IC Role |
|---|---|
Sensor | Reads data for ic |
Motor | Gets signals from ic |
LED | Lights up by ic |
Speaker | Plays sound from ic |
Device Operation
You use the ic to start and stop your device. The ic checks inputs and decides what to do next. You press a button, and the ic reacts. The ic can turn on a light or move a motor. You see the ic making choices based on what you tell it. The ic follows instructions stored in its memory. You watch the ic keep your device safe by stopping it if something goes wrong. The ic helps your device use less power and work longer.
Alert: Always test your ic in the real device to make sure it works as expected.
IC vs PCB
What is an IC?
You see an ic as a tiny chip that holds many electronic parts. You find these chips inside almost every modern device. An ic can process data, store information, or control signals. You use an ic to make your device smarter and faster. Each ic has a special job, like acting as a memory, amplifier, or processor. You notice that an ic comes in different shapes and sizes. Some ics have many pins, while others look very small. You always check the datasheet to learn what each ic does.
Tip: If you want to know what an ic does, look for its part number and search for its datasheet.
What is a PCB?
You use a printed circuit board, or pcb, to connect all the parts in your device. The pcb holds the ic and other components like resistors, capacitors, and connectors. You see thin lines on the pcb called traces. These traces let electricity flow between the ic and other parts. You design the pcb to fit your device and make sure every part connects the right way. A good pcb keeps your device safe and helps it work well.
PCB Feature | Purpose |
|---|---|
Traces | Carry signals and power |
Pads | Hold components in place |
Layers | Add more connections |
Interaction
You place the ic on the pcb to let it work with other parts. The ic sends and receives signals through the pcb traces. You make sure the ic connects to the right pins and pads. The pcb gives the ic power and lets it talk to sensors, motors, or lights. You test the pcb to see if the ic works as planned. If you see a problem, you check the ic and its connections on the pcb. You learn that the ic and pcb must work together for your device to run smoothly.
Note: Always double-check your ic placement on the pcb before turning on your device.
Identifying ICs on PCB
When you look at a pcb layout, you see many components. You need to know how to find an ic on a board. This skill helps you check signal integrity, power integrity, and the overall integrity of your device. You also improve your understanding of layout, routing, and simulation and verification. You can use these tips to identify ic chips and make sure your pcb layout works well.
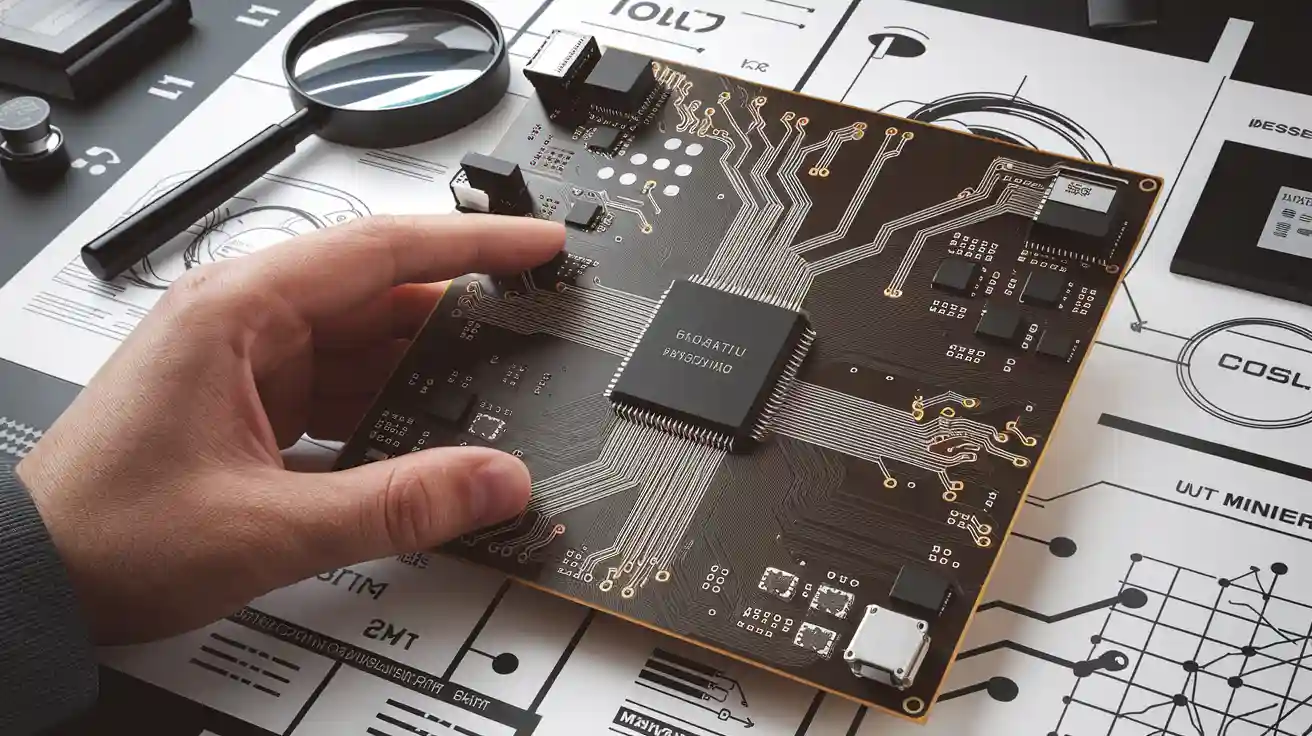
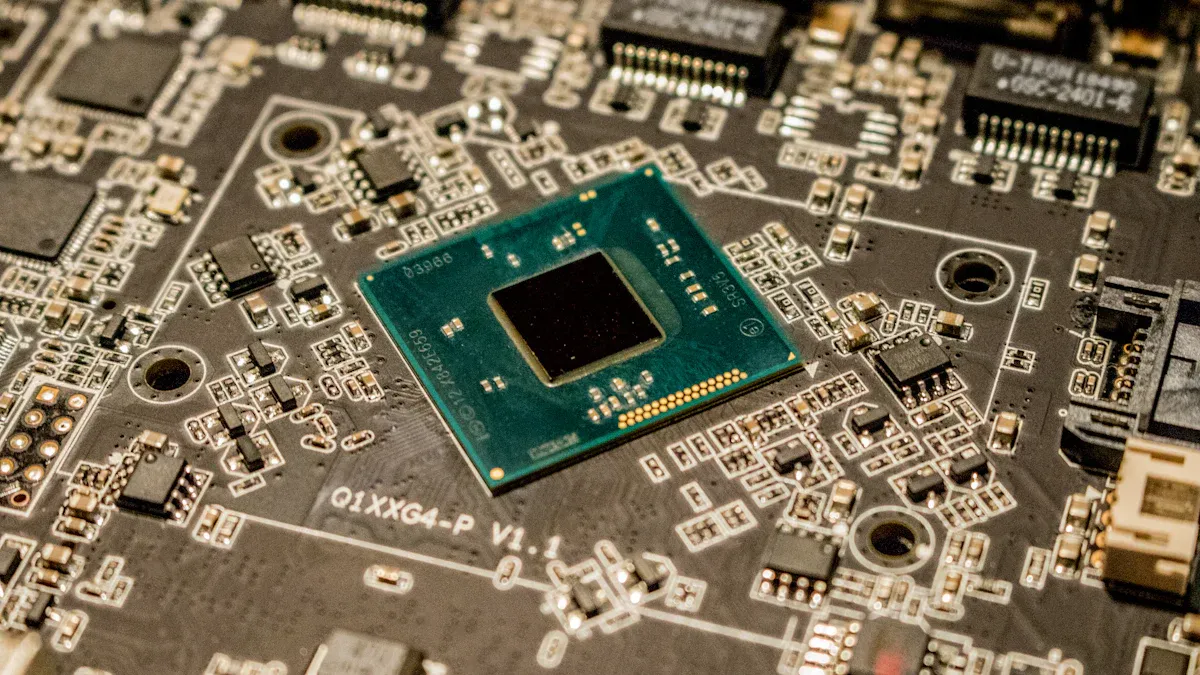
Physical Features
You start by looking at the physical features of components on your pcb layout. An ic often stands out from other components. You see that an ic on a board usually has a black rectangular or square body. It has many metal legs or pins that connect to the pcb layout. These pins help with routing and keep signal integrity strong. You notice that some ic chips have a notch or dot on one corner. This mark shows you how to place the ic on the pcb layout. You must match this mark with the pcb layout to keep the integrity of your design.
You also see that ic chips come in different sizes. Some are small with only a few pins. Others are large with many pins for complex routing. You find ic chips in through-hole or surface-mount packages. Surface-mount components sit flat on the pcb layout. Through-hole components have pins that go through the board. You use your eyes and sometimes a magnifier to spot these features. Good lighting helps you see the details of each component.
Tip: Always check the orientation of the ic before soldering. This step keeps your signal integrity and power integrity safe.
You also look at the placement of components around the ic. You see capacitors, resistors, and other components close to the ic. These help with power integrity and signal integrity. You check the layout to see if the ic connects to important traces. You follow the routing from the ic to other components. This step helps you understand how the ic works with the rest of the pcb layout.
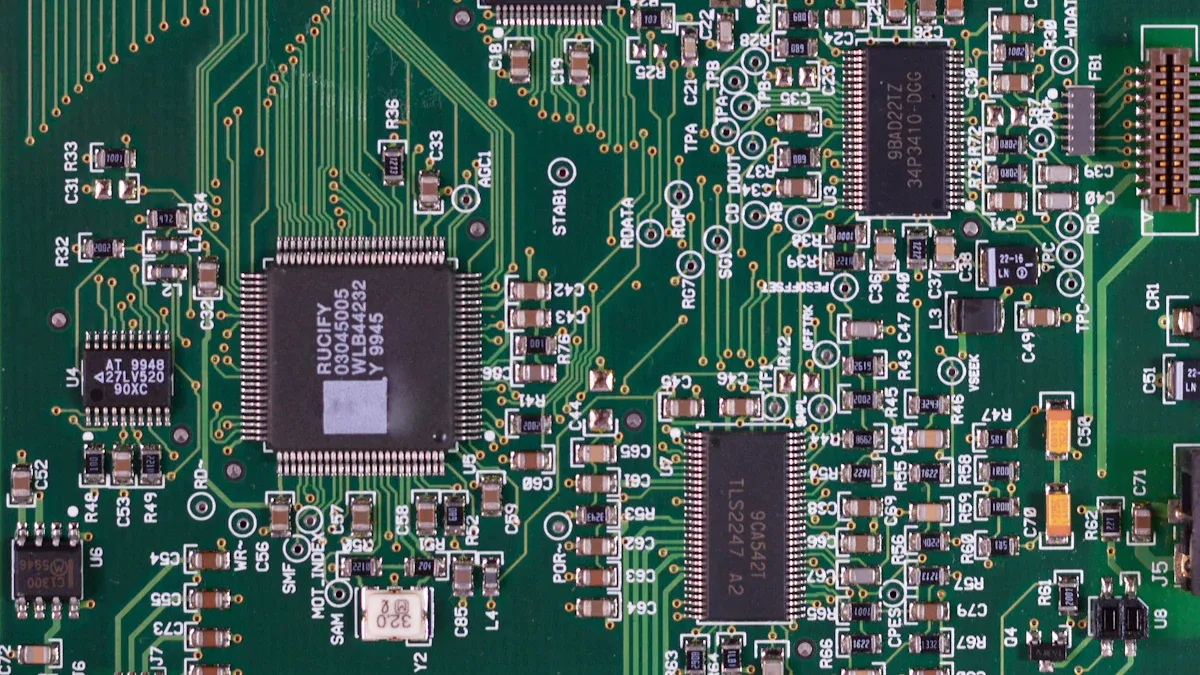
Part Numbers
You find part numbers printed on the top of most ic chips. These numbers help you identify the ic on a board. You see a mix of letters and numbers, sometimes with a logo. You write down the part number and search for it online. This search gives you details about the ic, like its function and pinout. You use this information to check if the ic matches your pcb layout and routing.
You also compare the part number with your schematic and pcb layout files. You make sure the ic on a board matches the design. This step keeps the integrity of your project. You check if the ic supports the right voltage and current for your components. You also look at the part number to see if the ic supports special routing techniques. Some ic chips need careful routing to keep signal integrity and power integrity.
Note: If you cannot read the part number, use a magnifier or take a clear photo. Good visibility helps you keep the integrity of your inspection.
You also check if the part number matches the components listed in your bill of materials. This list helps you track all components on your pcb layout. You use the part number to order replacements or find datasheets. You also use the part number to check if the ic supports simulation and verification. This step helps you test the integrity of your design before building.
Datasheets
You use datasheets to learn more about each ic on a board. A datasheet gives you details about the ic, such as pinout, voltage, current, and timing. You download the datasheet using the part number. You read the datasheet to check if the ic fits your pcb layout and routing. You also use the datasheet to check signal integrity and power integrity.
You look at the pinout diagram in the datasheet. This diagram shows you how to connect the ic to other components. You match the pinout with your pcb layout. You also check the recommended routing techniques in the datasheet. Some ic chips need special routing to keep signal integrity and power integrity. You follow these tips to keep the integrity of your pcb layout.
You also use the datasheet to check the maximum ratings for the ic. You make sure your components do not exceed these limits. This step keeps your pcb layout safe and keeps the integrity of your device. You also use the datasheet for simulation and verification. You test your pcb layout using the data from the datasheet. This step helps you find problems before you build the board.
Alert: Always use the latest datasheet for your ic. Old datasheets may not match your components or pcb layout.
You also use the datasheet to check the recommended placement of components around the ic. You see tips for placing capacitors and resistors to help with power integrity and signal integrity. You follow these tips to keep the integrity of your pcb layout. You also use the datasheet to check the best routing for high-speed signals. Good routing keeps your signal integrity strong.
You use the datasheet to check the thermal layout for the ic. Some ic chips need special pads or heatsinks. You follow the datasheet to keep the integrity of your pcb layout and prevent overheating. You also use the datasheet to check the recommended simulation and verification steps. This step helps you test your pcb layout before making the board.
Tip: Keep all datasheets for your components in one place. This habit helps you check the integrity of your pcb layout quickly.
You also use the datasheet to check the recommended soldering methods for the ic. You follow these tips to keep the integrity of your solder joints. Good soldering keeps your components safe and helps with signal integrity and power integrity.
You see that identifying ic chips on a board takes practice. You use your eyes, part numbers, and datasheets to check the integrity of your pcb layout. You also check the placement and routing of components to keep your device working well. You use simulation and verification to test your pcb layout before building. You follow these steps to keep the integrity of your design and make sure your components work together.
When you learn about IC board design and identification, you get useful skills. You start to see how each step in making an IC changes your device. You notice how ICs work with other parts on a PCB. You use easy tips to find and check ICs on any board.
Make better electronics by knowing good design.
Fix devices faster by finding ICs quickly.
Make your projects better by using these steps.
Tip: Try these skills on real boards to help you feel more sure and get better at it.
FAQ
What is a pcb and why do you use it?
You use a pcb to connect electronic parts. A pcb has thin lines that carry signals and power. You find a pcb in almost every device. A pcb keeps your parts safe and organized. You use a pcb to make your device work better.
How do you identify an ic on a pcb?
You look for a small black chip with many pins on the pcb. You check for a notch or dot to see the correct orientation. You read the part number on the chip. You use a datasheet to learn more about the ic on the pcb.
Why does pcb design matter for your project?
You need good pcb design to keep your device safe and reliable. A strong pcb design helps your device run faster and use less power. You use a pcb to connect all parts the right way. You avoid mistakes by planning your pcb layout.
What is the difference between a pcb and a printed circuit board?
You see no difference. A pcb means printed circuit board. Both terms describe the same thing. You use a printed circuit board to hold and connect electronic parts. You find printed circuit boards in computers, phones, and many other devices.
How do you keep your pcb safe from damage?
You handle your pcb with care. You avoid touching the metal parts. You keep your pcb dry and clean. You store your pcb in a safe place. You use the right tools when you work on your pcb. You check your pcb for damage before use.