You squeeze your new projector onto a crowded shelf. The screen sits at an angle. The image looks like a trapezoid instead of a rectangle. This distortion ruins the viewing experience. Keystone correction is a game changer because it lets short-throw projection show a perfect rectangle even when the projector is tilted. This feature makes setup easy and stress-free. A short throw projector solves space problems in small rooms. But the keystone effect can still show up when you tilt the device. You need a short throw projector with a tool to fix this issue. This article explains the tech behind this projector feature. You will learn how to use a projector well for your home theater setup.
Key Takeaways
Keystone correction fixes the trapezoid shape that comes from tilting a projector.
Digital correction gives you more flexibility, but it lowers the picture quality.
Optical correction gives full quality but is more expensive.
Setting up the projector correctly and adjusting all four corners helps keep the picture quality high.
The Keystone Effect in Short-Throw Projection
What Is the Keystone Effect?
You aim a projector at a screen from an angle. One side of the image gets wider than the other. This makes a trapezoid shape instead of a nice rectangle. The shape is named after the keystone block at the top of an arch.
The math behind this distortion explains why it happens. The keystone distortion ratio compares the size of one edge to the other edge. This ratio tells you exactly how much the image is stretched on your wall.
The keystone distortion ratio is given by:
cos(ε − α/2) / cos(ε + α/2)
where ε is the angle between the screen axis and the central projector ray, and α is the angular width of the projector’s focus beam. This ratio shows the size difference between the top and bottom edges (or left and right). It directly defines the geometric distortion you see.
When you tilt a projector up or to the side, the angle ε gets bigger. The ratio moves away from 1. Your image gets more distorted. When you put the projector straight in front of the screen, the angle is near zero. The ratio gets close to 1, and you see a perfect rectangle.
Why Short Throw Projectors Face Distortion
A short throw projector can show a 100-inch picture from only 15 inches away. This close placement means you often do not need keystone correction. You can put the projector on a low table and point it up without much trouble. Because the distance is short, the beam spreads less, so the distortion is very small.
But you still get distortion when you tilt the projector. You might put a short throw projector on a shelf that is not centered. You might need to point it to the side to avoid a light fixture. Any tilt creates the keystone effect, even at close distance. The image becomes a parallelogram or a trapezoid instead of a nice rectangle.
This is why keystone correction is so important for flexible placement. An ultra short throw projector sits just inches from the wall, but you still need tools to align it. An ultra short throw projector has the same problem when you put it on a media console that is not level. You need a projector that can fix these angles with digital adjustment. Without this feature, you have to move furniture or adjust shelves until everything lines up perfectly. That takes time and limits your choices.
The keystone correction feature gives you freedom. You can put your projector almost anywhere and still get a perfect image. This flexibility matters most in small rooms where you cannot control everything.
Keystone Correction: Optical vs. Digital
When you shop for a short throw projector, you will find two kinds of keystone correction. Each type works in a different way. Each type changes your viewing experience differently. Knowing the difference helps you pick the right tool for your setup. The choice between these methods shapes the final image quality you see on your screen. Every short throw projector needs some form of correction.
Optical Correction: Premium Precision
Optical keystone correction uses physical lens parts inside the projector. You adjust the lens by tilting, rotating, or shifting it. This method changes the path of light before it hits the screen. The projector moves the light physically rather than digitally. This approach keeps your original pixel data fully intact. The lens does not stretch or squeeze any pixels. Every pixel stays in its original shape and order. The result is excellent image quality. You keep all the fine detail from your source material. Colors stay bright. Sharpness stays high. There is no loss of resolution.
Optical correction appears in higher-end models. These models cost more because of the complex lens assembly. The premium price gives you a clear benefit. You get a perfect rectangle without any loss in quality. For a home theater fan who cares about every pixel, this feature matters. An ultra short throw projector with optical correction is rare. Most ultra short throw designs use digital methods. But some premium ultra short throw models include optical lens shift. This mix gives you the best of both worlds. You can place the projector almost anywhere and still get clean image quality. The optical system fixes the distortion without losing anything.
Digital Correction: Flexible Standard
Digital keystone correction is the more common feature. You find it in most short throw models on the market. The software inside the projector changes each pixel. It stretches some parts of the image. It compresses other parts. The goal is to reshape the trapezoid back into a rectangle.
This method offers great flexibility. You can adjust the image side to side and up and down. You can fix a tilted projector on a shelf. You can correct an angled placement in a corner. Digital correction adapts to almost any setup. Some ultra short throw projectors include a special feature called 4-corner adjustments. This tool lets you move each corner of the image on its own. You can fine-tune the shape with precision. This is helpful when the screen is not perfectly level or when the projector sits on an uneven surface. An ultra short throw setup benefits greatly from this feature.
The main trade-off is image quality. Digital correction lowers resolution and sharpness. Studies show you can lose up to 20 percent of perceived sharpness. The image becomes softer. Colors may look less bright. Brightness can drop a little. The quality loss depends on how much correction you apply. A small tilt needs only a small adjustment. The quality loss is minor. A large tilt needs more correction. The quality loss becomes more noticeable. With a 4k resolution signal, you still see a sharp picture after correction. The image quality stays acceptable for most viewers.
But for many users, this trade-off is okay. The ease of flexible placement beats the small quality loss. You can place your short throw projector on any table or shelf. You do not need to center it perfectly. The digital correction handles the rest. A quality short throw projector delivers a great image. Modern short throw models handle this correction well. Even with some quality loss, the image still looks good. A 4k resolution source keeps most of its detail. You can still enjoy sharp text and clear images. Many projectors also include hdr support. This feature helps keep colors bright even after correction. The mix of 4k resolution and hdr support ensures a satisfying experience. An ultra short throw lens gives you the best placement options. This short throw projector design offers maximum flexibility.
When you compare the two methods, think about your priorities. Optical correction gives you the best image quality. Digital correction gives you the most flexibility. Your choice depends on your room and your budget. For most short-throw projection setups, digital correction provides enough quality. The convenience and flexibility make it the standard choice for everyday use.
Benefits of Keystone Correction for Short Throw Projectors

Setup Flexibility and Space Savings
You gain real freedom when you choose a short throw projector with keystone correction. You can place the device on a side table, a bookshelf, or a low cabinet. You do not need to center it perfectly in front of your wall. The correction feature fixes the angled image for you. This flexibility transforms small rooms into comfortable viewing spaces.
Think about a typical apartment living room. You have a sofa against one wall and a TV stand against another. You want a big picture without rearranging furniture. A short throw projector sits close to the wall and still produces a large display. You can tuck it into a corner or place it off-center. Keystone correction handles the geometry. You keep your room layout intact.
Space savings matter just as much. Traditional projectors need several feet of clearance behind the viewer. A short throw projector eliminates that requirement. You place it near the wall and reclaim the rest of the room for seating or walking space. This advantage makes the short throw projector a smart choice for dorm rooms, bedrooms, and compact offices. You get a cinematic experience without sacrificing floor area.
The combination of close placement and angle correction gives you unmatched setup freedom. You can move the projector between rooms without worrying about exact positioning. You can adjust the image shape in seconds. This ease of use encourages you to experiment with different placements until you find the perfect spot.
Ultra Short Throw Projectors and Alignment
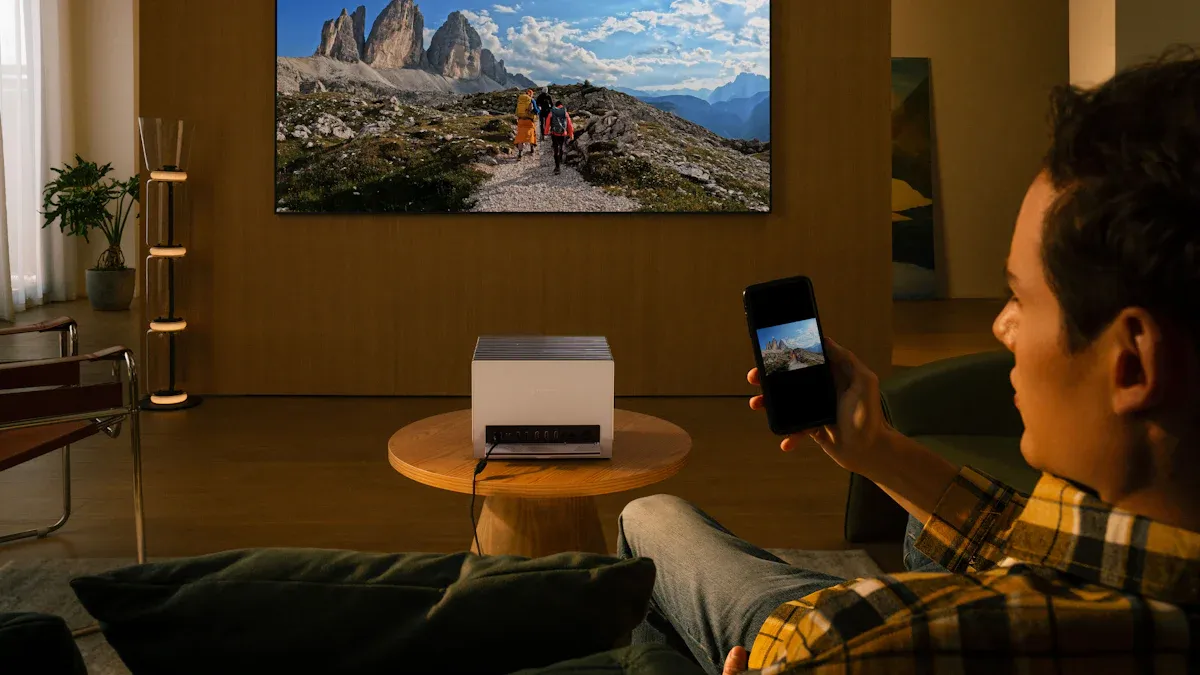
Ultra short throw projectors take space savings even further. These models sit on a media console and project onto a wall-mounted screen just inches away. You do not need ceiling mounts or long cable runs. You simply set the device down, plug it in, and enjoy the show.
Ultra short throw models only require a distance of less than 3.3ft to project a 100-inch screen. This tiny footprint makes them ideal for tight spaces where every inch counts.
You might wonder whether you need keystone correction at all with this setup. Some tutorials show perfect alignment without any adjustment. You place the ultra short throw projector level and square to the wall. The image lands as a clean rectangle. This works when your furniture sits on a flat floor and your wall is perfectly straight.
Real rooms rarely cooperate. Your media console might sit on a slightly uneven carpet. Your wall might have a subtle slope. Your projector screen might hang at a small angle. These tiny imperfections create visible distortion. Keystone correction acts as your safety net. You can fix these small errors without moving heavy furniture.
A 4k ultra short throw model with robust correction features gives you the best of both worlds. You get the convenience of close placement and the assurance of perfect geometry. You can adjust each corner independently with 4-corner correction. This precision tool lets you match the image exactly to your projector screen edges.
The image quality remains strong even after correction. Modern ultra short throw projectors deliver high brightness and vivid colors. You can pair the device with an ambient light rejecting screen to maintain contrast in bright rooms. This combination works well for daytime viewing. You get a clear picture without closing the curtains.
For a home theater projector, this flexibility proves invaluable. You can rearrange your space whenever you want. You can move the ultra short throw projector to a different room. You can adjust the image to fit any wall. Keystone correction removes the barriers that once limited projector placement. You enjoy a perfect rectangle every time, regardless of the setup challenges you face.
Concerns and Tips for Optimal Use
Does Keystone Correction Reduce Image Quality?
Yes, digital keystone correction does lower image quality. You need to know this trade-off. Optical correction keeps full resolution and brightness. Digital correction changes pixels and wastes light. The table below shows the key differences.
Quality Dimension | Lens Shift (Optical) | Keystone Correction (Digital) |
|---|---|---|
Resolution | Keeps full image resolution | Lowers effective resolution by changing pixels |
Brightness | Keeps full brightness | Lowers brightness because unused pixels waste light |
Focus uniformity | Keeps even focus across the whole image | Hurts focus evenness, may cause blurring |
Visual artifacts | No digital artifacts | Can add blurring, jagged edges, and gray borders |
Recommended use | Main alignment method for permanent or high-quality setups | Last choice for temporary setups or when physical/lens shift options are not available |
Optical correction keeps all pixels intact. You get full brightness and sharp focus. A 4k ultra short throw model with optical lens shift gives the best image quality. You keep 4k resolution fully. You keep high brightness levels. HDR support stays intact. An ultra short throw projector with optical shift gives you better image quality.
You can reduce quality loss. Follow these tips for better image quality.
Focus on physical alignment first. Place your short throw projector at a right angle to the screen. Use adjustable feet to fine-tune tilt. Small physical fixes reduce the need for digital changes. This keeps image quality high.
Use lens shift when you can. This optical adjustment moves the lens assembly. It keeps full 4k resolution and clarity. It works better than digital correction for off-center placement.
Use digital keystone correction only as a last choice. Apply the smallest amount needed. Too much correction causes pixel remapping and uneven scaling. This lowers effective resolution and brightness. You may see a gray border effect.
Ultra Short Throw Projector Setup Tips
You can get excellent image quality with proper setup. Follow these steps for your ultra short throw projector.
First, make sure your ultra short throw projector sits on a level surface. Use a bubble level tool. Adjust the feet until the device is flat. This stops the keystone effect from the start. An ultra short throw model works best when you level it carefully. The projector placement affects the final image quality.
Next, use the 4-corner adjustment feature. This tool is common on many ultra short throw models. The steps are simple.
Go to the projector menu: Settings > Keystone > Quick Corners.
The Quick Corners menu will show up.
Pick one corner using the arrow keys and press Enter.
Use the arrow buttons to adjust the corner’s shape until it is perfectly square.
Repeat steps 3-4 for each remaining corner.
Press Esc to exit when done.
A short throw projector with 4-corner adjustment gives you exact control. Match the image to your screen edges exactly. This keeps image quality high. A short throw projector works best with proper alignment.
A 4k resolution source helps keep detail after correction. Even with pixel remapping, you see sharp text and clear images. HDR support keeps color quality. High brightness levels keep the picture visible in ambient light. Your ultra short throw projector gives a satisfying viewing experience with excellent image quality. Even with correction, 4k resolution stays sharp.
Remember that your ultra short throw projector works best close to the wall. Follow the manufacturer’s recommended distance. This gives you the largest image with the least distortion. Your source material should have 4k resolution for best results. A short throw model will reward you with great image quality and high brightness.
The keystone effect creates a common problem in projector use. You see distortion when you angle the projector. Keystone correction gives you a powerful solution. You can place your short throw projector almost anywhere. You get a perfect rectangular image. This flexibility transforms small spaces. Consider a short throw projector with robust keystone correction for your next home theater projector or business setup. An ultra short throw projector delivers sharp image quality. An ultra short throw model offers maximum convenience. An ultra short throw projector requires proper alignment. Your short throw projector works well in any room with excellent image quality and proper setup. A short throw projector becomes a flexible tool. Explore specific short throw projector models online. A home theater projector with keystone correction makes setup easy. Your projector fits your space. This projector changes your viewing experience. Share your projector experience in the comments.
FAQ
How much image quality do I lose with digital keystone correction?
You lose some sharpness and brightness. How much you lose depends on the correction you use. A small tilt needs only a little correction. The loss of quality is small. A large tilt needs more correction. You might see softer edges and less brightness. Optical correction does not have this problem.
Can I use a short throw projector on a shelf that is not centered?
Yes, you can. A short throw projector with keystone correction works well when placed off-center. You change the image shape with digital controls. The projector stretches and squeezes pixels to fix the angle. You get a rectangle picture even when the projector is to the side. This flexibility makes it easy to put the projector on a shelf.
Do I need keystone correction for an ultra short throw projector?
You often need it. An ultra short throw projector is placed very close to the wall. Small bumps on the surface can cause visible distortion. Your media console might not be level. Your wall might be slightly tilted. Keystone correction fixes these small problems. You get a clean rectangle shape without moving furniture.
What is the best way to set up my projector for minimal distortion?
First, make your projector level. Use the adjustable feet to make it flat. Place it so it faces your screen straight on. Use optical lens shift if your projector has it. Only use digital correction for small fixes. This method keeps your image sharp and bright. Your projector gives you the best picture quality.