An LED driver is important for powering LEDs properly. It controls the electric current and voltage. Without it, LEDs can overheat or break early. Making your own LED driver has many benefits. You can design it to fit your needs. This can save up to 35% on starting costs. It can also lower energy bills by 20% each year. To get these benefits, you need to know how to make one. For example, connecting LEDs in series and improving parts can raise efficiency from 64% to almost 90%. With the right steps, you can build a strong and affordable driver.
Key Takeaways
An LED driver is important to power LEDs safely. It manages voltage and current to stop overheating or damage.
Making your own LED driver can save money. You can cut starting costs by 35% and save 20% on energy bills yearly.
Pick the right driver type for your needs. Constant current drivers work well for strong LEDs. Constant voltage drivers are easier for many LEDs.
Look at features like efficiency, heat control, and dimming. These help make a good and affordable LED driver.
Testing and fixing problems can make your LED driver last longer. Use the right tools to check voltage, current, and efficiency.
Understanding the Basics of an LED Driver
What is an LED Driver
An LED driver gives the right power to LEDs. It helps them work safely and efficiently. It works like a ballast in fluorescent lights. Without it, LEDs can overheat and get damaged. The driver controls the voltage and current to stop this.
Important features of an LED driver are input voltage, output voltage, output current, and dimming options. Some advanced drivers let you change settings for different uses. Using a driver helps LEDs last longer and work better.
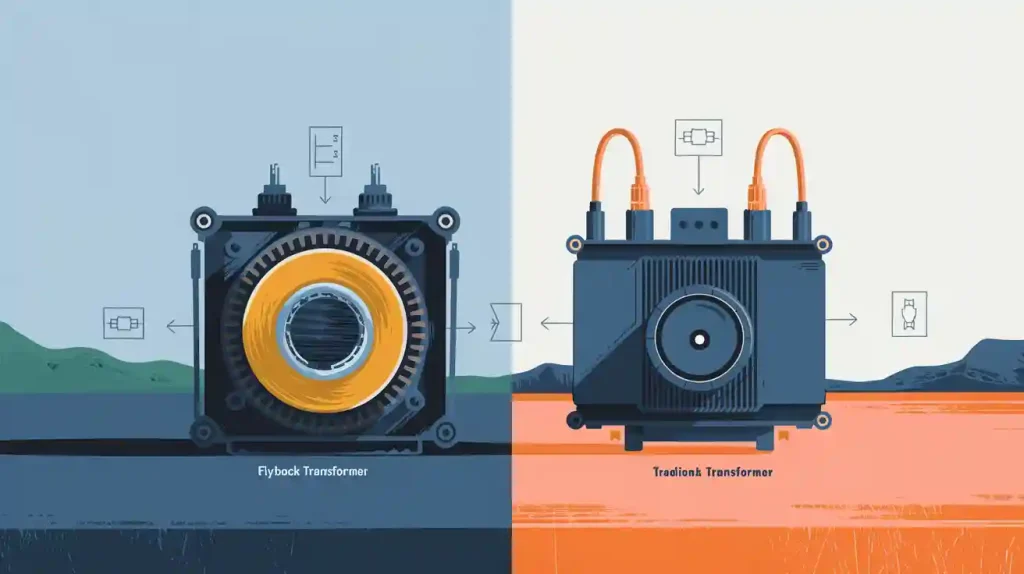
Types of LED Drivers: Constant Current vs. Constant Voltage
There are two main types of LED drivers: constant current and constant voltage. Each type is used for different needs.
Feature | Constant Current Driver | Constant Voltage Driver |
|---|---|---|
Current | Stays the same | Changes |
Voltage | Changes | Stays the same |
Constant current drivers keep the current steady. They are great for high-power LEDs. These drivers give even brightness and protect LEDs from too much current. But if one LED in a series breaks, others might stop working.
Constant voltage drivers give a fixed voltage. They are simple to set up and can power many LEDs together. If one LED breaks, others still work. But they need a current limiter and are less efficient than constant current drivers.
Key Features to Consider in LED Driver Design
When making an LED driver, balance cost and performance. Focus on these key points:
Efficiency: Saves energy and reduces heat.
Power Factor: A high power factor improves performance and lowers losses.
Thermal Management: Good cooling keeps the driver reliable.
Dimming Capabilities: Flicker-free dimming makes lighting better.
Programmability: Lets you adjust settings for different needs.
By focusing on these, you can design a cost-effective driver. For example, a constant current boost converter can make your design more efficient and stable.
How to Design Your Own LED Driver
Picking the Right Parts
Choosing good parts is key to making a strong LED driver. First, figure out how much power your LEDs need. This depends on their voltage and current. For example, six LEDs with 3V each need 18W of power. To be safe, pick a power supply with 20% more power, like 25W.
Next, decide the type of driver you need. A constant current boost converter works well for high-power LEDs. It keeps brightness steady and stops overheating. If you’re using many LEDs, a constant voltage driver might be better. Also, check the size and shape of the driver to make sure it fits your project, whether it’s for home or work use.
Important parts like capacitors and solder joints affect how long your driver lasts. Capacitors can wear out in heat, and solder joints can crack under pressure. Using high-quality parts lowers these risks and helps your driver last longer.
Setting Input and Output Needs
Setting input and output needs helps your LED driver work well. Start by finding the lowest output voltage. It should be higher than your LEDs’ forward voltage. For instance, if your LEDs need 15V, the driver’s output should be a bit more.
Use this formula to find input voltage:Vo + (Vf x LEDn) = Vin
Here, Vo is extra voltage, Vf is forward voltage, and LEDn is the number of LEDs. For six LEDs with 3V each, the input voltage should be at least 18V.
Make sure your driver meets standards. A power factor over 0.9 and harmonic distortion under 20% save energy and cut noise. For dimmable lights, pick drivers with high accuracy, like +/-2%, for steady brightness.
Adding Features like Dimming and Safety
Adding extra features makes your LED driver safer and better. Dimming lets you control brightness, saving energy and cutting heat. This is great for home or decorative lighting.
Overcurrent protection is also important. It stops damage by controlling electrical loads and keeping temperatures safe. This protects your LEDs and makes the driver last longer.
To improve reliability, use heat management tools like heat sinks or pads. These help remove heat and keep the driver working well. Adding these features makes your LED driver strong and ready for different uses.
Calculating Efficiency and Power Needs
When making an LED driver, knowing efficiency and power needs is key. Efficiency shows how well the driver turns input power into light. Higher efficiency means less wasted energy as heat. This saves money and boosts performance.
Key Metrics for Efficiency and Power
Here are some important things to check:
Metric | What It Means |
|---|---|
Efficiency | How much input power becomes useful light output. |
Power Factor | Shows how well power is turned into useful work. |
Total Harmonic Distortion | Measures signal distortion, which can lower performance. |
Dimming Range | The range where the driver can dim the light effectively. |
To find efficiency, divide useful light power (in lumens or lux) by input power (in watts). Then, multiply by 100. For example, if your driver uses 20 watts but gives 18 watts of light, the efficiency is 90%. This shows how much energy is used well.
Simple Power Calculations
Use this formula to find power:Power = Voltage × Current
For example, if the driver runs at 300 volts and 2 milliamps, it uses 0.6 watts. Also, think about switching and conduction losses. Switching loss depends on gate capacitance and frequency. Conduction loss rises with higher frequencies.
Tip: A linear constant current driver makes efficiency math easier. Multiply the voltage drop by the current to find power lost.
By using these steps, you can design a better LED driver. It will work well and save energy costs.
Manufacturing the LED Driver
Designing the PCB Layout
Making the PCB layout is an important step. A good layout helps your LED driver work well and stay safe. Focus on heat control, electrical flow, and strength. These are key for handling heat from LEDs and keeping things stable.
To improve your design:
Put parts in spots that reduce heat buildup.
Use thick copper lines for better electricity flow.
Keep enough space between parts to stop short circuits.
Small pads and crowded circuits can be tricky. But modern tools can solve these problems. Follow industry rules like improving heat paths and making strong connections. This will help you build a great PCB for your LED driver.
Choosing the Right Trace Width for Current
Trace width on the PCB is very important. If traces are too thin, they can overheat or fail. Use the IPC-2221 guide to pick the right width. This guide matches copper thickness and trace size to current levels and heat limits.
Tips for choosing trace width:
Keep trace widths the same for even current flow.
Make sure traces can handle the current without overheating.
Check IPC-2221 charts to find the right width for your design.
By following these tips, your LED driver will work safely and efficiently.
Managing Heat for Better Performance
Controlling heat is key to making your LED driver last. Too much heat can dim lights, change colors, or damage LEDs. Focus on reducing heat resistance and keeping temperatures safe.
Use tools like heat sinks, thermal pads, and good heat paths. Advanced methods like computer models can show how heat moves and help improve cooling. Also, pick materials that lower heat resistance to keep LEDs at safe temperatures.
These steps will make your LED driver stronger and more efficient. It will work well in different conditions.
Assembling and Soldering Components
Putting together and soldering parts is very important. It makes sure everything is connected well and works properly. Follow these simple tips for the best results:
Handle Components Carefully: Wear ESD-safe gloves and use special tools. This protects delicate parts like LEDs from static electricity damage.
Plan for Heat Control: Add heat sinks or thermal paste to hot parts. This keeps the driver working well and lasting longer.
Learn Soldering Skills: Use a soldering iron with adjustable heat. Add just enough solder for strong, clean joints. Avoid weak joints that can cause problems later.
Check Connections Closely: Look at each joint after soldering. Use a multimeter to test if electricity flows correctly and matches your design.
Keep Your Workspace Tidy: Arrange tools and parts neatly. A clean area helps you work faster and make fewer mistakes. Write down steps to follow for future projects.
Get Help from Experts: If you’re new, ask skilled people for advice. Watch videos or join classes to improve your soldering.
Take your time and be precise when soldering. Rushing can cause weak joints or broken parts. By following these steps, you can build a strong and efficient LED driver.
Tip: Use flux to help solder stick better and flow smoothly on the PCB.
Testing and Troubleshooting Your LED Driver
Tools for Testing LED Drivers
To test your LED driver, you need the right tools. These tools check if it works safely and efficiently. Each tool has a specific job, like measuring energy use or simulating LED conditions. Here’s a simple guide:
Tool/Equipment | What It Does |
|---|---|
Vitrek PA9xx Power Analyzers | Checks energy use and performance of LED products. |
Low Power Programmable AC Source | Tests voltage range and creates AC waveforms for drivers. |
Modular DC Electronic Load LED Simulator | Mimics LED load conditions for accurate driver testing. |
Programmable DC Power Supply | Gives power to drivers and simulates different outputs. |
Chroma 6310A Electronic Load | Measures LED features and helps test drivers thoroughly. |
These tools help measure light output and electrical performance. They also ensure your driver meets safety standards.
Verifying Voltage and Current Specifications
To check if your LED driver works, measure its voltage and current. These numbers show if it gives the right power to LEDs. Here’s an example of test results:
Specification | Value |
|---|---|
LED Driver Specification | 30W / 0.7A |
Test Result Voltage (Vo) | 38.5V |
Test Result Current (Io) | 700mA |
Vp-p | 2.4V |
Ip-p | 0.130mA |
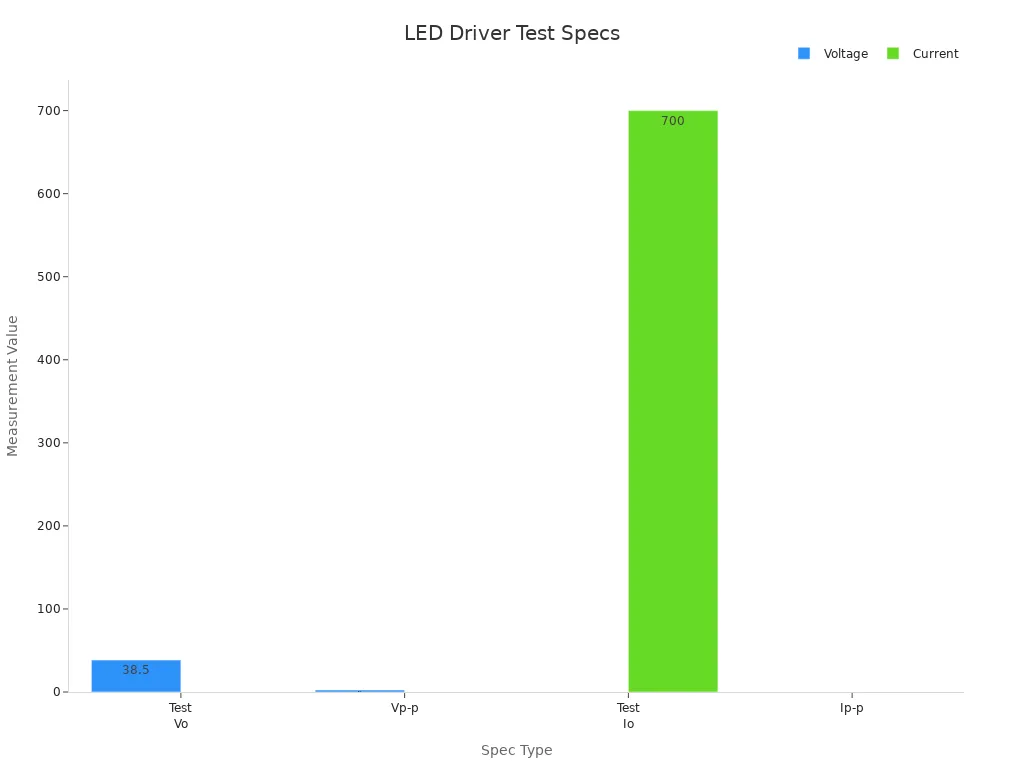
Make sure the voltage matches the LEDs’ needs. The current should stay steady to avoid overheating. Use a multimeter or analyzer to check these values.
Identifying and Resolving Common Issues
LED drivers can have problems, even with good design. Fixing these early keeps them working longer. Here are common problems and how to solve them:
Common Issues | Causes | Fixes |
|---|---|---|
Driver Failures | Overheating, bad parts, voltage changes | Use quality drivers with heat and surge protection. |
Poor LED Chip Quality | Low brightness, quick wear-out | Choose trusted chips with high brightness ratings. |
Poor Heat Dissipation | Dim lights, damaged parts | Use fixtures with good heat sinks and airflow. |
Uneven Lighting | Bright spots, glare | Check light data to improve distribution and reduce glare. |
By solving these issues, your LED driver will work better and last longer. Regular checks can catch problems early and save time later.
Ensuring Long-Term Performance and Reliability
To keep your LED driver working well for years, focus on key areas. These include managing heat, using good parts, and improving designs. These factors affect how long and how well your system works.
High temperatures and heat cycles can harm LED drivers. Heat increases resistance, which lowers performance over time. Capacitors, especially electrolytic ones, are at risk. Their life shortens as heat rises because the liquid inside evaporates. The table below explains these effects:
Evidence Description | Key Findings |
|---|---|
Heat cycles and high temperatures harm reliability | More heat cycles and higher temperatures increase resistance and lower performance. |
Capacitor life shortens with heat | Higher temperatures cause capacitor liquid to evaporate, reducing lifespan. |
You can make your LED driver last longer by using smart engineering. Try these tips:
Energy Efficiency: Add dimming and power-saving features to use less energy.
Thermal Management: Use better materials and cooling methods to handle heat.
Innovative Designs: Add smart controls and make parts smaller for tough conditions.
Keeping a steady current is also very important. Changes in current can harm LEDs and shorten their life. Use strong parts and solder carefully to avoid problems. Check your driver often for signs of trouble, like overheating or uneven light. Fixing issues early can save money and make your system last longer.
By focusing on these steps, you can create an LED driver that works reliably for a long time.
Now you know how to make an LED driver. First, learn the basics. Then, design and build it step by step. Testing makes sure it works well and safely. Each step helps you create a better driver.
Try different designs to fit your needs. Share your work to inspire others. A custom driver saves money and works better for special uses. With practice, you’ll get better and make drivers that match your goals.
FAQ
How long does an LED driver last?
An LED driver’s life depends on its design and parts. Good drivers can work for over 50,000 hours. Managing heat and using strong materials make them last longer.
Can one LED driver power many LEDs?
Yes, it can. Make sure the driver’s voltage and current match all LEDs. You can connect LEDs in series or parallel, depending on the driver type.
Why is controlling heat important for LED drivers?
Controlling heat stops damage and keeps the driver efficient. Tools like heat sinks, thermal pads, and good PCB designs help it stay cool and work longer.
How do I pick between constant current and constant voltage drivers?
Use constant current drivers for bright, steady high-power LEDs. Choose constant voltage drivers for LEDs needing the same voltage. Pick the right type for your project.
What tools are needed to check an LED driver?
You need tools like multimeters, power analyzers, and simulators. These measure voltage, current, and efficiency to ensure the driver works safely and properly.