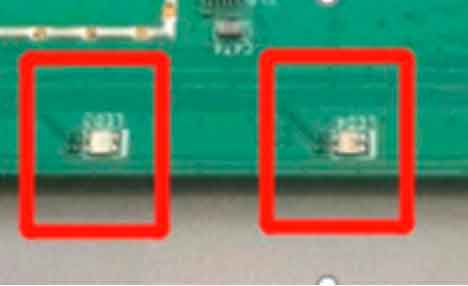
You can design a hybrid pcb stackup in 2025 by first understanding your application needs and choosing the right materials for each layer. The pcb stack-up you select should balance electrical performance and cost, as advanced materials like PTFE can increase costs by up to 800% over basic FR4.
Layer Count | Relative Cost Multiplier | Typical Applications |
|---|---|---|
2 Layers | 1.0x | Consumer electronics |
4 Layers | 1.8x-2.2x | Mid-complexity devices |
6 Layers | 2.8x-3.5x | Computer peripherals |
8 Layers | 4.2x-5.0x | High-speed systems |
10+ Layers | 6.0x-10.0x+ | Advanced computing |
To design a hybrid pcb, you must plan the stackup, check material compatibility, and use up-to-date pcb stack-up simulation tools. Work closely with your manufacturer to build a stack-up that meets both performance and manufacturability goals. Simulation and layout tools help you verify that your stack-up will work before you build it.
Key Takeaways
Plan your hybrid PCB stackup carefully by defining clear design needs and choosing the right number of layers to balance performance and cost.
Select materials like FR4 for general use and PTFE for high-speed signals to improve signal quality and thermal management in your PCB.
Use simulation tools early to check impedance, signal integrity, and thermal performance before manufacturing to avoid costly errors.
Work closely with your manufacturer from the start to ensure your design meets production standards and to prevent issues with lamination and layer alignment.
Follow quality standards and perform thorough testing to build reliable hybrid PCBs that perform well in demanding applications.
When to Use a Hybrid PCB
Typical Applications
You should consider a hybrid pcb when your project needs both high-speed signals and strong power delivery. Many engineers use hybrid pcb designs in advanced computing, telecommunications, and aerospace systems. These fields often require a mix of materials to handle different electrical and thermal demands. For example, you might see hybrid pcb technology in 5G base stations, automotive radar, or medical imaging equipment.
A hybrid stack-up lets you combine materials like FR4 and PTFE. This approach helps you control the coefficient of thermal expansion (CTE), which improves assembly and reliability. You can also fine-tune the electrical properties for each layer. In high-frequency applications, you need to manage signal integrity and thermal stability. Hybrid pcb designs give you the flexibility to meet these needs.
Here is a table showing where you might use a hybrid pcb:
Application Area | Why Use Hybrid PCB? |
|---|---|
5G/Telecom | High-speed signals, thermal control |
Automotive Electronics | Mixed power and RF requirements |
Medical Devices | Precision, reliability, low loss |
Aerospace | Weight savings, harsh environments |
Key Benefits
When you choose a hybrid pcb, you gain several important benefits:
You can optimize signal integrity by selecting materials with the right dielectric constant (Dk), which usually ranges from 2 to 10.
You improve thermal management, which is critical for high-frequency pcb performance.
You control impedance by adjusting circuit thickness, copper thickness, and conductor width.
You increase reliability by matching the CTE of different layers, which helps during assembly and in the field.
Tip: Always use simulation tools to check impedance and thermal performance before you finalize your pcb design.
Hybrid pcb solutions help you balance cost, performance, and reliability. By planning your hybrid stack-up carefully, you can meet the needs of modern electronic systems.
Material Selection for PCB Stack-Up
FR4, PTFE, and Other Materials
When you start your pcb stack-up, you need to choose the right materials for your layers. Each material brings different electrical and thermal properties to your stackup. FR4 is the most common choice for many pcb designs. It offers good dielectric strength and works well for general electronics. You can use FR4 in layers that do not carry high-speed signals or high power.
PTFE, like Rogers laminates, gives you a lower dielectric constant and less signal loss. You should use PTFE in layers that handle high-frequency signals. This helps your hybrid pcb stack-up perform better in RF and microwave applications. Metal-core and ceramic substrates work best for layers that need to move heat away quickly, such as in power electronics or LED lighting.
You can see how different materials compare in the table below:
Material Type | Dielectric Constant (Dk) | Thermal Conductivity (W/mK) | Cost Range ($ per sq. inch) | Typical Applications |
|---|---|---|---|---|
Standard FR4 | 4.0 – 4.5 | ~0.3 | Low (0.05 – 0.15) | General electronics, consumer devices |
High-Tg FR4 | 4.0 – 4.5 | ~0.4 | Moderate (0.10 – 0.25) | Automotive, industrial applications |
PTFE (Rogers) | 2.2 – 3.5 | 0.6 – 1.2 | High (0.50 – 2.00) | RF/microwave, aerospace, high-speed data |
Metal-core PCBs | N/A | ~200 (Aluminum core) | Higher | High-power LED lighting, power electronics |
N/A | 20 – 200 | Higher | High-power, high-frequency, aerospace |
You should always check the dielectric constant and loss tangent for each layer. Lower values mean less signal loss. The chart below shows how materials compare for signal loss and dielectric constant:

Prepreg and Core Methods
You need to bond your layers together in a pcb stack-up. Prepreg is a resin-coated fiberglass sheet that bonds layers during lamination. For a hybrid pcb stack-up, you should use homogeneous prepreg between layers with similar properties. This helps prevent delamination and mechanical stress.
Rigid core methods use a solid base layer, or core, to give your stackup strength. You can build up layers on both sides of the core. This method works well when you need many layers or want to keep your pcb flat and stable.
When you select materials, always check IPC standards like IPC-4101 and IPC-4103. These standards give you data on material compatibility and processing. You can match the coefficient of thermal expansion (CTE) and moisture absorption for each layer. This reduces the risk of failure during manufacturing and use.
Tip: Use simulation tools to test your stack-up before you build. This helps you find the best mix of materials for your design.
Hybrid PCB Stackup Design Process
Requirements and Layer Planning
You start every hybrid pcb stackup by defining clear design requirements. These requirements guide your choices for materials, layers, and stack-up structure. You need to know the electrical, thermal, and mechanical needs of your application. For example, high-speed data lines, power delivery, and thermal management all affect your stackup.
Careful planning of layers is essential. You decide how many layers your pcb stack-up needs based on signal routing, power distribution, and shielding. Each layer in your hybrid pcb stackup serves a purpose. Some layers carry signals, others provide power or ground, and some offer shielding or mechanical support.
Here are important planning tips for your hybrid pcb stack-up:
Separate analog and digital sections to reduce interference.
Use single-point ground references and isolated ground planes to avoid ground loops.
Keep enough space between analog and digital traces to lower crosstalk.
Place ground planes under signal and power layers for better EMI shielding.
Plan return paths for signals to reduce noise.
Use separate power planes or rails for analog and digital circuits.
Avoid routing traces over split ground or power areas.
Shield sensitive parts with ground planes or guard rings.
Run signal integrity simulations to check for noise, crosstalk, and reflections.
Specify board materials, copper thickness, impedance control, and shielding in your production files.
You can see the impact of good planning in the table below:
Aspect | Metric / Guideline | Importance / Impact |
|---|---|---|
Controlled Impedance | ±10% tolerance | Maintains signal integrity by keeping impedance within limits |
Dielectric Thickness | Minimum 2.56 mil (for IPC class 3) | Meets electrical and mechanical standards |
Layer-to-layer Registration | Maximum 50µm (1.9685 mil) tolerance | Prevents misalignment and defects |
Material Selection | Use low-Dk materials for high-frequency layers | Reduces signal loss and distortion |
Layer Arrangement | Alternate signal, ground, and power planes; avoid adjacent signal layers | Minimizes EMI and crosstalk |
BGA Impact | Layer count increases with BGA pin count; use dogbone fanout and microvias for routing | Improves routing and signal integrity |
Ground Planes | Solid ground planes beneath controlled impedance traces | Provides return paths and reduces EMI |
Thermal Management | Use thermal pads, vias, and heat sinks for BGAs | Improves reliability by managing heat |
Manufacturing Collaboration | Early consultation with manufacturer on capabilities and tolerances | Aligns design with manufacturing and reduces delays |
Stack-up Symmetry | Maintain symmetry in layer stack-up | Prevents warping and failures |
You should always match your stackup to your design requirements. This step helps you avoid costly changes later.
Signal, Power, and Ground Arrangement
The way you arrange signal, power, and ground layers in your hybrid pcb stackup affects performance. Good arrangement improves signal integrity, reduces noise, and ensures stable power delivery. You want to keep signal layers close to ground planes. This setup shields signals and lowers electromagnetic interference.
Here are some key points for arranging your stackup:
Ground planes are essential for routing signals and reducing noise.
Place signal layers next to ground or power planes to create shielding.
Keep symmetry in your stackup to balance performance and prevent warping.
Use separate power planes for analog and digital circuits.
Avoid placing two signal layers next to each other without a ground or power plane in between.
Use design software to help with material selection, impedance calculation, and stackup optimization.
Numerical evaluations show that alternating signal and ground layers in your pcb stack-up reduces crosstalk and electromagnetic interference. For example, an 8-layer pcb with four signal layers and four planes (ground and power) improves routing and isolation. A 10-layer pcb with six signal layers and four planes, arranged with alternating ground and power planes, gives excellent signal integrity and EMC performance.
PCB Layer Count | Layer Arrangement Highlights | Performance Improvements |
|---|---|---|
8-Layer PCB | Four signal layers and four planes including ground, power, and signal layers | Minimizes crosstalk, enhances signal routing, improves EMC, and provides high-speed signal routing and power/ground plane isolation |
10-Layer PCB | Six signal layers and four planes arranged with alternating ground and power planes between signal layers | Excellent signal integrity and EMC performance; ground and power planes act as shields reducing noise; improper replacement of ground/power layers with signal layers degrades performance |
You should always check your stackup for symmetry and proper layer arrangement. This step keeps your hybrid pcb stackup reliable and high-performing.
Impedance Control and Simulation
Impedance control is critical in hybrid pcb stackup design. You need to keep impedance within tight limits to maintain signal integrity, especially for high-speed signals. You use simulation tools to check and adjust your pcb stack-up before manufacturing.
Follow these steps for impedance control and simulation:
Analyze power needs to choose the right power rails and decoupling capacitors.
Use SPICE simulations with transmission line models to check if your component interfaces match and if signals transmit well across a wide bandwidth.
Run waveform analysis in your pcb layout to see how signals behave. Look for crosstalk and reflections that can cause noise or signal loss.
Calculate trace lengths for parallel and differential pairs to keep timing and minimize skew.
You can also use S-parameters, like return loss (S11) and insertion loss, to measure impedance matching and signal loss. Simulate eye diagrams to check signal quality against high-speed standards. Always include power distribution network impedance and decoupling capacitor effects in your simulations.
Simulation tools help you:
Detect crosstalk and reflections caused by impedance mismatches.
Control impedance by adjusting trace width and laminate material.
Validate your hybrid pcb stack-up before production.
Tip: Use 3D field solvers and SPICE models to optimize your stackup and ensure signal integrity.
By following these stack-up design tips, you can build a hybrid pcb stack-up that meets your design requirements and delivers reliable performance.
Manufacturing and Collaboration
Early Communication
You need strong communication with your manufacturing partner when building a hybrid pcb stack-up. Early and clear conversations help you avoid mistakes and delays. You should set up dedicated contact points for each project stage. This makes it easy to share important data like BOMs, Gerber files, material specs, and delivery schedules.
Assign a named program manager to your project. This person will guide you and answer questions quickly.
Use real-time updates through online portals to track your pcb stack-up progress.
Choose a partner who offers multiple ways to communicate, such as email, phone, or live chat.
Make sure your partner has technical experts who can explain complex stack-up or manufacturing issues.
Check that your partner responds within 24 hours and speaks clear English. Fast and accurate replies keep your pcb stack-up on track.
Note: Clear and open communication helps you avoid misunderstandings, speeds up manufacturing, and builds trust.
Manufacturability Checks
You must check your pcb stack-up design for manufacturability before production. These checks help you spot errors early and make sure your stack-up meets all manufacturing standards.
Use Design for Manufacturability (DFM) checks to optimize your pcb stack-up layout. This step prevents bottlenecks during manufacturing.
Run automated Design Rule Checks (DRC) to verify trace widths, clearances, via sizes, and pad sizes. DRCs also catch open or short circuits in your stack-up.
Identify common errors like copper slivers, starved thermals, or improper clearances. Fixing these issues early improves your pcb stack-up reliability.
Follow IPC and other manufacturing standards to ensure your stack-up passes quality checks.
Integrate quality statistics and manufacturability checks to reduce costly rework and improve prototype success rates.
Tip: Early manufacturability checks save time, reduce errors, and help your hybrid pcb stack-up succeed in large-scale manufacturing.
Stackup Challenges and Best Practices
CTE, Lamination, and Plating
You will face several challenges when building a hybrid pcb stack-up. One of the biggest issues is the mismatch in the coefficient of thermal expansion (CTE) between different materials. If you use materials with very different CTE values in your stackup, the layers can shift or crack during heating and cooling. This can cause problems like layer registration errors, delamination, or even cracks in plated through-holes. Flexible laminates, such as polyimide, help reduce these stresses and improve reliability.
Lamination is another key step in your pcb stack-up process. You need to control temperature, pressure, and time during lamination. If you do not manage these factors, you may see layer separation, blistering, or uneven bonding between layers. Always review material datasheets and match properties like glass transition temperature (Tg), resin flow, and cure temperature. This helps you avoid lamination problems and keeps your stackup strong.
Plating also presents challenges. Different materials and hole sizes in your stack-up can lead to uneven copper plating. Smaller holes and higher current densities increase the risk of cracks or poor adhesion. You should optimize drilling and plating parameters for each material in your pcb stack-up.
Tip: Engage your fabricator early. Share your preliminary stackup design and detailed requirements. This helps verify lamination feasibility and material compatibility before you start manufacturing.
Reliability and Quality
You want your hybrid pcb stack-up to be reliable and consistent, especially in high-volume manufacturing. You can use several best practices to achieve this:
Use Statistical Process Control (SPC) to monitor key manufacturing steps like etching, drilling, and plating. This helps you catch problems early and improve your process.
Follow IPC Class 3 or higher standards for your pcb stack-up. These standards ensure high reliability for critical applications.
Keep detailed records of all materials used in your stackup. Track lot numbers, certificates, and storage conditions. This supports quality control and helps with troubleshooting.
Test every production lot for controlled impedance and electrical performance. Use methods like time-domain reflectometry to check signal quality.
Inspect incoming materials for thickness, dielectric properties, and consistency. This step ensures each layer in your stackup meets your design needs.
You should also use advanced testing methods, such as X-ray inspection and thermal cycling, to find hidden defects in your pcb stack-up. These tests help you spot issues like voids, misalignments, or delamination before your boards reach customers.
Note: A strong quality system, including ISO 9001 certification and continuous improvement, builds trust and ensures your pcb stack-up meets the highest standards.
You can design and build a reliable hybrid PCB stackup by following a clear process. Start by defining your requirements and planning the stack-up with the right layers. Choose materials that match your electrical and thermal needs. Work closely with your manufacturer to avoid issues with layer registration and lamination.
Arrange layers to improve signal isolation and thermal management.
Use simulation tools to check your stackup before production.
Follow standards like IPC 4101 and review datasheets for each material.
Keep learning about new tools and standards to improve your stackup design.
FAQ
What is a hybrid PCB stackup?
A hybrid PCB stackup uses more than one type of material in its layers. You can mix materials like FR4 and PTFE to get better electrical or thermal performance for your circuit board.
Why should you use simulation tools for stackup design?
Simulation tools help you check your design before you build it. You can find problems with signal integrity, impedance, or heat. This saves you time and money.
How do you choose the right materials for each layer?
You should match each material to your needs. Use FR4 for general layers. Pick PTFE for high-speed signals. Always check the datasheet for properties like dielectric constant and thermal strength.
What are common mistakes in hybrid PCB stackup design?
Many designers forget to check material compatibility or skip manufacturability checks. You should always review CTE values, run DFM checks, and talk to your manufacturer early.