You can build a simple am radio receiver with just a few basic parts. This device lets you listen to am broadcasts without batteries. Many students enjoy learning about am signals by making a simple am radio at home. You only need to follow clear steps for am tuning and am detection. > AM radio receiver construction teaches you how am signals travel and how you can hear them.
AM Radio Basics
AM Bands
AM radio has many stations because it uses different frequency bands. Each band has its own group of frequencies. Medium wave is the most used band. Different places use these bands for am broadcasts. The table below lists the main am bands and their frequencies:
Band | Frequency Range | Spacing |
|---|---|---|
Medium Wave | 531 kHz – 1602 kHz (Region 1 & 3) | 9 kHz |
530 kHz – 1700 kHz (Region 2) | 10 kHz | |
Shortwave | 2.3 MHz – 26.1 MHz | 5 kHz |
Longwave | 148.5 kHz – 283.5 kHz | 9 kHz |
You can set your am radio to these frequencies. This lets you hear stations nearby or far away. Medium wave is the most common for am. Shortwave lets you listen to far stations. Longwave is not used as much but is still found in some areas.
Amplitude Modulation
Amplitude modulation is used to send sound on am radio. It changes the signal’s strength to carry voices and music. The radio catches these changes and makes them into sound again. The table below shows how amplitude modulation and frequency modulation are different:
Feature | Amplitude Modulation (AM) | Frequency Modulation (FM) |
|---|---|---|
Bandwidth | Low (around 10 kHz) | High (around 200 kHz) |
Low quality, highly susceptible to noise | High quality, less susceptible to noise | |
Power Efficiency | Less efficient, most power in the carrier | More power needed for transmission |
AM uses less bandwidth but gets more noise. Amplitude modulation is easy to use and works for simple radios.
Resonance and Tuning
You must tune your am radio to get the right station. Resonance helps your radio pick one frequency and block others. The coil and capacitor make a resonant circuit in your radio. This circuit works best with one frequency and ignores the rest.
Resonant circuits help you pick one frequency and block others.
Better selectivity means your radio can tell stations apart.
The quality factor, or Q, shows how well your radio does this.
Good selectivity keeps other stations from causing problems.
You turn the tuning knob to match the station’s frequency. Resonance makes sure you only hear the am signal you want.
Components

Building a crystal am radio receiver starts with gathering the right components. You need each part to pick up am signals and turn them into sound. Let’s look at what you need and how you can find these items.
Diode and Capacitor
You need a diode to detect am signals. The diode lets your radio separate the sound from the am carrier wave. Many builders use a 1N34A germanium diode because it works well for am detection. You also need a capacitor to help tune your radio. A variable capacitor lets you change the frequency and select different am stations.
Here is a table showing good sources for diodes and capacitors:
Source | Description |
|---|---|
digikey.com | You can find diodes and capacitors for am radio receivers here. |
1N34A Diode | This germanium diode works well for am detection in crystal radios. |
270 pf Capacitor | Variable capacitors like this help you tune your am radio easily. |
Tip: You can reuse diodes and capacitors from old radios or electronic toys. Ask adults before taking apart devices.
Coil and Antenna
The coil and antenna help your radio pick up am signals. You make the coil by wrapping wire around a non-conductive tube. The coil works with the capacitor to tune your radio to the right am station. The antenna collects am signals from the air. You can use a long wire as your antenna. Stretch the wire outside or near a window for better am reception.
Use enamel-coated wire for the coil.
Try a wire at least 10 feet long for your antenna.
You can use a telescoping antenna from an old radio.
Note: The longer your antenna, the more am stations you can hear. Keep your antenna away from metal objects for best results.
Headphones and Ground
You need headphones to hear the am radio. High impedance or ceramic earphones work best. These headphones need less power, so your radio works without batteries. You also need a ground connection. Connect a wire to a metal water pipe or a ground rod. This helps your radio pick up weak am signals.
Use old-style crystal earphones for clear am sound.
Connect your ground wire to a safe metal object.
You can find these components at electronics stores or online. Many people use parts from old radios or kits. You can ask teachers or family for help finding am radio components.
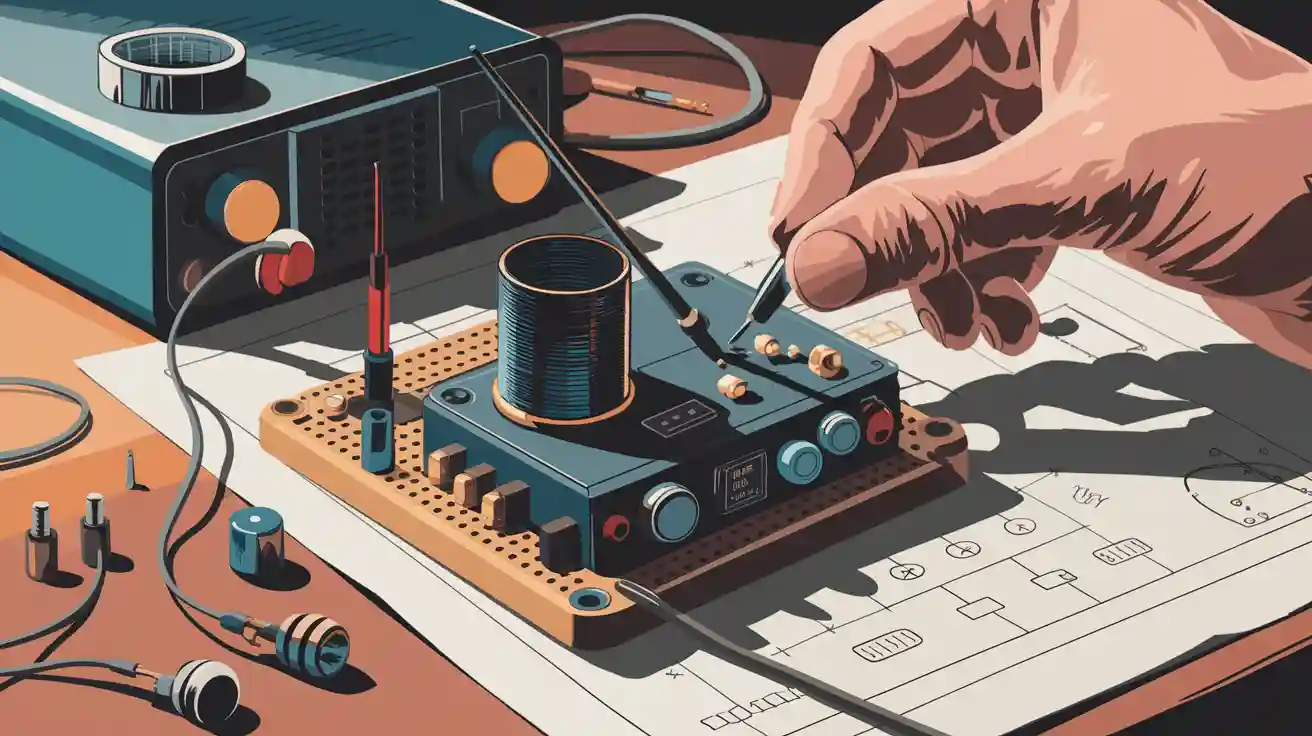
AM Radio Receiver Construction

Building your own am radio receiver construction project helps you understand how radio waves turn into sound. You will follow a step-by-step process to create a working receiver. This section guides you through the circuit diagram, winding the coil, assembly steps, and tuning and testing.
Circuit Diagram
You need to start with a clear circuit diagram. The most common crystal radio circuit uses a simple series tuned circuit. This circuit includes a variable capacitor (up to 500pF) and an inductor (about 250µH). These two parts form the heart of your receiver. The circuit also includes a diode for detection and headphones for listening.
The circuit uses a variable capacitor and a coil to tune into different am stations.
You connect the antenna and ground to the circuit for better signal reception.
The diode separates the audio signal from the carrier wave.
Headphones connect to the circuit so you can hear the sound.
Some advanced crystal radio circuit designs add an input transformer for impedance matching. This can improve the performance of your receiver. You may also see variable coupling in some diagrams, which helps you get better selectivity.
Winding the Coil
The coil is a key part of your am radio receiver construction. You must wind it carefully to get the best signal. The number of turns in the coil affects how well your receiver works. The wire gauge also changes the resistance and quality of the signal.
Use enamel-coated wire for the coil.
Wind the wire around a paper tube or plastic form. Do not let the turns overlap.
Leave about 3 inches of wire free at each end for connections.
Secure the ends with tape or a rubber band.
Sand the ends of the wire to remove insulation before connecting to the circuit.
You can use Litz wire to make a high Q coil. This type of wire reduces losses at radio frequencies. A high Q coil helps your receiver pick up weak am signals. You may also try using different coil arrangements. Using dissimilar primary and secondary coils can help you receive more stations.
Assembly Steps
You can build your am radio receiver construction project by following these steps:
Wind the copper wire around your tube. Keep the turns neat and do not overlap them.
Secure the wire with a rubber band. Leave extra wire at both ends for connections.
Insert the coil into your base or holder.
Sand the ends of the wire to remove the enamel coating.
Prepare your diode, earphone, and connecting wires. Make small loops at the ends for easy attachment.
Connect the coil, variable capacitor, and antenna to the circuit as shown in your diagram.
Attach the diode between the coil and one earphone wire.
Connect the other earphone wire to the ground.
Make sure all connections are tight and clean. Polish any metal parts to remove oxide coatings.
Double-check your circuit layout before testing.
Tip: If you have trouble finding the right parts, ask for help at an electronics store or use parts from old radios. Make sure you use the correct components for your circuit.
Tuning and Testing
After you finish your am radio receiver construction, you need to tune and test your receiver. Good tuning helps you pick up more am stations and get clear sound.
Best Practice | Description |
|---|---|
Use Dual Tuned Circuits | Add a second tuned circuit for better selectivity between stations. |
Optimize Coil Q | Make sure your coil has a Q of at least 500 for strong signals. |
Utilize Litz Wire | Use Litz wire for winding to reduce signal loss at radio frequencies. |
Match Earphone Impedance | Use earphones that match your circuit for the best sound. |
Add a FET Transistor | Use a FET as a source follower to improve selectivity and reduce loading. |
To tune your receiver, turn the variable capacitor slowly. Listen for changes in the sound. You may need to adjust the antenna or ground for better reception. If you only hear one station or no sound, check your connections. Make sure your ground and antenna are set up correctly. Try using a stronger ground clamp or polishing the connections.
Common mistakes include using the wrong coil or poor grounding. If you have trouble, check each part of your circuit. Replace weak ground clips with stronger ones. Clean all connections to remove any oxide coating.
Note: Am radio receiver construction takes patience. If you do not hear a station right away, try moving your antenna or adjusting the coil.
You now have a working am radio receiver. This project teaches you how a simple circuit can turn radio waves into sound. You can improve your receiver by trying different coils, antennas, or even adding an amplifier.
AM Radio Receiver Operation
How It Works
Your crystal am radio receiver uses simple parts to make sound from am signals. The antenna grabs am waves from the air. The coil and capacitor work together to pick one station by tuning to its frequency. The diode is important for demodulation. It lets current move in only one direction. This takes away half of the waveform and leaves the audio you can hear. The headphones change these signals into sound, so you can listen to your favorite am station without batteries.
The coil and capacitor help tune to one station.
The diode separates the sound from the carrier wave.
The headphones let you hear the am broadcast.
Troubleshooting
If your am radio does not get stations or sounds weak, you can try some fixes. Many builders notice low sensitivity when trying to hear far away am stations. You might get strong signals from close transmitters but have trouble with weaker ones.
Put your radio near a window or outside wall to get better reception.
Turn off things like TVs, fluorescent lights, and microwaves to stop interference.
Use a longer antenna or a Twin Coil Ferrite® AM Antenna for stronger signals.
Check all connections to make sure they are tight and clean.
Make sure your ground wire connects to a metal water pipe or a buried rod.
Tip: If you still have problems, try moving your radio to different spots. Sometimes, things like temperature, humidity, and stress can change how your radio works.
Performance Tips
You can make your am radio work better by following these tips:
Do not use wood or cardboard for coil winding because moisture can lower selectivity.
Use the biggest wire size you can for your coil and keep turns close together.
Pick a coil form with a low dielectric constant, like air or plastic.
Choose good tuning capacitors with ceramic insulation.
Lift your antenna and use top-loading if you cannot make it longer.
Try different diodes to find the best one for weak signals.
Keep a good ground system, like a buried wire or copper pipe.
Tip | Benefit |
|---|---|
Large coil diameter | Improves selectivity |
Vernier dial for tuning | Allows precise station tuning |
Good grounding | Boosts weak signal reception |
Note: You can test coil size, wire type, and antenna placement to get the best results from your am radio.
AM Radio Receiver Upgrades
Making your am radio receiver better lets you hear more stations. You can add an amplifier to make weak signals stronger. This helps you get louder sound. Many people start with a simple crystal am radio. Later, they use a transistor amplifier or an lm386 amplifier for more power.
Transistor Amplifier
A transistor amplifier is a good way to improve your am radio. You can build a simple amplifier with one transistor. This upgrade gives you some nice benefits:
You get louder sound with small speakers or earphones.
The amplifier helps you hear weak am stations.
The design is easy, so you can build it at home.
Adding an RF amplifier before the detector helps you get more am signals.
Some popular designs use a single transistor reflex circuit. This circuit uses regeneration and automatic gain control. Some people build the eight-transistor am MW superheterodyne for better reception. The Chinese “636” radio design uses smart tricks to make sensitivity better.
LM386 Amplifier
The lm386 amplifier is a top choice for am radio upgrades. You connect the audio signal from your detector to the lm386 amplifier. This chip makes the sound louder and sends it to a speaker. You will hear clearer and louder audio. Some people use a transistor before the lm386 amplifier for even better sound. With this setup, you can tune into many am stations. Sometimes you can even hear an FM station. The lm386 amplifier helps your radio sound good, even in noisy places.
When to Upgrade
You should think about upgrading your am radio if you notice these things:
The sound is low, even with a good antenna.
You cannot hear far away am stations well.
There is interference from other devices or poor grounding.
Your coil or variable capacitor is old or not good quality.
Criteria | Description |
|---|---|
Selectivity | Hear one am station without interference from others. |
Sensitivity | Receive weak or distant am stations with ease. |
Design | Enjoy a radio that looks good and is easy to use. |
A transistor amplifier or an lm386 amplifier upgrade will help you hear more stations and get better sound. Try these upgrades if you want your am radio project to be even better.
You learned to build a crystal am radio receiver with simple parts. You need a long wire antenna and a good earth connection. Use a tuned coil and capacitor for picking stations. Add a diode detector and high impedance headphones to hear sound. Try using different antennas and grounds to see what works best. Adjust the tuning knob to find new stations. Keep a logbook of every station you hear. If you want to learn more, try superheterodyne am receivers. These designs help you pick stations better and hear weak signals. Your radio experience will be even more fun.
FAQ
What is the best wire for winding the coil?
You should use enamel-coated copper wire. This wire works well for radio coils because it reduces signal loss. Try using wire between 22 and 26 gauge for easy handling.
Can you use regular headphones with a crystal radio?
Regular headphones do not work well. You need high-impedance or crystal earphones. These earphones need less power and let you hear weak signals.
How long should your antenna be?
A longer antenna helps you pick up more stations. You can use a wire at least 10 feet long. If you want better reception, try a wire up to 50 feet.
Tip: Hang your antenna as high as possible and away from metal objects.
Why do you need a ground connection?
A ground connection helps your radio receive weak signals. You can connect a wire to a metal water pipe or a ground rod. This makes your radio work better.
Ground Option | Works Well? |
|---|---|
Water Pipe | ✅ |
Ground Rod | ✅ |
Radiator | ⚠️ |