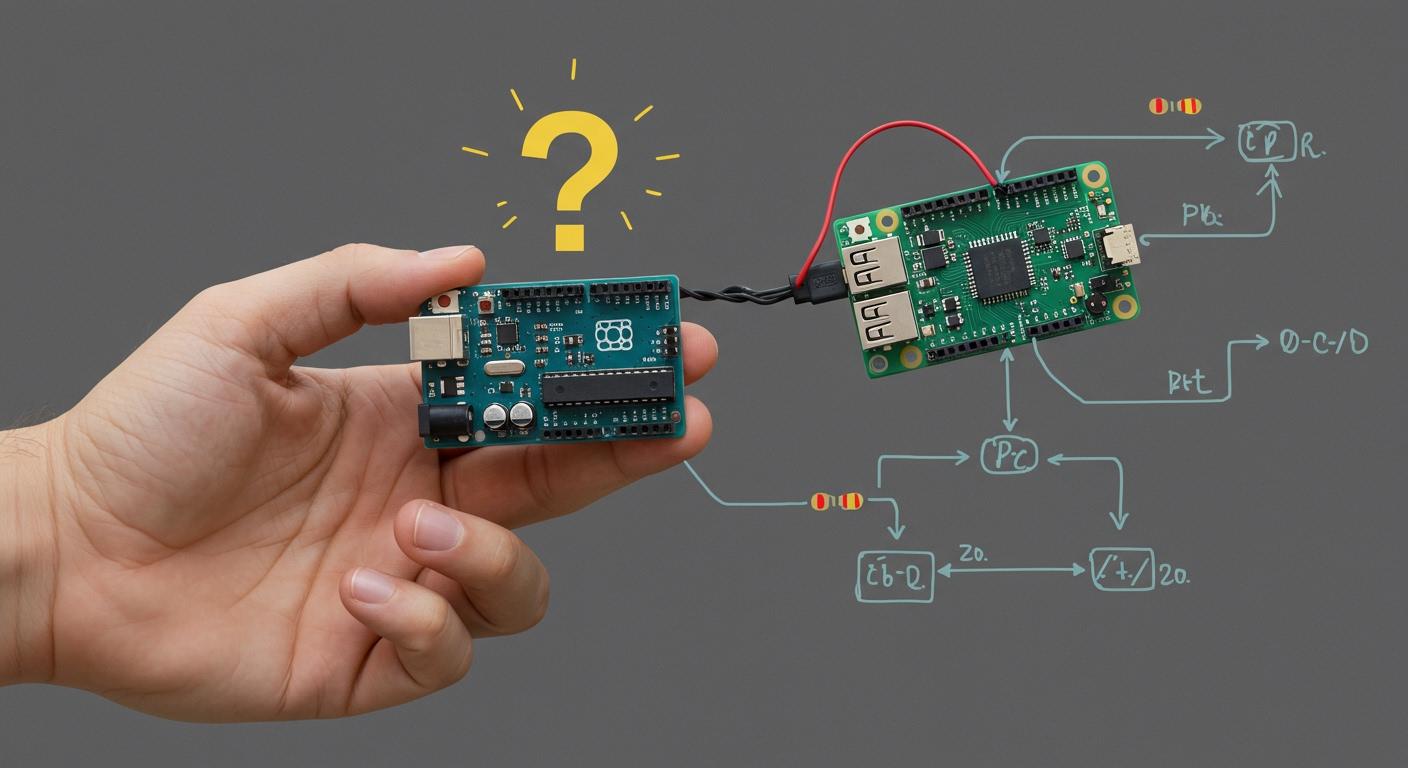
Choosing your first microcontroller is exciting, but it can feel hard. You want one that is simple to use. It should have many guides and a helpful community. Arduino, STM32, and Micro:Bit are good choices. They let you program easily. They have many add-ons and lots of support. When you look at choices, notice the key differences:
Processing power and memory
Number of I/O pins and built-in features
Power use
Community help and learning guides
Picking the right one makes your first project fun and easy!
Key Takeaways
Pick a microcontroller that is easy to use. Arduino is good for beginners. It is simple to set up. There are many guides for it.
Find a programming environment that is easy to use. Arduino and Micro:Bit have simple interfaces. STM32 is harder to use.
Choose a microcontroller with good community support. Arduino has a big community. People share help and resources for projects.
Look at the hardware features you need. Check how many I/O pins there are. See what communication interfaces it has. Make sure it fits your project.
Think about cost and how easy it is to buy. Many beginner boards do not cost much. They are easy to find. This helps you start your projects.
Key differences for beginners
Ease of use
When you start with microcontrollers, you want something simple. You do not want to get stuck before you begin. Arduino is easy to use. You plug it in and open the software. You can make things blink or move right away. Arduino is easier for beginners. STM32 has more features, but it takes longer to learn. You need more time before you see results. Micro:Bit is also easy, especially if you like visual tools. You can see results quickly.
Here are some things that make a microcontroller easy:
Feature | Benefit for Beginners |
|---|---|
Simplicity | Smaller microcontrollers are easier to use. |
High-level programming support | Lets you use languages you already know. |
Manageable documentation | Easy to read and follow, even for new users. |
If you want something different, Raspberry Pi Pico is friendly. You can drag and drop files to program it. This is good for someone who has never used a microcontroller.
STM32 is powerful but needs more patience.
Micro:Bit is good if you want to learn by doing.
Programming environment
The programming environment is where you write code. You want something that works on your computer and is free. It should not be confusing. Arduino uses a simple IDE. You can download it for free. It works on Windows, Mac, and Linux. The interface is clean. There are many examples to help you.
Micro:Bit is different. It uses graphical programming. You build code with blocks, like a game. This is great if you are new to coding. You can drag and drop to learn. Micro:Bit supports MakeCode, a web tool. You do not need to install anything.
STM32 is more advanced. It uses STM32CubeIDE or Keil. These tools give you more control. They can be confusing at first. You may need to read guides and watch videos.
Here is a quick comparison:
Platform | Key Features | Accessibility Level |
|---|---|---|
Arduino | Simple IDE, lots of guides, big community, low cost | Beginner |
STM32 | Advanced features, good for embedded systems | Intermediate to Advanced |
Micro:Bit | Graphical programming, easy for school, supports MakeCode | Beginner |
If you want to start fast, Arduino and Micro:Bit are best. STM32 is good if you want to learn more about microcontrollers.
Community support
You do not want to feel alone when you need help. A strong community can help you solve problems. It gives you ideas and keeps you motivated. Arduino has a big and active community. You can find forums, guides, and videos for almost any project. If you search for help, you will find answers quickly.
Micro:Bit also has a friendly community. Many teachers and students use it. You will find lots of guides and lesson plans. This makes it easy to learn at your own pace.
STM32 has a growing community. It is more for advanced users. The forums are active, but the talks are more technical. Here is a look at STM32 forum activity:
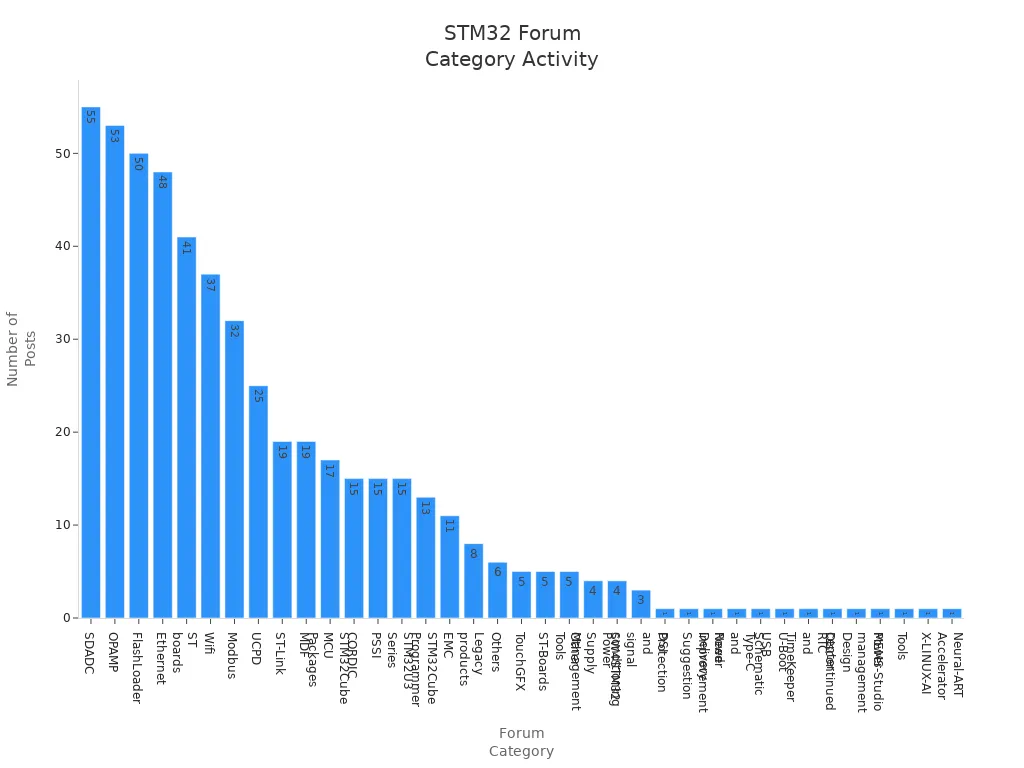
You can find beginner guides for all three platforms:
Arduino: Step-by-step guides, project ideas, and next steps.
STM32: Info about STM32duino, Arm Mbed, and different IDEs.
Micro:Bit: Lots of classroom resources and fun projects.
Tip: If you get stuck, search your question online. Someone else probably had the same problem and found an answer!
When you look at the key differences between Arduino, STM32, and Micro:Bit, you see that ease of use, programming environment, and community support matter a lot. Arduino is simple and fun. Micro:Bit helps you learn by doing. STM32 gives you more power but needs more effort. The best microcontroller for you depends on how you want to learn and what you want to build.
Microcontroller hardware features
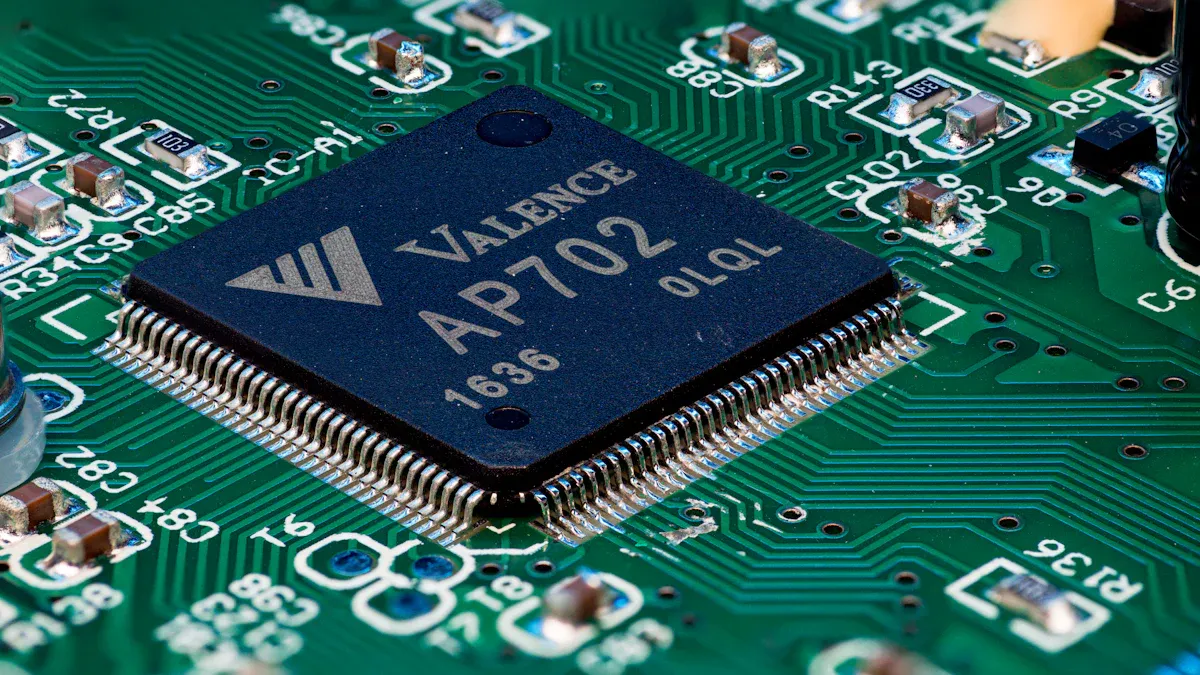
When you choose your first microcontroller, look at its hardware features. These features decide what your board can do. Let’s talk about the most important ones for beginners.
I/O pins
I/O pins work like hands and ears for your microcontroller. You use these pins to connect things like sensors, LEDs, and motors. Some boards have more pins, so you can make bigger projects. Arduino boards usually have lots of I/O pins. This lets you try many things. Micro:Bit has fewer pins, but it is enough for simple projects. STM32 boards often have more pins and extra hardware features. These help with harder projects.
Tip: If you want to add more parts, check if your microcontroller can use expansion shields or modules.
Communication interfaces
Communication interfaces help your microcontroller talk to other devices. You might want to connect displays, sensors, or even other microcontrollers. Here are the main types you will see:
Interface | Description |
|---|---|
UART | Lets your microcontroller send and get data with other hardware using serial communication. |
I2C | Connects many devices with just two wires. It is great for sensors and displays. |
SPI | Moves data quickly between your microcontroller and things like memory chips or screens. |
Most beginner boards, like Arduino, STM32, and Micro:Bit, have these features. You can use them to add new hardware or connect to other devices.
Peripherals
Peripherals are extra hardware features built into your microcontroller. These features make your projects easier and more fun. Common peripherals you will find include:
I/O ports for digital and analog signals
Timers for counting or measuring time
Converters for changing signals from analog to digital
You can also add more to your microcontroller with shields and modules. For example, Arduino works with shields like the Gravity IO Expansion Shield. This adds more hardware features. You can plug in touch screens, e-paper displays, or communication shields to give your microcontroller more features.
If you want to make bigger projects, look for hardware features that let you add more parts and peripherals. This way, your microcontroller can grow with your ideas.
Cost and availability
When you pick your first microcontroller, you want to know how much it will cost and how easy it is to get. Some boards are cheap and easy to find. Others might cost more or be harder to buy. Let’s look at what you need to know.
Price range
You do not have to spend a lot to start with microcontrollers. Many beginner boards are affordable. Here is a quick look at the price for some popular boards:
Board Name | Price (EGP) |
|---|---|
STM32F103C6T6 ARM Board | |
Arduino Mega2560 Rev3 | 1,450.00 |
Arduino Pro Mini ATMEGA328P 5V | 225.00 |
You can see that the cost changes a lot between boards. The Arduino Mega2560 costs more than the STM32 or the Pro Mini. If you want to save money, you can start with a smaller board. You will still get good features for your projects.
Accessibility
You want a microcontroller that you can buy easily. Most Arduino, STM32, and Micro:Bit boards are sold in many stores and online shops. If you break your board or want a second one, you can order a new one fast. You can also find lots of add-ons and shields for these boards. This makes it simple to expand your project without spending too much.
Tip: Always check if the board you want is in stock before you start your project. This saves you time and stress.
Power and size
The power your microcontroller uses matters for your project. If you want to build something that runs on batteries, pick a board that uses less power. Smaller boards often use less power and fit in tight spaces. For example, the Arduino Pro Mini is tiny and uses little power. The STM32 boards also come in small sizes and can run on low power. Bigger boards like the Arduino Mega2560 use more power but give you more features.
You should also think about the size of your project. If you want to make a wearable or a small robot, a small microcontroller works best. If you need more pins or features, you might need a bigger board.
Choosing the right microcontroller means thinking about cost, how easy it is to buy, and how much power and space you need. This helps you finish your project without surprises.
Beginner’s guide to microcontrollers ecosystem
When you begin with microcontrollers, you enter a world of gadgets and tools. This guide helps you see what is available. It shows how you can use these things to make your projects better.
Accessories
There are many accessories for your development board. These add-ons make projects more fun. They let you try new ideas. Here are some popular choices:
Accessory | Category | Description |
|---|---|---|
0.25W 8 Ohm 40mm Thin Speaker | Sound and Music | This small speaker works with the micro:bit for sound projects. |
16 in 1 Building:bit Super kit | Robotics | This kit lets you build and program robots with the micro:bit. |
2×40 Right Angle Edge Connector for micro:bit | Electronics | This connector fits the edge of the micro:bit. |
32 IN 1 Wonder Building Kit | Electronics | This kit has 32 projects for the micro:bit. |
You can also get shields, sensors, and displays for Arduino boards and STM32 boards. These accessories help you grow your ideas. You do not need to build everything yourself.
Software tools
You need software tools to program and fix your microcontroller. Many tools are free and easy to use. Here are some favorites:
Visual Studio Code is good for Arduino and other boards.
TrueStudio is a professional IDE for STM32 boards.
You use these tools to write code and upload it to your board. They help you solve problems. They are good for beginners and help you learn quickly.
Learning resources
There are many learning resources online. Guides and courses help you pick the microcontroller that fits your needs. Here are some popular choices:
Course Name | Description |
|---|---|
Arduino Courses | These courses teach beginners programming, electronics, and science step by step. |
Block Based Coding and Robotics | This course helps younger students learn to program robots with fun STEAM activities. |
Explore Robotics in MicroPython | You learn to program and use your Alvik while building skills. |
Plug and Make | You create IoT devices with projects that are fully explained. |
Education Starter Kit | This kit gives step-by-step exercises for programming and electronics. |
If you want to learn more, you can join forums or watch videos. These resources help you choose the microcontroller and board for your project. The beginner’s guide to microcontrollers ecosystem gives you what you need to start and keep learning.
Matching microcontroller to your project
Project needs
You want your microcontroller to fit your project. First, think about what your project will do. Are you building a robot, an IoT device, or something to collect data? Each project needs different things for performance and programming. You should check how much code you will write. Think about which sensors you need. Also, decide how hard the project might be.
Here’s a table to help you match features to your project:
Criteria | Explanation |
|---|---|
Connectivity needs | Pick Wi-Fi or Bluetooth for IoT or robots. |
GPIO requirements | Count the pins you need for sensors and outputs. |
Architecture | Choose the right speed for your device and applications. |
Development support | Look for easy guides, libraries, and community help. |
Cost | Think about upgrades and any extra fees. |
Security | For IoT, check if it has built-in security features. |
Tip: Always check if your microcontroller has enough programming libraries and tutorials for your project. This makes learning easier and lowers the difficulty.
Scalability
You might want to make your project bigger later. Scalability means your microcontroller can handle more code or sensors. If you want to add more features, pick a board with extra memory and pins. This helps you avoid running into limits.
Here are some things to look for:
Enough memory for bigger code and more applications.
Enough pins for new sensors or outputs.
Good ways to connect to other devices.
Special hardware for advanced projects.
Low power use for battery projects.
A strong community with lots of guides and libraries.
The best microcontroller family gives you simple and advanced choices. You can start easy and move to harder projects without much trouble.
Make sure you have enough memory for your code and projects.
Leave 20-30% of memory free for future changes.
Many projects need safe code and data. Look for hardware security if you want to keep your project safe.
Examples
Let’s look at some beginner projects. These show how you can match your microcontroller to your project and skills:
Use Arduino for a simple weather station. You can find many guides and libraries for sensors and displays. The programming is easy, and you get lots of help.
Try STM32 for a small robot. You get more speed and advanced features. The code can be harder, but you find many guides and libraries online.
Pick Micro:Bit for a step counter or a classroom project. The programming uses blocks, so it is not hard. You get quick results and lots of help.
You can also use raspberry boards for IoT projects. They work well for projects that need more code or extra speed. Raspberry boards have many guides, libraries, and help for advanced projects.
No matter what you build, always check the programming difficulty, available guides, and support. This helps you finish your project and learn new skills.
Considerations for electronic product design and manufacturing
When you want to make your project into a real product, you need to think about more than just making it work. Your design should be simple to build, strong, and ready for people to buy. Let’s see what is most important.
Manufacturability and integration
Picking the right microcontroller makes building your product much easier. If you choose a board with common parts, it is easier to find what you need. Manufacturers like when you use parts that fit their machines. This helps you avoid waiting and keeps the price low.
Implication | |
|---|---|
Standardized components | Makes it easier to find parts |
Tooling considerations | Helps with the design of the case |
Manufacturer alignment |
If you use popular microcontrollers, you can get help fast. Your product will also be easier to fix or make better later.
Long-term availability and supply chain
You want your product to last a long time. This means you need to plan for the future. Sometimes, microcontrollers are hard to find. You can avoid problems by planning and staying ready.
Design your board so you can change parts if needed.
Work with more than one supplier.
Keep some extra microcontrollers just in case.
Pick parts that many companies make.
Teams that plan ahead have fewer problems. If you work with different suppliers, you can avoid long waits. Having backup plans and extra parts helps you finish on time.
Certification and compliance
Before you sell your product, you must follow the rules. Many places need lab tests and special papers. For example, you might need FCC approval in the United States. You should test your device early to find problems.
Pass lab tests for FCC or other rules.
Use early testing to find problems soon.
Put labels on your product after it passes all tests.
Arduino boards meet many rules like RoHS and UL.
If you do these things, your product will be safe and ready to sell. Following the rules also helps people trust your product.
Tip: Always check the newest rules for your country before you sell your product. This saves you time and trouble later.
You have lots of options for your first microcontroller. Think about what you want to make. Think about how you like to learn. Also, think about how much money you can spend. Use this easy checklist to help you pick:
Checklist Item | What to Do |
|---|---|
Make a Hardware Interface List | Write down all sensors and devices you need |
Check Software Architecture | Decide how much processing power you need |
Choose Architecture | Pick 8, 16, or 32-bit for your project |
Determine Memory Requirements | Make sure you have enough memory for your code |
Check Price and Power Constraints | Stay in your budget and check power use |
Check Device Availability | Make sure you can buy the board easily |
Choose a Development Kit | Find a kit that fits your project |
If you are new, pick a board with lots of help and examples. You will learn faster this way. You might make mistakes, but you can fix them by checking your connections and testing your board. Everyone feels unsure when they start. Try different boards and ask for help. Have fun and keep learning. You can do it!
FAQ
What is the easiest microcontroller for beginners?
Arduino is a good choice for beginners. It is easy to set up and use. The development environment is simple and friendly. There are many guides and examples online. This helps you feel less worried about your first project. You can see results quickly and learn as you go.
Can I use one microcontroller for all my projects?
You can use one microcontroller for many projects. But sometimes your project needs will change. If your project gets bigger, you may need more pins or memory. Pick a board that fits your goals and can grow with your ideas.
How do I choose the right programming language for microcontroller development?
Pick a language that matches your skills. Arduino uses C or C++. Micro:Bit lets you use block coding or Python. STM32 boards work with C and C++. Your experience and what your project needs will help you choose.
Where can I find help during microcontroller development?
You can get help from online forums and video tutorials. Official documentation is also helpful. The Arduino, STM32, and Micro:Bit communities are active. You get answers quickly. You can ask questions and share your progress.
Do I need special tools for microcontroller development?
You need a computer and a USB cable. You also need free development software. Arduino IDE, STM32CubeIDE, and MakeCode are popular tools. These make development easier. You can use sensors and shields to add more to your projects.
Tip: Always check if your board works with your software and accessories before you begin.
Tool Name | Use in Development |
|---|---|
Code and upload programs | |
STM32CubeIDE | Advanced development |
MakeCode | Block-based development |