Keeping your circuit board clean helps it last longer and work well. Dust and dirt can pile up, causing problems like short circuits or poor performance. The safest way to clean a circuit board is to use methods that won’t harm delicate parts, such as using a clearn pcb solution.
You might ask how to clean a circuit board safely. Using the right tools and steps is very important. Tests like ROSE and SIR show that clearn pcb boards have fewer bad particles, which improves how they work. Learning to clean circuit boards properly avoids expensive fixes and keeps your electronics functioning optimally.
Be careful when cleaning your circuit board. Use anti-static tools and pick the right cleaning method. Whether it’s dust, sticky dirt, or rust, knowing safe ways to clean circuit boards, including the use of a clearn pcb approach, saves time and trouble.
Key Takeaways
Clean your PCBs often to stop dust and dirt buildup. This helps avoid performance problems.
Use isopropyl alcohol for cleaning. It dries fast and leaves nothing behind.
Always use anti-static tools to keep your circuit board safe from static damage.
For a deeper clean, you can try ultrasonic cleaners. Do not use them on delicate parts.
Stay safe by grounding yourself and using distilled water while cleaning.
Essential Tools for Cleaning PCBs
Cleaning a PCB starts with using the right tools. The correct equipment helps clean circuit boards without harm. Below are some reliable tools you’ll need.
Isopropyl Alcohol and Solvent Alternatives
Isopropyl alcohol (IPA) is great for cleaning PCBs. It’s very pure and leaves almost no residue. This makes it ideal for removing dirt, oils, and other grime. Unlike water, IPA dries fast, lowering the chance of moisture damage. It also avoids mineral buildup, which can hurt your circuit board.
If you need options, ethyl alcohol works too. But IPA often gives better results, especially in labs. Special cleaners like Tri-V solutions are worth trying. Tests show Tri-V cleans better than many others. It uses less material and works well, saving money.
Tip: Always check if your cleaner is safe for your PCB. Some solvents can harm certain parts.
Brushes, Swabs, and Anti-Static Tools
For hand cleaning, brushes and swabs are helpful tools. Anti-static brushes are great because they stop static electricity from damaging your PCB. These brushes remove dust and dirt without scratching surfaces.
Not all brushes and swabs work the same. Foam swabs can tear when wet, leaving a mess. Some brushes spread flux residue, causing white marks on the board. To fix this, use brushes with solvent attachments or slower-drying solvents like IPA. This ensures thorough cleaning without quick drying.
Note: Anti-static tools protect your PCB from static damage. Don’t skip this step!
Ultrasonic Cleaners for Circuit Boards
Ultrasonic cleaners give a deeper clean for PCBs. They use sound waves to make tiny bubbles in the cleaner. These bubbles gently remove dirt and tough grime from your PCB. This method is safe and works well for most circuit boards.
Ultrasonic cleaners are great for tight spaces. They clean areas brushes or swabs can’t reach. Use a solution safe for electronics, like distilled water with IPA. This mix works for most cleaning needs.
Warning: Don’t use ultrasonic cleaners on PCBs with fragile parts like microphones. Vibrations can damage them.
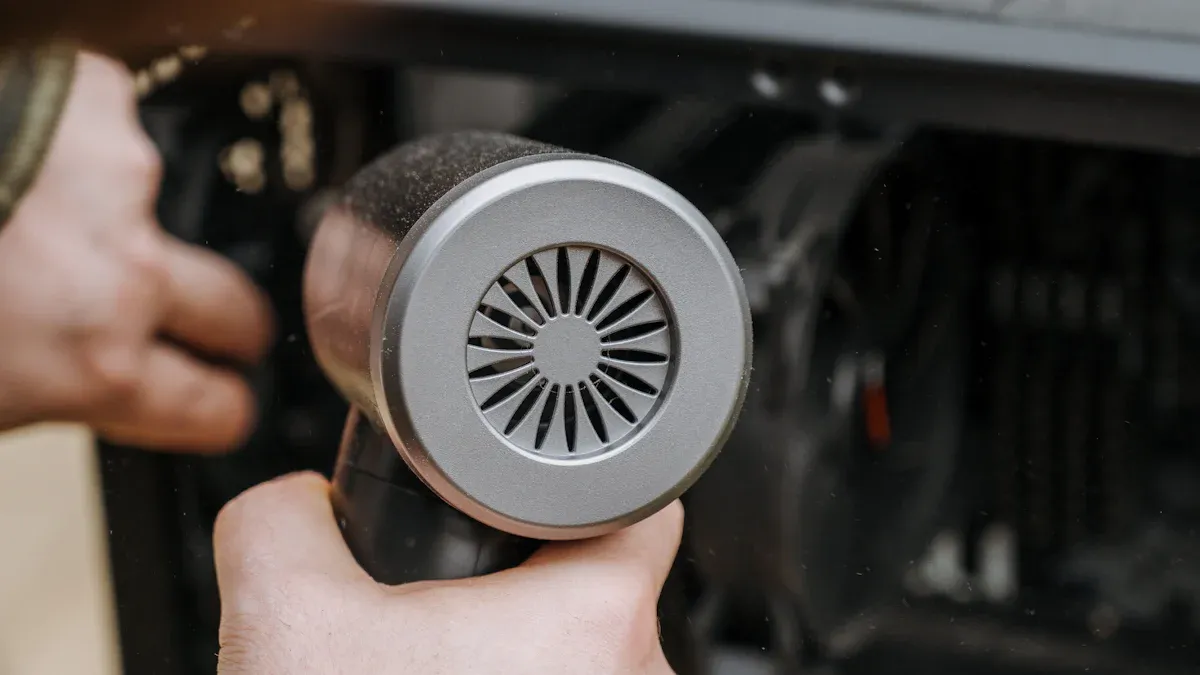
Compressed Air and Vacuum Devices
Cleaning PCBs is easy with compressed air and vacuums. These tools remove dust and dirt without touching fragile parts. They are great for quick, contact-free cleaning of your circuit board.
Why Use Compressed Air?
Compressed air blows away dust and dirt from your PCB. It works well in tight spaces where brushes can’t reach. You can use a can of air or an air compressor.
Here’s why compressed air is helpful:
No touching needed: It cleans without touching, keeping parts safe.
Reaches small gaps: Air gets into hard-to-reach spots under components.
Fast and simple: Cleaning takes only a few seconds.
Tip: Spray in short bursts while holding the can upright. Tilting it may release liquid that can harm your PCB.
Using Vacuum Devices for PCB Cleaning
Vacuum devices suck up dirt instead of blowing it away. This stops dust from flying around and resettling on your PCB.
Benefits of vacuum devices include:
Neat cleaning: They remove dirt without spreading it.
Static-safe options: Some vacuums protect your PCB from static damage.
Eco-friendly: Vacuums don’t need refills or create waste like air cans.
Note: Use vacuums made for electronics. Regular vacuums can create static that harms your PCB.
Best Practices for Using These Tools
Follow these tips for better cleaning with compressed air and vacuums:
Turn off your device: Always unplug electronics before cleaning.
Clean workspace: Keep your area dust-free to avoid re-dirtying the PCB.
Keep some distance: Hold the nozzle a few inches away from the board.
Check after cleaning: Look for leftover dirt and clean again if needed.
Warning: Never use these tools on a wet PCB. Moisture can cause damage or short circuits.
Using compressed air and vacuums the right way keeps your PCBs clean and working well. These tools are simple, affordable, and very effective for electronics care.
How to Clean a Circuit Board with Dust and Debris
Dust can build up on your circuit board over time. This can cause problems and make it work poorly. Cleaning it is simple if you use the right methods.
Using Compressed Air for Dust Removal
Compressed air is a quick way to clean dust. It’s safe and doesn’t touch the board directly. Use a can of compressed air, hold it upright, and spray gently. Short bursts of air blow dust out of small spaces without harm.
Keep the nozzle a few inches away from the board. Spraying too close might knock off tiny parts. Don’t tilt the can, as liquid could come out and damage the board. For stubborn dust, angle the air slightly to reach under parts.
Tip: Clean in a place with good airflow to avoid breathing in dust.
Cleaning with Anti-Static Brushes
If dust won’t come off with air, use anti-static brushes. These brushes clean safely without causing static electricity. Gently brush the board to remove stuck debris.
Pick a brush with soft bristles to avoid scratches. For very dusty boards, use a vacuum made for electronics along with the brush. This keeps dust from settling back on the board.
Preventing Static Damage During Cleaning
Static electricity can ruin circuit boards. Even a tiny static shock can break parts. Always ground yourself before cleaning. Wear an anti-static wrist strap or touch metal to remove static.
Don’t clean on carpets or plastic mats, as they create static. Use an anti-static mat or a clean, hard surface instead. These steps protect your board from accidental damage.
Reminder: Grounding yourself is easy and prevents costly mistakes.
Using compressed air, anti-static brushes, and safety steps keeps your board clean. Regular cleaning helps your electronics last longer and work better.
Removing Wet Contaminants and Sticky Residues
Wet messes and sticky spots can harm your PCB. Spilled liquids, glue, or grime can cause problems. Cleaning a wet circuit board the right way is important. Safe methods protect delicate parts and make the board work again.
Cleaning with Isopropyl Alcohol
Isopropyl alcohol (IPA) is great for cleaning wet PCBs. It dries fast and doesn’t leave moisture behind. To clean, dip a cotton swab or soft cloth in IPA. Gently wipe dirty areas like connectors and sockets.
For tough grime, soak the board in IPA solution. Let it sit for a minute or two. Use a soft brush to scrub sticky spots. Make sure the board is fully dry before turning it on. IPA is a favorite cleaner for many experts.
Tip: Use 99% IPA for better cleaning. Lower grades may have water that harms your PCB.
Using Distilled Water and Baking Soda
Distilled water and baking soda help clean acidic spills or corrosion. Baking soda fights acids, and distilled water avoids mineral buildup. This method works well for cleaning PCBs after leaks or spills.
Mix baking soda with distilled water to make a paste. Apply it with a soft brush or swab to dirty areas. Scrub gently until the mess is gone. Rinse with distilled water to remove leftover paste. Dry the board with a lint-free cloth or cool hairdryer.
Warning: Don’t use tap water. It has minerals that can damage your PCB.
Step-by-Step Guide for Wet Cleaning
Follow these steps to clean your PCB safely and thoroughly:
Set up: Place the board on a clean, dry table. Keep tools like cotton swabs, IPA, and an anti-static strap ready.
Spot cleaning: Dip a swab in IPA and clean connectors gently. Avoid letting liquid touch circuits.
Deep cleaning: Soak the board in IPA for 1-2 minutes. Use a soft brush to scrub sticky areas lightly.
Rinse and dry: Wash the board with distilled water to remove dirt. Dry it completely with a lint-free cloth or cool hairdryer.
Check and test: Look for damage and fix connections if needed. Test the board to ensure it works properly.
Safety tips: Handle the board carefully, wear an anti-static strap, and follow safety rules.
Reminder: Make sure the board is totally dry before turning it on. Even tiny moisture can cause short circuits.
These steps help you clean PCBs safely and keep them working well. Regular cleaning removes dirt and extends the life of your electronics.
How to Clean a Circuit Board with Corrosion
Corrosion can harm your circuit board, but cleaning can fix it. Learn how to spot corrosion, clean it safely, and stop it from coming back.
Spotting and Checking Corrosion
Before cleaning, check how bad the corrosion is. Look for changes like discoloration, flaky bits, or green spots. These are signs of corrosion. For hidden damage, advanced tools can help.
AI tools find corrosion problems by studying electronic parts.
Special algorithms check images to find defects and solder issues.
Sound-based tools show hidden cracks or peeling layers.
Heat-sensing tools (IRT) detect unseen problems in circuit parts.
These methods are great for experts, but most damage is visible. Once you know the problem, you can start cleaning.
Cleaning with Vinegar or Special Cleaners
White vinegar is a simple way to clean corroded boards. Its mild acid removes corrosion without hurting parts. Dip a cotton swab in vinegar and rub the corroded areas gently. For tough spots, let the vinegar sit for a few minutes, then scrub with a soft brush.
If vinegar doesn’t work, use cleaners made for electronics. These are stronger and safe for delicate parts. Follow the cleaner’s instructions to avoid damage. After cleaning, rinse with distilled water and dry the board completely.
Tip: Don’t use tap water. It has minerals that can harm your board.
Stopping Corrosion on Circuit Boards
Keeping your board clean helps stop corrosion. Here are some tips:
Tip | Why It Helps |
|---|---|
Smart design | Fixes problems before they happen. |
Regular checks | Finds corrosion early for quick fixes. |
Control the environment | Lowers humidity and dirt that cause corrosion. |
Use protective coatings | Shields the board from harmful elements. |
Clean often | Removes dirt that leads to corrosion. |
Manage moisture | Keeps humidity low to avoid damage. |
Safe storage | Protects boards during storage and shipping. |
By following these tips, you can clean and protect your boards. Regular care keeps your electronics working longer and better.
Cleaning Solder Flux and Residues
Solder flux is important for soldering, but its leftovers can cause problems. These residues might create short circuits, rust, or lower performance. Let’s learn about flux types, how to clean them, and the best tools to use.
Types of Flux and Their Residues
Flux comes in different kinds, each leaving specific residues. Knowing these types helps you pick the right cleaning method.
Flux Type | What It’s Made Of | Activity Level |
|---|---|---|
Rosin (RO) | Natural rosin, often from pine trees | Low, Moderate, High |
Resin (RE) | Synthetic or natural resins other than rosin | Low, Moderate, High |
Organic (OR) | Organic compounds | Low, Moderate, High |
Inorganic (IN) | Inorganic compounds | Low, Moderate, High |
Residues from these fluxes can cause different problems:
Rosin flux leaves sticky spots that collect dust.
Organic flux washes off with water but may harm parts.
Inorganic flux is very strong and needs quick cleaning.
Leaving these residues on your board can cause short circuits or leaks. Cleaning them is key to keeping your board working well.
Using Flux Removers and Solvents
Special flux removers and solvents make cleaning easier. For example, Techspray’s G3 Flux Remover works well for non-activated rosin flux. It cleans residues stuck in corners and under parts. A final rinse removes all traces, improving your board’s function.
Pick a solvent that matches your flux type. Isopropyl alcohol (IPA) works for most fluxes. For tougher residues, stronger cleaners may be needed. Always follow the cleaner’s instructions to avoid damaging your board.
Step-by-Step Guide for Flux Cleaning
Follow these steps to clean solder flux safely:
Set up your area: Place the board on a clean, static-free surface.
Pick your cleaner: Use IPA or a flux remover for your flux type.
Apply the cleaner: Dip a swab or soft brush in the solvent. Gently scrub the flux spots.
Rinse the board: Use distilled water or a final rinse to clear leftover cleaner.
Dry completely: Use a lint-free cloth or compressed air to dry the board.
Check your work: Look for any remaining residue and clean again if needed.
Tip: Wear gloves and work in a space with good airflow to avoid fumes.
By following these steps, you can clean soldered boards and keep them working well for a long time.
Keeping your PCBs clean helps your electronics work well and last longer. Use safe tools like isopropyl alcohol, anti-static brushes, and compressed air. These tools clean circuit boards without harming fragile parts. If you’re new to cleaning or need a reminder, these steps will help keep your boards in great condition.
Clean your boards often. Dust, sticky messes, and rust can build up over time. Regular cleaning makes your circuit board work better and prevents expensive fixes. Learning how to clean circuit boards the right way saves time and effort. Keep your PCBs tidy, and your devices will stay as good as new!
FAQ
What is the safest way to clean a PCB?
The safest way to clean a PCB is with isopropyl alcohol. Use anti-static tools to avoid harming delicate parts. For deeper cleaning, ultrasonic cleaners work well but need careful use.
Can I use water to clean a circuit board?
Distilled water is safe for cleaning, but never use tap water. Tap water has minerals that can damage your PCB. Always dry the board fully before turning it on to avoid short circuits.
How often should I clean my PCB?
Clean your PCB when you see dust or dirt building up. Regular cleaning every few months keeps your electronics working well and prevents damage.
What tools do I need to clean a circuit board?
You’ll need isopropyl alcohol, anti-static brushes, and compressed air. Lint-free cloths are also helpful. For tough dirt, try ultrasonic cleaners or special electronic solvents.
Why is cleaning solder flux important?
Solder flux can cause rust, short circuits, or poor performance. Cleaning it helps your PCB last longer and work better. Use isopropyl alcohol or flux removers for the best results.