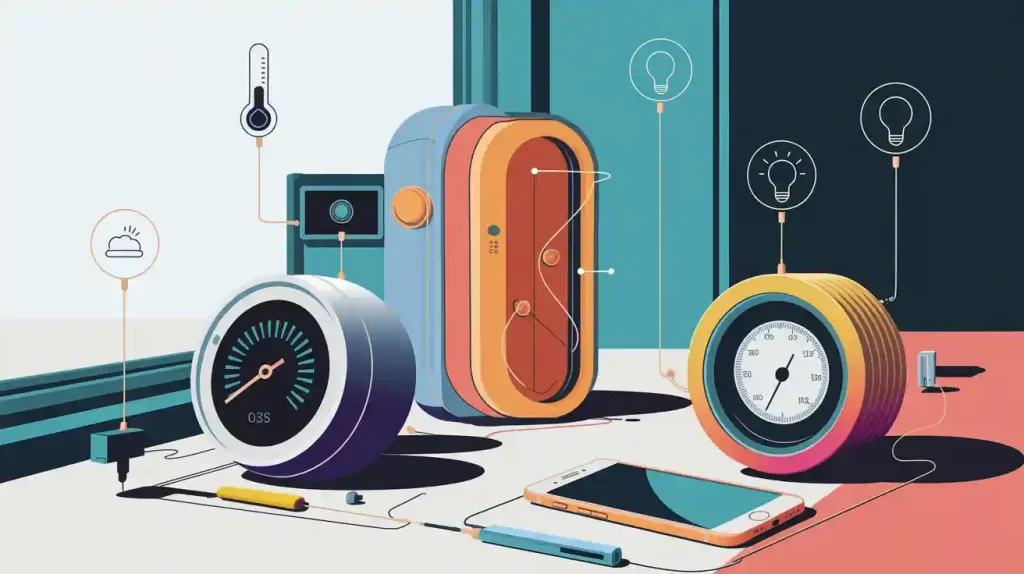
You use pcb design to create a circuit board that fits inside a handheld gaming console. You must make it small, efficient, and strong. You often add microcontrollers like the ESP32, connect display screens, and manage power so your device works longer. The global market for handheld game consoles reached $ 6.84 억 in 2024 and is expected to grow to $10.2 billion by 2035. Many people use design software like Kicad or join DIY communities to build their own devices.
주요 요점
Design compact PCBs for handheld consoles. Use high-density interconnect (HDI) technology to fit more components in less space.
Prioritize power efficiency. Choose the right battery type and use battery management ICs to extend playtime and maintain battery health.
Ensure durability in your design. Use underfill materials and good thermal management to protect the PCB from damage during use.
Plan component placement carefully. Group related parts together and keep trace lengths short to improve performance and reduce noise.
Test and iterate your designs. Build prototypes and make adjustments based on real-world performance to enhance reliability and user experience.
주요 요구 사항
크기 및 레이아웃
You must fit many components into a small space when you design a PCB for a handheld game console. Most handheld devices use PCBs that range from 50mm × 50mm ~ 100mm × 100mm, which is much smaller than those in laptops.
장치 유형 (Device Type) | PCB 크기 범위 |
|---|---|
스마트 폰 | 50mm × 50mm ~ 100mm × 100mm |
노트북 | 200mm × 250mm ~ 300mm × 300mm |
You can use high-density interconnect (HDI) PCBs to make your design more compact. HDI PCBs let you place more components in a smaller area. This approach improves signal quality and speed, which is important for gaming. You also get more features in a smaller console, making it easier to hold and use.
전력 효율
You want your game console to last as long as possible on a single charge. Battery management ICs help you control charging and power use. These chips use smart algorithms to keep the battery healthy and extend its life. They also help you predict when the battery needs maintenance.
Lithium-Ion batteries give you high energy in a light package.
Lithium Polymer batteries are flexible and fit well in slim designs.
Nickel-Metal Hydride batteries cost less but store less energy.
내구성
You need your PCB to survive drops, bumps, and long gaming sessions. You can use underfill materials to protect the connections between chips and the board. Mechanical bonding adds strength and keeps solder joints safe from stress. Good thermal management moves heat away from hot chips, which keeps your console cool. Stress relief features spread out force, so no single part gets damaged easily.
사용자 컨트롤
You interact with your handheld game console through buttons, joysticks, and touch panels. The PCB must support all these controls for a smooth gaming experience.
부품 유형 | 기술설명 |
|---|---|
For D-pad, action buttons, and triggers | |
Analog Stick Interfaces | With precise ADC conversion |
Audio Processing Circuits | Includes amplifiers and headphone output |
디스플레이 컨트롤러 | Supports LCD and OLED screens |
촉각 멤브레인 스위치 | For reliable button response |
터치 패널 통합 | For modern gaming interfaces |
Haptic Feedback Controllers | For enhanced gaming experience |
You should design tactile buttons that give clear feedback when pressed. This makes gameplay more fun and helps you control the game better.
PCB design considerations
부품 배치
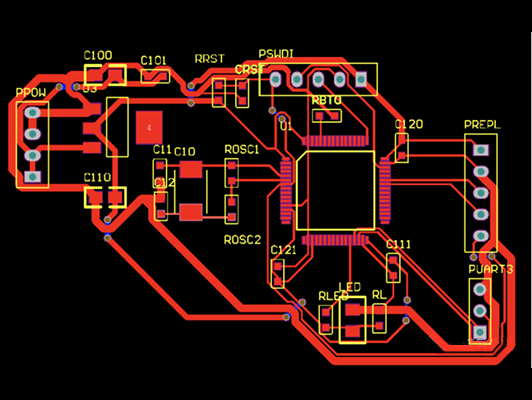
When you start pcb design for a handheld game console, you need to think about where to put each part. Good placement helps your device work better and last longer. You should always group components by function. For example, keep all power parts together and all display parts together. This makes your schematic easier to read and helps you avoid mistakes.
Place important components like the esp32 s3 microcontroller and display connectors first. These parts control most of the console’s actions.
Keep trace lengths short. Short traces help signals move faster and reduce noise.
Separate analog and digital sections. This keeps noise from spreading between different parts of your pcb design.
Put decoupling capacitors close to the esp32 s3 wroom 1 and esp32 s3 wroom 2 chips. This helps filter out unwanted noise.
Avoid long, parallel traces. These can cause electromagnetic interference.
Place heat-generating components away from sensitive areas. This keeps your gaming device cool and safe.
Make sure you leave enough space for the footprint of each part, especially for buttons and connectors.
You should always check your schematic before you move to the next step. This helps you spot errors early.
Tip Grouping related components, such as power management ICs and decoupling capacitors, can minimize noise and improve performance.
레이어 스택업
The number of layers in your pcb design affects how well your game console works. More layers give you more space to route signals and power. They also help reduce noise and improve signal quality.
레이어 수 | 레이어 구성 | 주요 특징 |
|---|---|---|
4- 레이어 | 1. Top Signal | |
2. 접지면 | ||
3. 파워 플레인 | ||
4. Bottom Signal | Cost-effective, decent performance, good impedance control, EMI reduction. | |
6- 레이어 | 1. Top Signal | |
2. 접지면 | ||
3. Inner Signal | ||
4. Inner Signal | ||
5. 파워 플레인 | ||
6. Bottom Signal | More routing space, higher signal integrity, ideal for mixed-signal designs. | |
8- 레이어 | 1. Top Signal | |
2. 접지면 | ||
3. 신호 | ||
4. Power Plane (3.3V) | ||
5. Power Plane (5V) | ||
6. 신호 | ||
7. 접지면 | ||
8. Bottom Signal | Multiple power planes, excellent for high-speed applications, optimized for signal integrity. |
If you use a 4-layer stack-up, you get 좋은 성능 at a lower cost. A 6-layer stack-up gives you more routing options and better signal integrity. An 8-layer stack-up is best for high-speed designs and advanced features. More layers also help reduce crosstalk and support higher data speeds, which is important for modern gaming.
You can place sensitive traces on inner layers to protect them from interference. This keeps your esp32 s3 microcontroller and display circuits running smoothly.
열 관리
Thermal management is a big part of pcb design for handheld devices. High-power components like the esp32 s3 and display drivers can get hot. You need to keep your console cool so it works well and lasts longer.
해결책 유형 | 기술설명 | 온도 영향 |
|---|---|---|
Fans and Airflow Design | Use small fans to move air over hot components. This can lower temperatures by 20-30°C during heavy use. | |
액체 냉각 | Rare in handhelds, but very effective. Keeps temperatures under 60°C even when the esp32 s3 wroom 1 runs at full speed. | |
고급 재료 | Use metal-core PCBs to spread heat. This can lower board temperature by 10-15%. |
You should space out high-power components like the esp32 s3 wroom 2 and power regulators. This stops hot spots from forming. Use large copper planes in your pcb design to spread heat away from the esp32 s3 and display circuits. Short traces for high-current paths also help reduce heating.
Thermal vias are small holes filled with metal. They move heat from hot components to cooler parts of the board or to a heat sink. This keeps your schematic safe from overheating.
참고 : Compact enclosures limit airflow, so you must balance cooling with quiet operation. Gamers want a cool device, but they do not want loud fans.
배터리 통합
Battery integration is key in pcb design for handheld devices. You want your game console to run for hours without charging. You need to choose the right battery and make sure it fits your schematic and footprint.
Use lithium-ion or lithium polymer batteries for high energy and light weight.
Place battery connectors close to the power management ICs. This reduces power loss and keeps your schematic simple.
Add protection circuits to stop overcharging and short circuits.
Make sure your pcb design supports charging and discharging safely.
Leave enough space for the battery footprint, but keep the board compact.
You must also support different display technologies, like IPS LCD, OLED, or e-ink. Each display type needs its own power and control circuits. The esp32 s3 microcontroller can handle many display types, but you need to check your schematic to make sure everything connects correctly.
When you plan your pcb design, always think about how the esp32 s3, esp32 s3 wroom 1, and esp32 s3 wroom 2 will work with your display, battery, and buttons. Careful planning and checking your schematic at every step will help you build a reliable and fun gaming device.
PCB design challenges
EMI 감소
You face electromagnetic interference (EMI) when you design a handheld console. EMI can cause glitches in your gaming experience and make buttons respond poorly. You must use several techniques to keep your device running smoothly.
기술 | 기술설명 |
|---|---|
차폐 | Using conductive or magnetic materials to prevent EMI from affecting devices. |
필터링 | Installing EMI filters to block unwanted frequencies while allowing desired ones to pass through. |
접지 | Implementing proper grounding to provide a pathway for excess electromagnetic energy to dissipate. |
장치 설계 | Designing with EMI-resistant components and circuits, such as twisted-pair cables and balanced circuits. |
You can combine shielding and filtering to protect sensitive circuits. Proper grounding helps you avoid signal problems. Device design choices, like using twisted-pair cables, make your console more resistant to interference.
Tip: Place EMI filters near connectors and display circuits for best results.
기계적 강도
You want your console to survive drops and bumps. Mechanical stress can damage solder joints and connectors. Rigid-flex PCBs help you solve this problem. These boards minimize weak points and keep connections strong during regular use.
선택할 수 있습니다. durable materials like advanced FR-4 or polyimide-based laminates. These materials give your PCB strength and flexibility. Thicker copper layers help carry more current and reduce trace damage. Rigid-flex designs combine rigid and flexible circuits, making your layout compact and reliable. Symmetrical stack-up designs prevent warping and protect your console from thermal stress.
비용 대비 성능
You must balance cost and performance in every design. High-quality materials and advanced features improve reliability, but they raise the price. You can select components that fit your budget and still deliver a great gaming experience.
You may use fewer layers to save money, but this can limit routing options. Choosing efficient power management chips helps you extend battery life without increasing cost. You can test prototypes to find the best mix of performance and price. Careful planning lets you build a console that works well and stays affordable.
PCB 설계 워크플로우
회로도 캡처
You start your PCB design workflow by creating a schematic. This step helps you plan how each part connects inside your console. You follow these main steps:
Define the schematic. Draw an abstract map of your circuit, showing how each part links together.
Link parts to footprints. Assign each part a shape from your footprint library. This step ensures that every button, chip, and connector will fit on the board.
Generate a netlist. Make a file that lists all the connections and footprints. This file helps your design software understand your plan.
KiCad makes schematic capture easier. You can use its project-based workflow to keep your files organized. The software checks your design for errors and helps you avoid mistakes before you move to the next step.
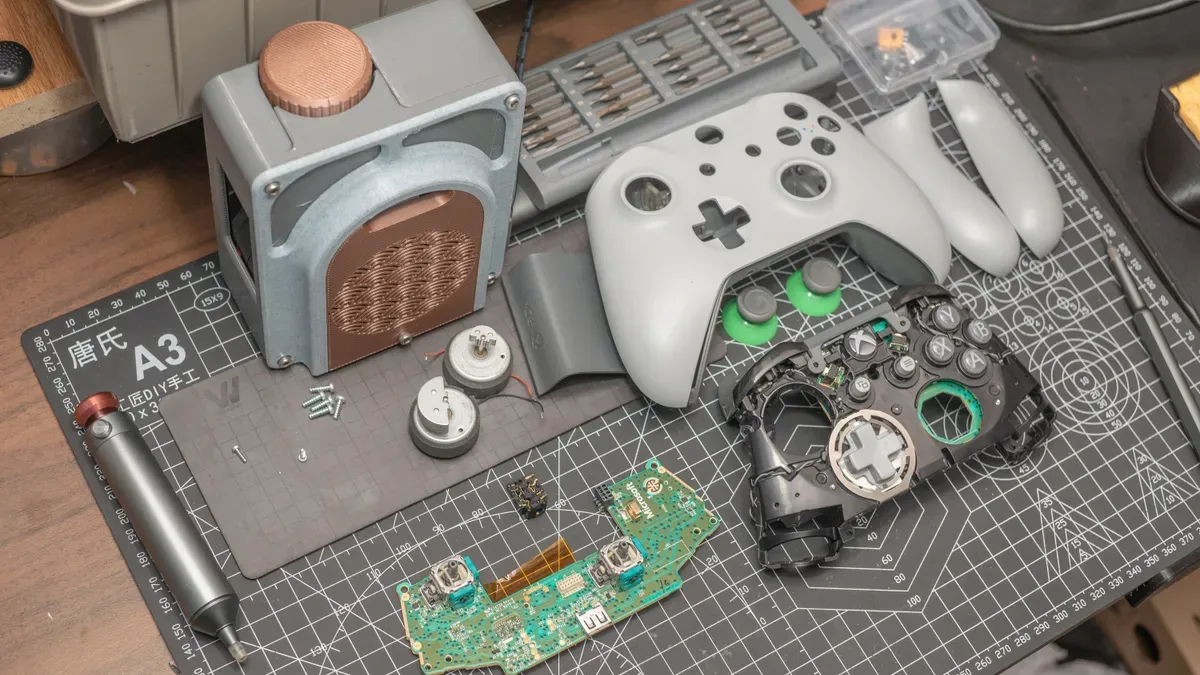
프로토 타이핑
After you finish your schematic, you build a prototype. This stage lets you test your design in real life. You can use soldering tools to connect parts by hand. Many DIY makers use breadboards or simple PCBs to check if the buttons, display, and power circuits work together.
You also need to think about enclosure design. Make sure your board fits inside the case. When designing a case, you must leave space for the battery, display, and all controls. Good enclosure design protects your board and makes your console comfortable to hold.
반복적인 개선
You rarely get everything perfect on the first try. You test your prototype, find problems, and make changes. KiCad helps you update your schematic and layout quickly. You can adjust the board for better processing speed or to support advanced features like max refresh rate displays.
You may need to tweak the enclosure design if you add new parts or change the board shape. Look at classic devices like the gameboy color for inspiration. Each round of changes helps you improve the speed, reliability, and feel of your console.
Tip: Always refresh your design files and check your footprint library after each change. This habit keeps your project on track and ready for the next step.
실제 사례

Classic handheld console PCBs
You can learn a lot from classic handheld consoles. Early devices like the Game Boy and Game Gear used simple pcb layouts. These boards had large traces and through-hole components. You could see the connections easily. The pcb in a Game Boy used only a few layers. This made repairs simple. You could swap out buttons or screens with basic tools.
Classic pcb designs focused on durability. The boards had thick copper traces. This helped the console survive drops and bumps. The designers placed the battery holder and cartridge slot close to the edge. This made it easy for you to change games and batteries. The pcb also supported basic sound chips and small LCD screens. You could play for hours because the board used little power.
현대 혁신
Today, you see many changes in pcb design for handheld consoles. New devices use advanced pcb layouts. These boards support 고해상도 화면 and fast processors. The GameShine console shows how modern pcb design improves your gaming experience.
You get better visuals because the pcb supports high-resolution displays. Games look sharp and bright.
You feel every button press. Custom 3D printed buttons and a D-pad connect to the pcb. This gives you strong tactile feedback.
You can program the console with MicroPython. The pcb allows for flexible programming. You can create your own games or apps.
You see longer battery life. The pcb uses smart power management to keep your device running.
You enjoy more features in a smaller case. The pcb fits more parts in less space.
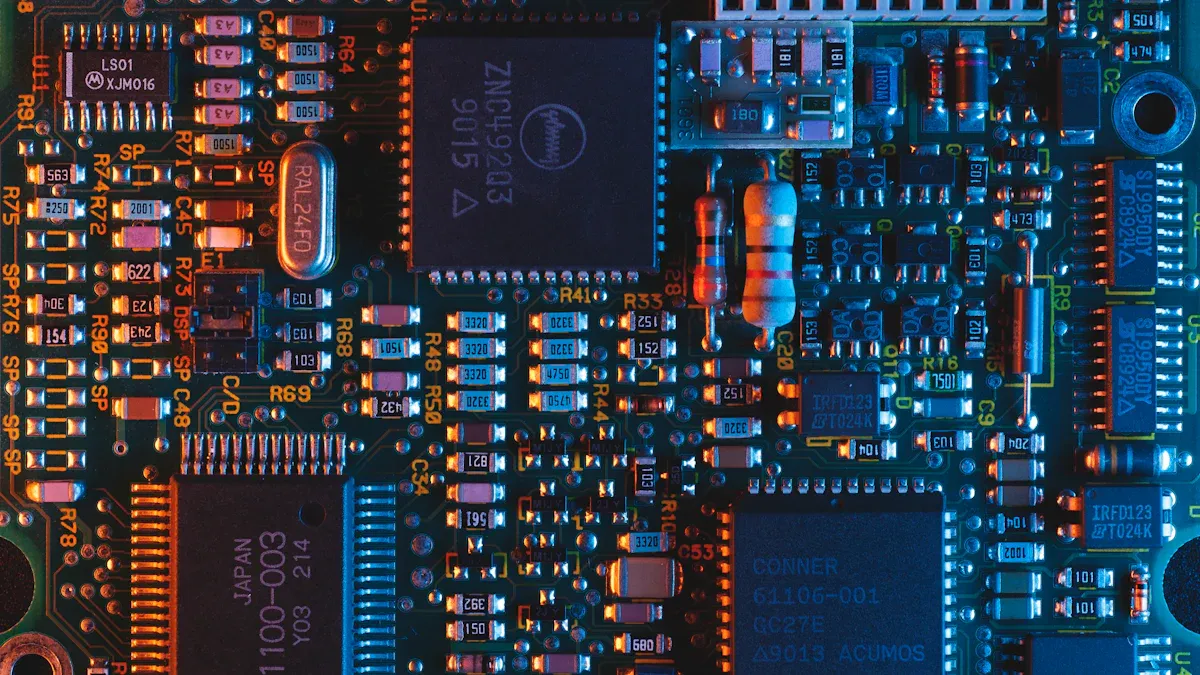
Modern pcb designs use surface-mount components. This makes the board smaller and lighter. You also get better heat control. The pcb spreads heat away from hot chips. You can play longer without the device getting too warm. These innovations help you enjoy handheld gaming in new ways.
You shape the performance and reliability of handheld game consoles with smart PCB design. Careful planning helps your device run smoothly and last longer. You solve unique challenges by using modern tools and best practices.
You boost user satisfaction with durable and efficient boards.
You can join the DIY community and build your own console.
Tip: Explore PCB design projects to understand the complexity behind your favorite gaming devices. 🕹️
FAQ
What software should you use for PCB design in handheld consoles?
You can use free tools like KiCad or paid options like Altium Designer. KiCad works well for beginners and hobbyists. Altium offers advanced features for professionals. Both let you create schematics, layouts, and simulations.
How do you choose the right battery for your handheld console?
You should look for batteries with high energy density and safe chemistry. Lithium-ion and lithium-polymer batteries work best. Check the size, voltage, and capacity to match your console’s needs.
Why is thermal management important in handheld game consoles?
Thermal management keeps your console cool. Hot chips can slow down or break. You can use copper planes, thermal vias, or small heat sinks to move heat away from sensitive parts.
Can you design a PCB at home?
Yes! You can design a PCB at home using free software and simple tools. Many DIY makers use soldering kits, breadboards, and online tutorials. You can order custom boards from PCB manufacturers.
What are common mistakes to avoid in PCB design?
Avoid long traces, poor grounding, and placing components too close together.
Always double-check your schematic and footprints before ordering your board.